


Keeping this system free of dirt, debris, and rust is imperative.
It is very important to keep Volvo cooling systems properly maintained to assure there are no leaks and no potential problems for the customer. Running out of coolant or antifreeze will overheat the engine and possibly ruin it. Always advise your customers to keep an eye on the temperature gauge to make sure the vehicle is not getting hot. The engine is designed to run at an optimum temperature. This is not just for performance, it’s also about maintaining the right temperature for all the emission control systems so they will perform at their peak.
Periodic Maintenance
Keeping this system free of dirt, debris and rust is imperative. Flushing the system out from the vehicle and adding new coolant will keep the cooling system fresh and reliable.
Replacing radiator in a 2004 XC70
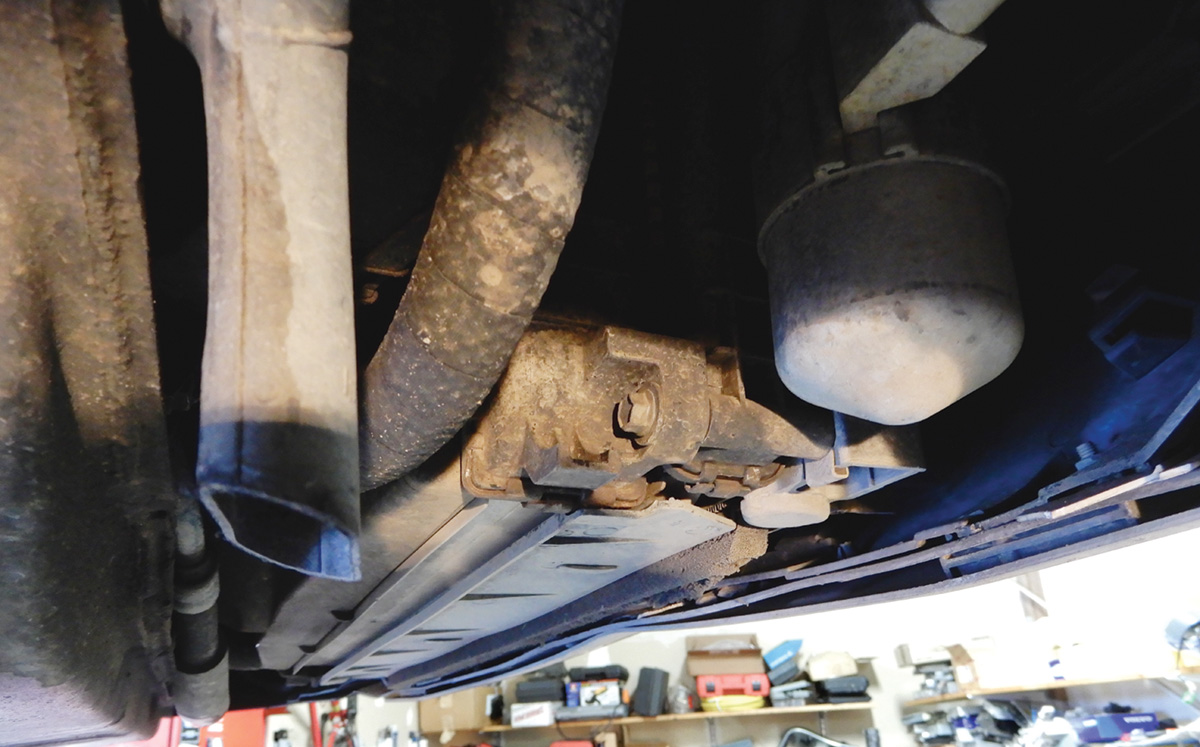
The radiators in these vehicles are removed from the bottom of the vehicle. Volvo started this in 1993 with the front wheel drive vehicles, the 850 being the first.
Raise the vehicle on a hoist and remove the air valance that is positioned under the radiator, then remove the air conditioning condenser and turbo intercooler. The turbo intercooler and the radiator will come down together, leaving the air conditioning condenser to remain in the vehicle. Drain coolant from the system; this can be done at the bottom corner of the left front area of the radiator. Unscrew the petcock until all coolant has drained, then tighten the petcock.
While the vehicle is still up in the air remove two bolts with 10 mm heads that hold the radiator, condenser and intercooler together.
Remove the lower radiator hose from the radiator and plug both ends so coolant doesn’t leak all over.
Lower the vehicle to work on top. Remove the top radiator hose and also remove the intercooler hose and pipe to the turbo. Remove the screws that hold the electric fan in place. Disconnect the electrical connector that goes to the fan and pull the fan assembly up and out.
Remove the two 10 mm bolts at the top that hold the radiator, intercooler and condenser together. Now, the intercooler pipe from intercooler to throttle will need to be removed. Also remove the top reservoir or expansion tank hose that is connected to the top of the radiator.
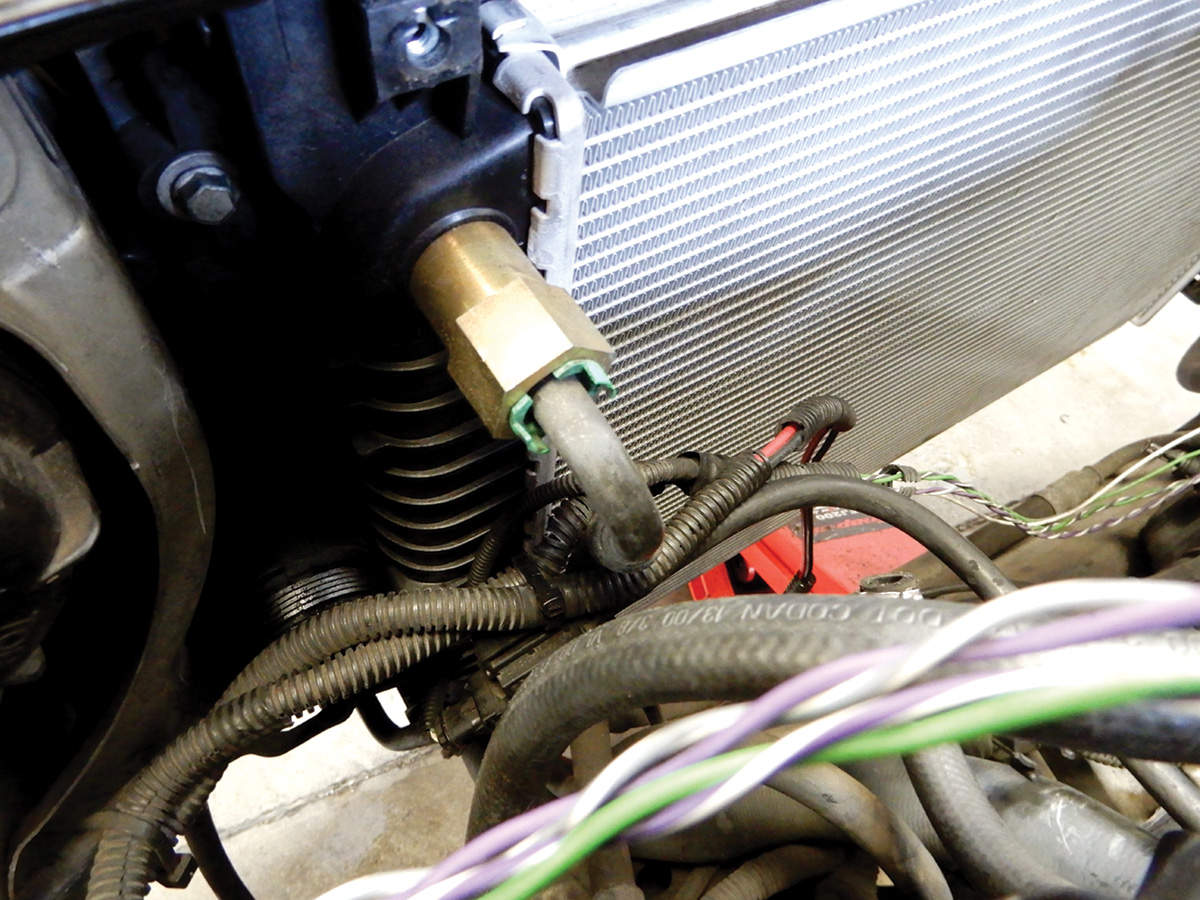
Remove the transmission hoses, upper and lower, connected to radiator. Push in on green connectors and pull out. It is necessary to replace the connectors and O-rings on both hoses. Use Volvo Genuine Part number 9485149 and O-ring, 988840. Make sure to put a drip pan under the hoses to catch escaping fluids.
Now that everything is disconnected, raise the vehicle back up and remove the last two 12 mm bolts holding the complete assembly in. The condenser will stay in the vehicle; you can secure it with tie wraps. Pull down both the radiator and intercooler together. This can be hard to do; pulling down passenger side first at an angle will help in removing the radiator.
Once the radiator and intercooler are out, match up the new radiator with the intercooler. Replace both radiator mounts and the nuts that fit in the top of radiator that hold in the fan assembly. Using some A/C pipe wrap will hold the nuts in place so they won’t fall out while installing the radiator.
Assemble the radiator with intercooler into the vehicle. Install it at an angle up at the driver’s side then fit it with the air conditioning condenser. Push up level so that all three (radiator, intercooler and condenser) are together. Using a scissor jack can help in holding all together. Install the two radiator bolts 12 mm headed. Install the two bottom 10 mm bolts that hold all three units together. Start them but leave them loose until the other two at top are in place.
While the vehicle is still on the hoist, install the bottom radiator hose and secure. The bottom cooling hose to transmission can now be installed. Remember to use new O-rings and connector. Fit into the radiator and secure. Lower the vehicle and install the top cooling hose from the transmission with new O-rings and connector. Install the two long 10 mm bolts that hold everything together and tighten. Install the rubber hose from the expansion tank to the top of the radiator and tighten the clamp.
Making sure to hold electrical wiring out of the way, install the electric fan assembly. Slip fan assembly into place and secure with two bolts at the top of the radiator. Plug in the electric connectors that were removed and tie wrap together out of the way of any moving parts.
Install the top radiator hose and secure. Add new coolant to the system (Volvo coolant 31439821), and check to make sure there are no leaks. Install the turbo intercooler hose and pipe from the turbo to the intercooler. Connect the pipe from the throttle housing to the intercooler and tighten the clamp. Start the vehicle and warm up, adding coolant if needed.
Raise the vehicle back up on the hoist and check to make sure there are no leaks from the radiator, hoses, and transmission lines. Tighten the two 10 mm long bolts already installed at the bottom of the radiator. Lower the vehicle and test drive. Let the vehicle cool down and check the coolant level again to make sure the tank is full.
Replacing water pump on 2003 S80 non turbo
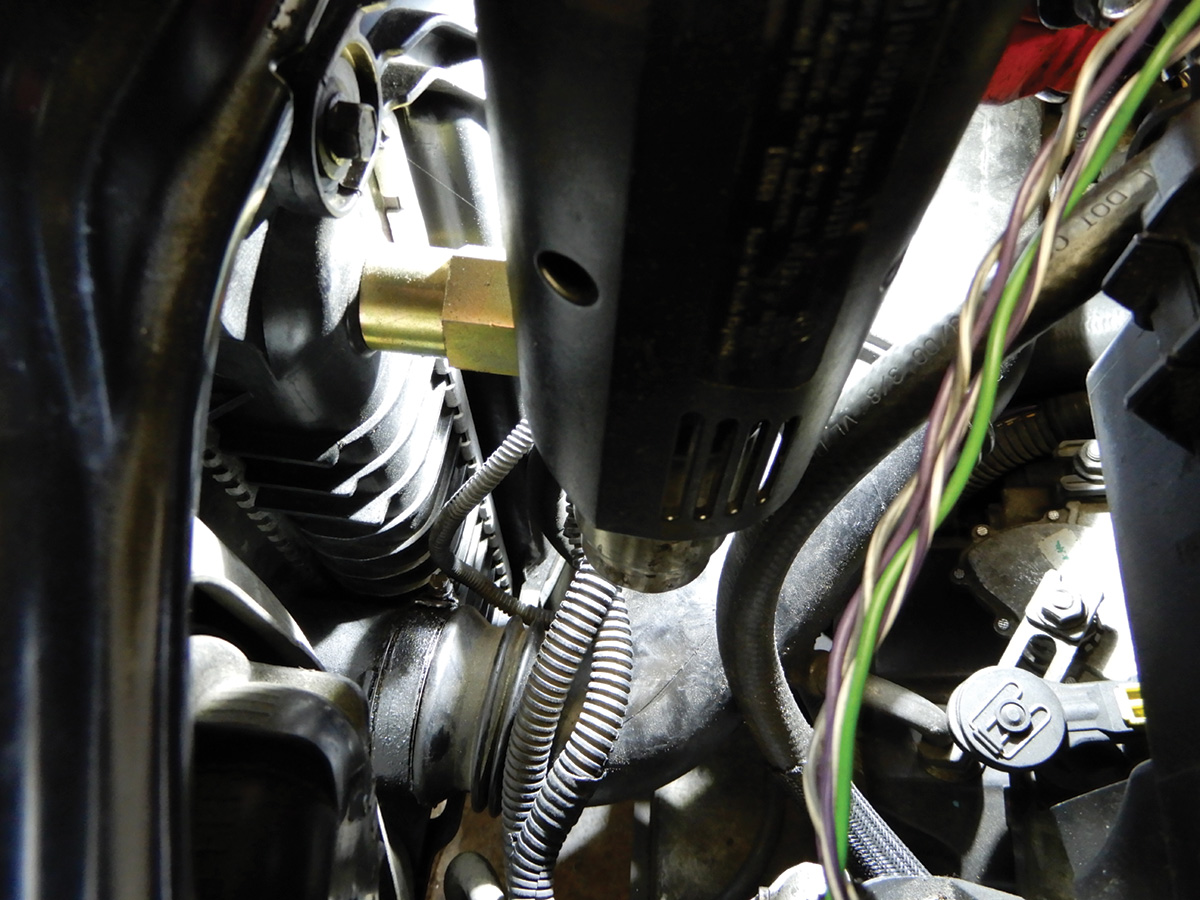
Customer brings in a vehicle, 2003 S80 non turbo, complaining of overheating. Vehicle builds up pressure and starts to get hot. Seems like a possible head gasket, but wait! Be sure to check the temperature at the thermostat housing and at the radiator hoses. If the temperature is over 200 degrees F at the thermostat housing, and only 80 degrees F at the radiator inlet, and if the bottom hose is also cooler than the thermostat housing, it’s possible there’s no circulation in the coolant system.
After the vehicle cools down, remove the thermostat from the vehicle and secure the housing. Fill the system with water and check again. If the same thing occurs again – hot at the thermostat housing and cool at the radiator – it’s time to check the water pump.
Under these circumstances, it’s possible the water pump has failed. The water pump on this vehicle is driven by the timing belt.
Replacing the water pump on 2003 S80 turbo
The water pump is on the front of engine on the right side of the vehicle. Drain all coolant from system. This can be done at the radiator petcock at the bottom of the radiator. After all coolant is out, tighten the petcock.
Remove the expansion tank and power steering reservoir from the vehicle, and plug all lines so not to drip fluids. Remove the auxiliary serpentine belt from the vehicle. The timing cover will need to be taken off; remove the center bolt that holds on the cover. Remove the top torque rod across the top of the engine. This will make it easier to remove the cover.
Now that the cover is removed, the water pump is exposed. Jack the vehicle up or put the vehicle on a hoist and raise it up enough to remove the tire on the right side of the vehicle. Pull back the inner fender removing two 10 mm plastic nuts. Use a 30 mm socket with extension and turn the crankshaft clockwise until all timing marks are lined up.
Loosen the timing belt tensioner with a 12 mm wrench and remove the timing belt and set it aside. Remove the two engine mount bolts under the crankshaft and jack the front of engine up. This will give more room to remove the water pump.
Now that the water pump is exposed, use a 10 mm socket to remove all seven bolts holding the water pump on. Tap on the pump to release it from the engine block. Remove the pump and inspect. If any impeller blades are missing or broken, or if the impeller just spins easily, this is the problem.
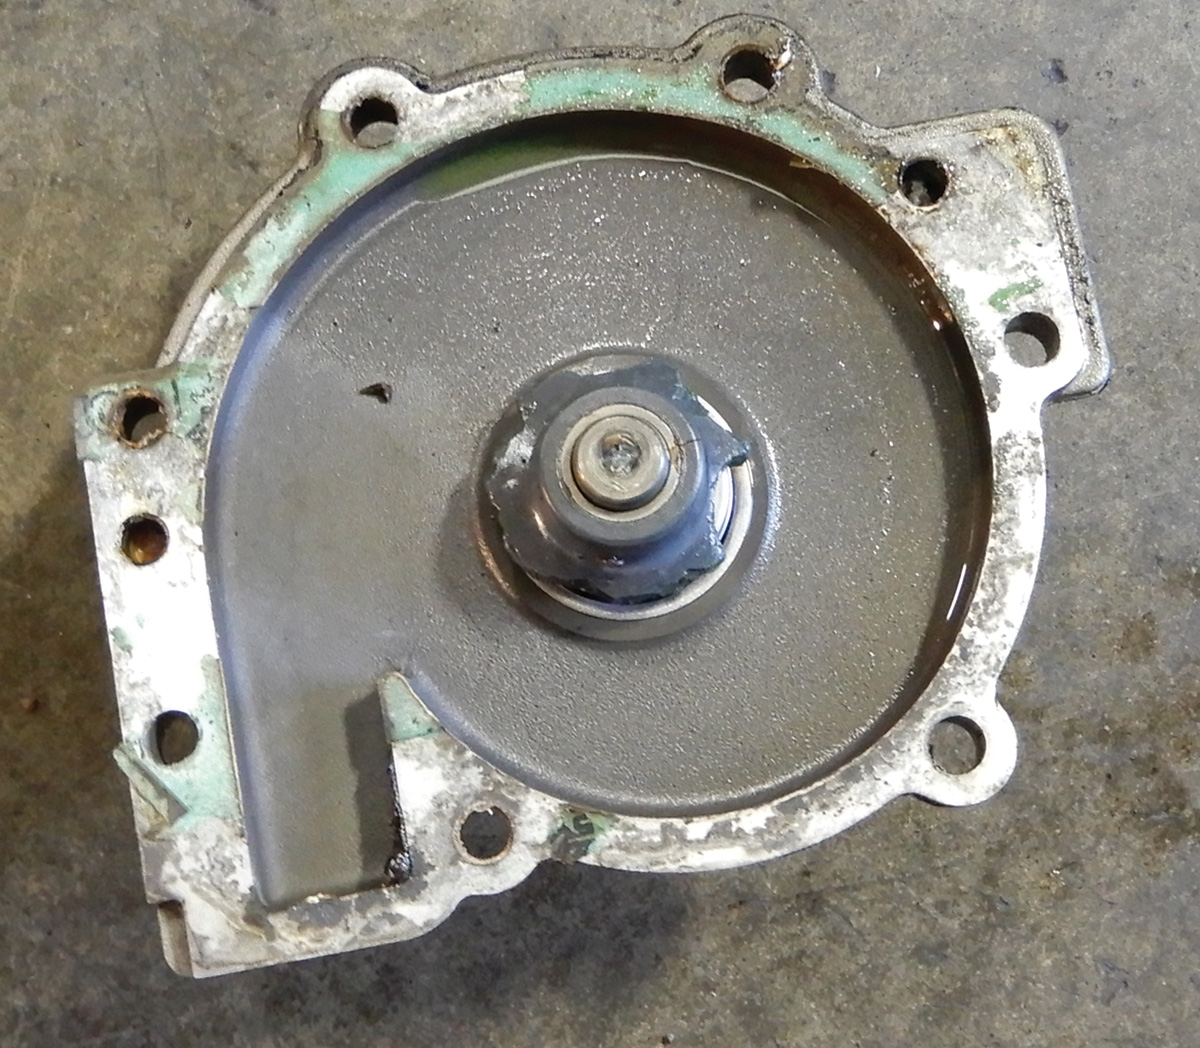
Once the water pump is removed, clean the surface really well with sandpaper and a blade to remove gasket material. Use a gasket sealer to secure the gasket to the new water pump, Volvo Genuine Part number 30751700 and replace bolts part number 985151. Set the pump with gasket into place, making sure that the two dowel pins line up and the water pump is flat. Install the water pump bolts and tighten.
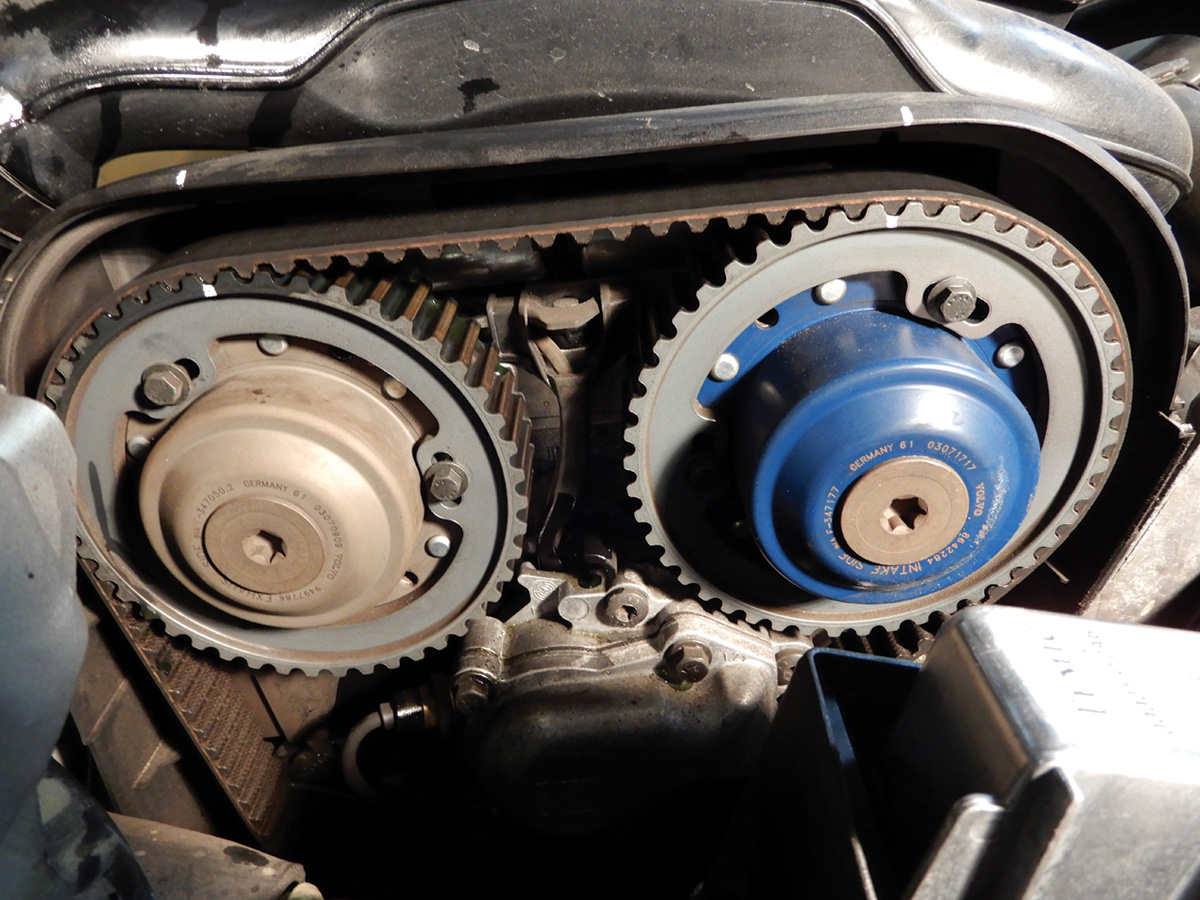
Reinstall the timing belt, making sure that the timing marks are lined up. Route the belt around the crankshaft up to the intake camshaft over to the exhaust camshaft, down to the water pump and around the tensioner. With the tensioner loose, push the needle over just enough to slide the belt on. Check to make sure the marks are aligned. With a 6 mm Allen wrench, position the timing tensioner to the desired position, and tighten with a 12 mm wrench. Spin the engine over by hand to make sure the timing marks are aligned properly. Route the auxiliary belt correctly around all pulleys.
Install the expansion tank and connect the hoses. Make sure the radiator petcock is tight. Add coolant to the system and check to make sure there are no leaks.
Lower the engine and install the engine mount bolts and tighten. Leave the front timing cover off at this time. Install the power steering reservoir and hoses, being sure the power steering is full. Start the engine and bring it up to normal operating temperature. Add coolant until full and install the cap. Let the vehicle warm up, and check for any leaks again. Shut off the vehicle and install the front timing cover and top torque rod across the top of the engine. Test drive the vehicle and check to make sure the coolant is full.
Heater Core Replacement 2008 XC70
Replacing heater cores can sometimes be very challenging. Having the right tools and the know-how to do this job will help in getting it done correctly.
Referring to VIDA will always help when replacing a Volvo heater core.
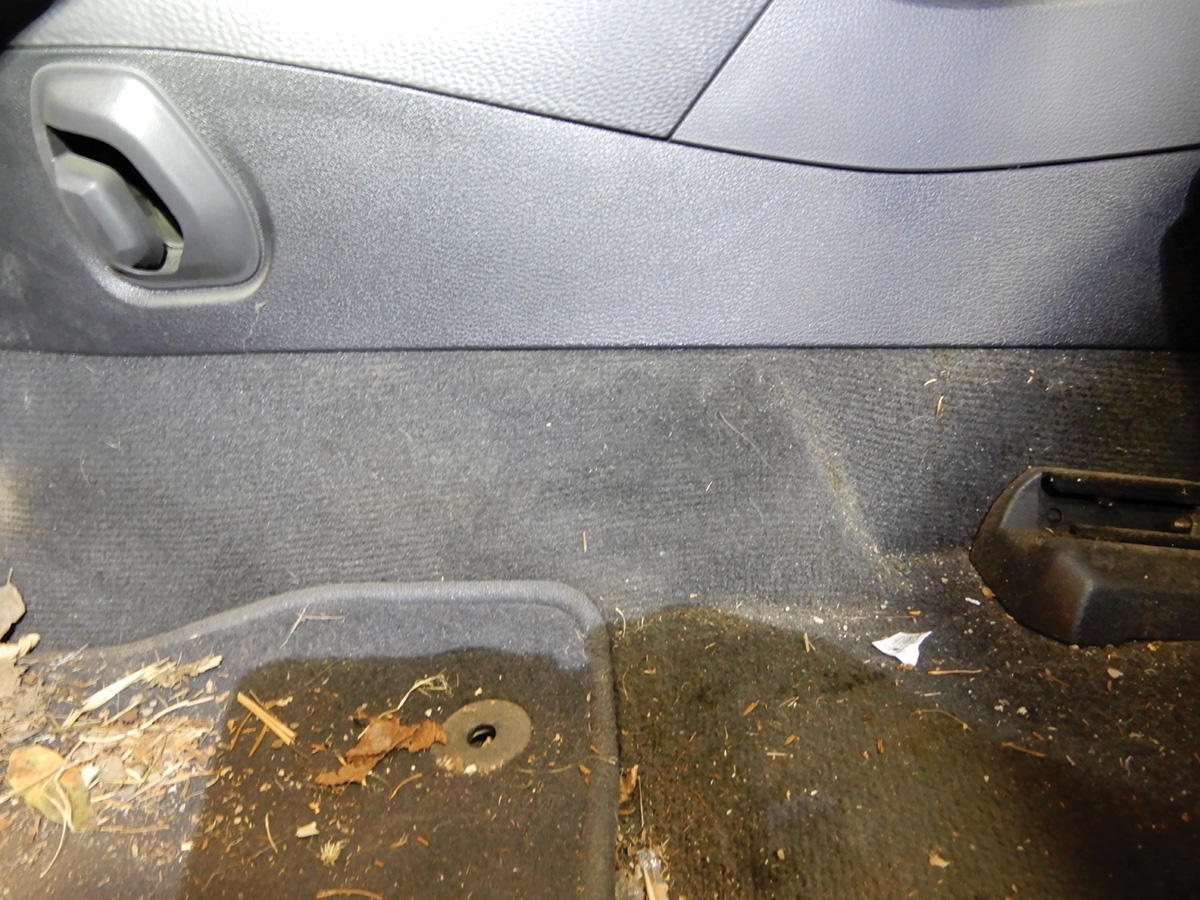
Leaking coolant inside the cabin floor is always a good indication the heater core is leaking. Cleaning this coolant out of the cabin area can sometimes be time consuming. You often have to remove both front seats and carpet, and then clean and vacuum all the coolant up so your customer won’t be breathing fumes from the coolant.
Drain coolant from the engine system at the bottom of the radiator on the left side.
Once coolant is drained, tighten the petcock so no dripping will occur.
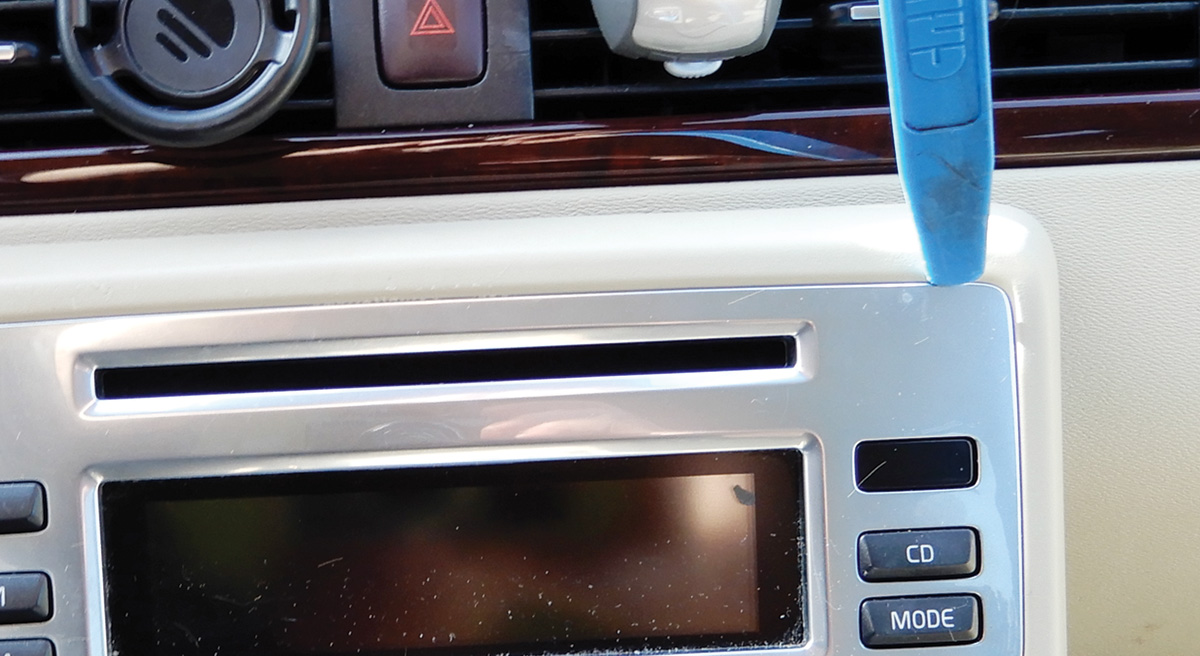
Inside the vehicle, the center console will need to come out. With a trim tool, remove the face plate around the infotainment system. This will expose the screws that will need to come out.
Also, remove the trim around the shifter with the same trim tool. Once the trim is removed, remove the eight screws that hold down the information and entertainment display with the climate control unit. Two screws on the back side will need to come out too. Disconnect all electrical connections and fiber optic cables, making sure not to bend to a radius of less than 25 mm. Set aside the entertainment display and climate control unit.
Now, for removing the center console, move both front seat back as far as they will go. Remove both side panels; this will expose the screws to remove at the front of the console. Open up the console compartment and remove the rubber liner. Underneath there will be two T25 Torx fasteners that need to come out.
Remove the screw under the cup holder, and pull the cup holder straight up. The shifter cable will need to be disconnected at the shift assembly. Push the cable end out towards the passenger side so that the cable is free of the shifter assembly. Disconnect all electrical connectors and remove the complete console and set it out of the way.
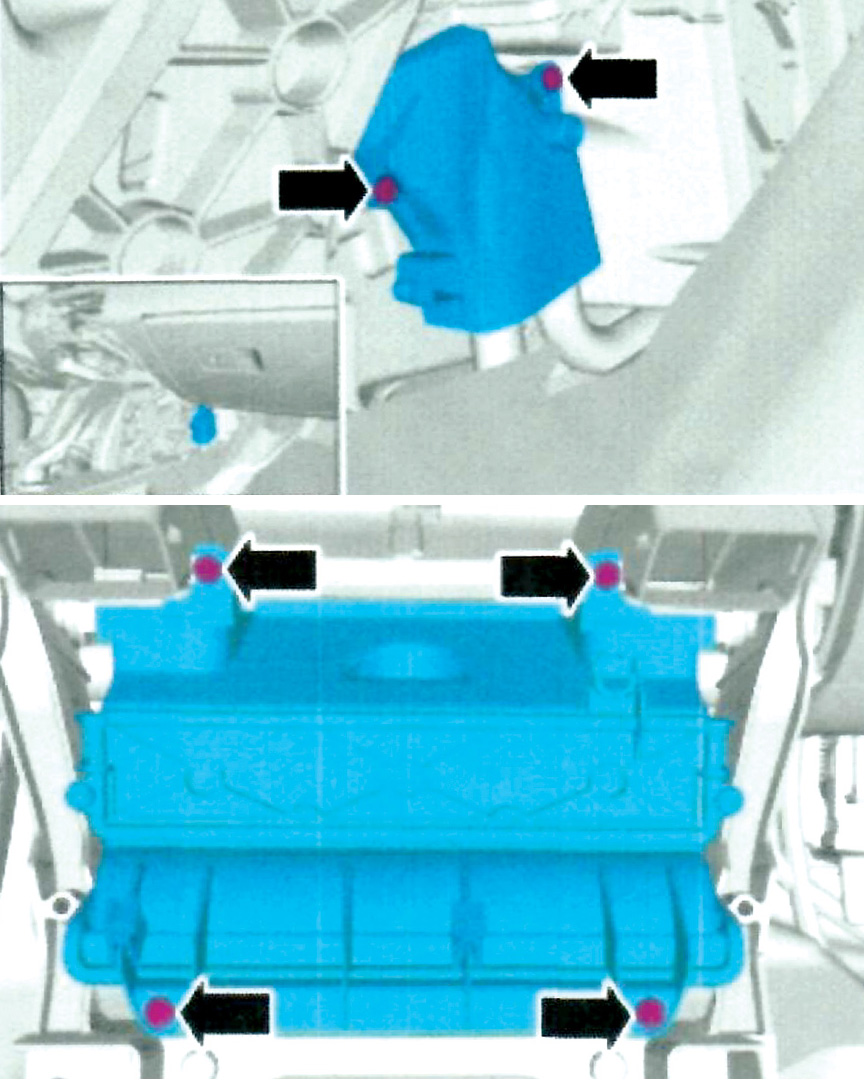
Now that the center console is out, remove the air ducting surrounding the heater box. Remove the four screws on the front cover and also the two screws covering the coolant pipes. This will give room to disconnect the coolant pipes going to the heater core.
Push in the collector at the connection and pull out on the coolant pipe. Some heater cores will have a clamp holding the pipes in the heater core. Just unscrew and remove them together. Be prepared to collect any coolant that might escape. Remove the heater core and replace it with a Volvo Genuine part.
Clean out the heater box with a detergent and rinse. Dry out the box and make sure all coolant is cleaned up.
Install the new heater core. Connect both coolant pipes and secure in place. Install the cover over top and tighten the screws to hold it in place. Install the cover over the pipes, right side up, and tighten down. Align all the heater duct tubing and snap into place.
Put the center console back into place and attach all electrical connectors. Tighten down the screws for the console. Connect the shifter cable and put into place. Check and make sure the shifter operates correctly. Install the cup holder after the screw is tightened down.
Install the information and entertainment display, with climate control. Attach all electrical connectors and fiber optics making sure not to crimp the fiber optics. Secure the panel with the temperature sensor.
Install the trim pieces around the shifter and information and entertainment display. Install the side panels at the console.
Add coolant to the system and warm up the vehicle, making sure the coolant is full. Test drive the vehicle. Let the vehicle cool down and top off the coolant. Check for any kinds of coolant leaks and make sure all controls work correctly.
Diagnosing coolant-related problems can sometimes be difficult. Using the right procedures can help to correct problems in the system. It could have been very easy to misdiagnose this problem with the water pump if the temperature was not checked at each place: the radiator top hose, bottom hose and engine thermostat. Looking for circulation in system will be helpful also.
Leaking coolant usually can be found by pressurizing coolant system. Hoses and clamps can sometimes be the problem. After years of wear on the vehicle, it’s a good idea to change all hoses and clamps. Oil can get on a hose and make it swell up and leak, especially near the turbo, where the hoses get really hot.
Checking the coolant system periodically and changing the coolant as needed will keep the system clean and the temperature gauge where it’s supposed to be.
Download PDF


0 Comments