


As the odometer turns Some service issues show up more often than others.
Like fine wine, Volvos can get better with age (if they get the proper care and feeding). Volvos, over the years, have proven to be among the longest lasting cars on the road. It’s very common to see Volvos coming into a shop with well over 150K on them. Most other cars are ready for the retirement home at 150K miles. A Volvo P1800 reportedly holds the world record for the most miles on a passenger car, with over three million miles recorded. The cars you work on probably will not have this kind of mileage on them, but with your help your customers’ well-aged Volvos can continue to be safe and reliable for many more miles.
As these cars age, we see common issues coming into the shop, and if you know what to look for, you can spot them and fix them before they become a bigger problem for your customer. Here are just a few of the pattern failures, seen on Volvos with higher mileage or lack of maintenance.
Control Arm Bushings
More and more Volvos are appearing with cracked or broken control arm bushings.
The driver of the car won’t always notice that there is a problem with the bushings, but they will notice the difference after the bushings are replaced.
On a Volvo, worn control arm bushings can cause reduced control on sharp turns, pulling, clunking noise on braking, reduced stopping performance and uneven tire wear. You should make inspecting these bushings part of your regular inspection procedure.
There are several ways to check these bushings for wear. One way is to put the car in gear with your foot on the brake and have someone watch the front wheels while you release and apply the brakes while moving forward. If the bushings are badly worn, the wheel will jerk back and forth quite a bit. On XC70 and XC90 models the movement can be as much as a few inches. This is also a great way to show the customer how much worn bushings can affect braking performance and steering control.
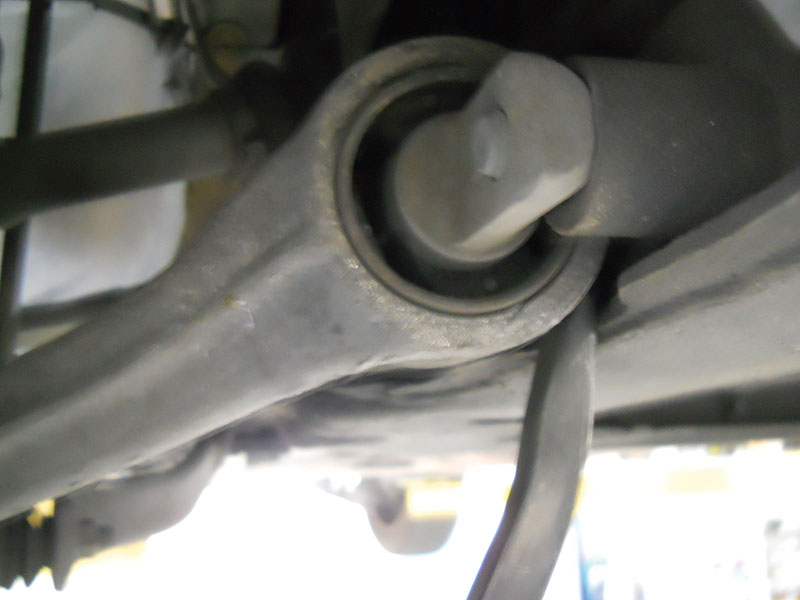
The more common way of checking is to put the car on the rack and use a pry bar to move the control arm back and forth while observing the bushings with a flashlight.
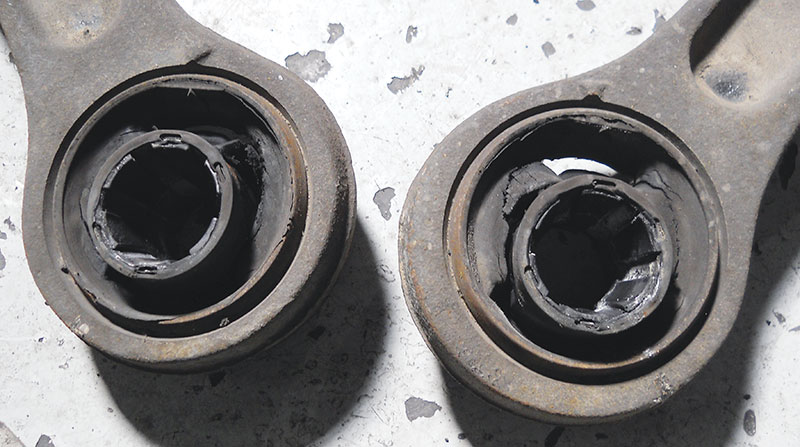
Some play is normal, even with new bushings. If the cracks in the bushings are small, there is probably not cause for concern. Just make the customer aware that they may be looking at replacing the control arm bushings in the future and you can re-check them on their next visit.
In the photo you can see the front lower control arm bushing is completely separated and torn. In this case, it’s time to advise the customer that their Volvo needs to have them replaced. As with all suspension components, you should always advise to replace the bushings on both the left and right sides. This will help prevent alignment and pulling issues.
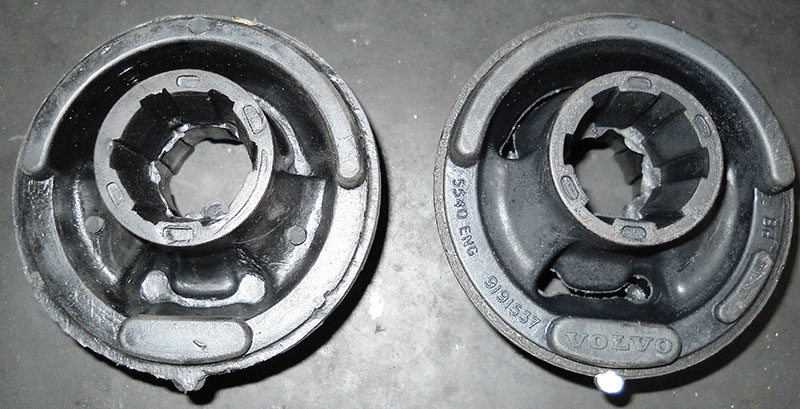
On this job it is very important to use only OE Volvo bushings. Aftermarket bushings often become torn or badly cracked in less than a year of driving. If installing new bushings in your shop, make sure you mark the position and depth of the old bushings before you press them out. This is critical for installation on the car and proper suspension performance. You may choose to farm out the press work to a local machine shop, or you may opt for simply replacing the control arm with bushings already installed.
The job of removing the control arms from the car is pretty straightforward on early Volvos like 1994 850 through 2000 S/V and C70 series. The majority of Volvos showing cracked or worn lower control arm bushings are 2001–present V70/XC70, 2003–present S60, and 2003–present XC90. Bushing wear typically begins to appear after 60K miles, unless the car has been driven repeatedly on rough pavement or has impacted something like a large pot hole.
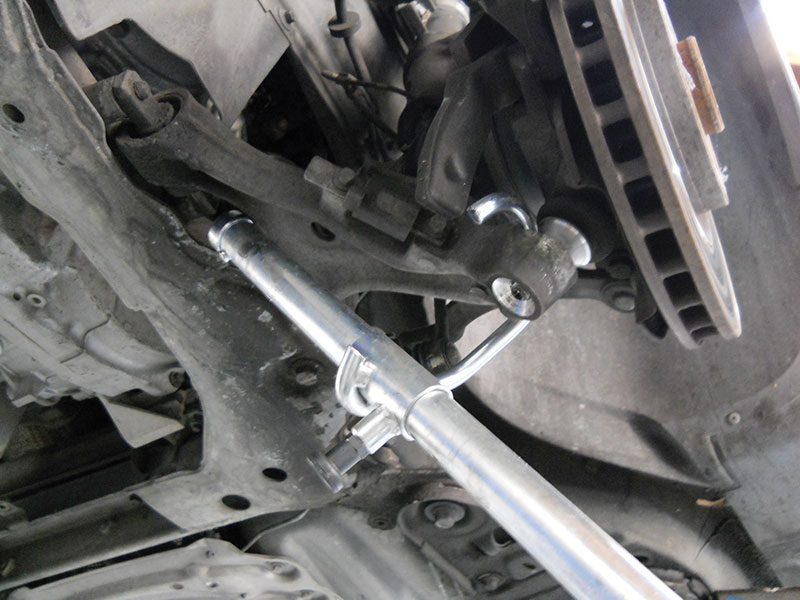
The problem most techs have is prying down the control arms enough to clear the ball joint during removal and installation. The trick to safely and easily lower the arm under tension is to use the Volvo special tool (999 7076).
Sounding the Alarm
Late-model Volvos have a lot of bells and whistles and sometimes, as they age, some components start making noise when they’re not supposed to. If your customer brings in one of these Volvos complaining about the alarm going off randomly or the lights flashing in the middle of the night, in most cases the car is having an issue with the alarm module, or as Volvo calls it, the SCM (Siren Control Module).
In some cases the car will display a message of Alarm System Service Required. But before you start throwing parts at the car, let’s check a few things and do some testing. Start by checking for codes in the UEM and CEM. The most common code is code UEM 0004, Siren Communication Fault.
Volvo uses a siren module with an internal non-serviceable but rechargeable battery. The battery in these units is designed to provide power to the security system in the event that the car’s 12V main battery is disconnected or discharged. When troubleshooting these systems, make sure you load test the battery as part of preliminary testing.
There are many reasons why the car’s alarm could be falsely activated, from a weak 12V main battery to a broken tailgate harness to someone sitting on their keys and activating the panic button on the remote. So with this in mind, the first step in any alarm system diagnosis is to ask the customer the right questions. When and where does the car display the problem? How often does the problem occur? And is there a message in the dash display, like “Alarm Triggered Check Car?â€
The right information can help you avoid a wild goose chase. Start by checking the alarm system for function by arming the system with the remote with the driver’s window open. After 25 seconds the alarm indicator light should start flashing. Reach inside and open the door with the inside door handle and the alarm should sound.
If the alarm goes off and the lights flash, you know the system is functioning. However this does not mean the system is free from faults, especially if the problem is intermittent false alarms.
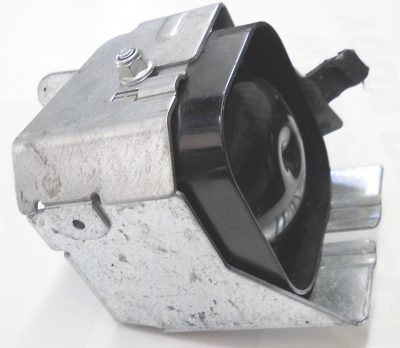
If the alarm does not go off when you trigger it, you should start by checking the siren fuse inside the fuse box on the driver’s side of the dash. In most cases the siren module’s internal battery has deteriorated to the point that it can no longer hold a charge for long periods of time, causing the alarm system to perform erratically. The module is located inside the right front fender. To replace it you will need to remove the right front wheel and inner fender liner.
The siren module is held on by one security bolt that will have to be drilled or cut off. You will need to get new fender rivets from your Volvo parts department in order to reinstall the fender liner correctly.
The siren module does not need software to work, but if you have VIDA and the car needs the update software for the UEM or CEM it’s a good idea to include it in the job. Make sure you check all the functions of the alarm system, including the remote and locks, after the repair is complete. And always reset the system by using one of the main keys to lock and unlock the driver’s door twice. If you fail to do this last step the car may come back with the same UEM 004 code and intermittent false alarms.
Check the Coolant
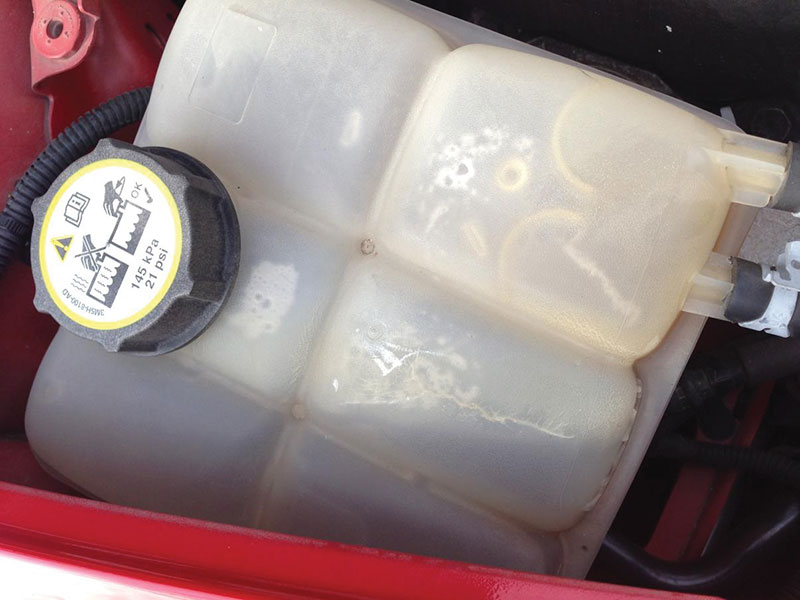
When a Volvo is in for service, check for cracks or leakage on top of the coolant reservoir. After about 90K miles some tanks become brittle and develop cracks and leaks on top. When you replace the tank you should also recommend a new reservoir cap and a coolant change. Make sure you use only Volvo factory coolant in these cars. Using a vacuum lift system for filling the system on these engines is not recommended because of the lower radiator hose; its hard plastic and rubber construction can separate under vacuum. The customer won’t always notice that they are losing coolant until the low coolant light comes on. If the tank’s weakness results in one of the nipples breaking off at the wrong time, like on a long driving trip, an overheating condition can occur.
Leaking Valve Cover Gaskets
The Yamaha-designed 4.4L V-8 is a great motor, it has lots of power, provides decent mileage, and is very reliable. One of the pattern problems we see a lot on the V-8 is leaking valve cover gaskets. They usually start leaking after 90K miles, and when they do you will see oil all over the sides of the engine block. Sometimes the oil leak can look like it’s coming from the oil pan or head gasket, but in most cases it’s the valve cover gaskets leaking.

To confirm this, remove the plastic covers on the intake and valve cover gaskets and with a mirror and a flashlight, look around the edges of the valve covers. The one near the firewall usually starts leaking first. Doing this repair is not that difficult but it does take more time than on most cars with similar engine configurations. When you perform this repair you should replace all the seals in the valve covers as well as the PCV valve and hoses located under the intake manifold.
The two hoses replaced during this repair are often rock hard and crack during removal, so include them in every V-8 valve cover job. It’s also a good time to replace the spark plugs if needed.
You can clean the throttle plate while the intake is apart but try not to push on or move the throttle plate by hand, since this can damage it. If the throttle plate is really filthy, you can wait until the intake is reassembled and, with the intake hose off, put the ignition key in position 2, and then use a prop rod to push the accelerator pedal to the floor. This will put the ETM at full open. With a clean rag and some throttle cleaner, gently clean the opening, again trying not to touch the throttle plate.
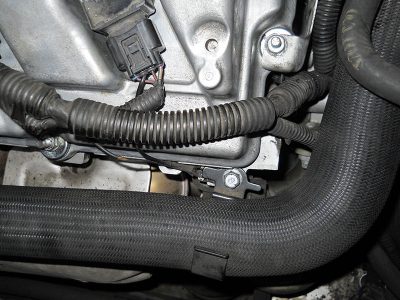
You should be careful with the wire harness for the ignition coils, especially the ground wires on the valve cover bolts. They tend to break if you are rough with them. Use a 10mm wrench to hold the bolt while you remove the ground connector. Here is a list of the Volvo part numbers you will need to order to do the complete job:
- 30720095 Valve cover gasket bank 1
- 30720096 Valve cover gasket bank 2
- 30720335 Intake gasket
(two needed) - 30720101 PCV valve hose
- 30720126 Throttle body gasket (optional)
- 925063 Oil filler cap O-ring
- 30720097 VVT solenoid seal (four needed)
- PCV Valve
- Breather Hose
- 30731383 Spark Plug Set B8444S (optional)
- Ignition Coils 1992–present (most Volvo models)
Like most cars that use a coil over plug ignition system, the coils on Volvos can fail with age and mileage. Volvo first started using the coil over plug type of ignition on the 1992 960 series cars, and by 1998 it was used on all Volvo models. In the majority of cases, problems with the coils start to develop after the car has gone over 90K miles, but some fail sooner. It depends on the climate, how the car was serviced and how it was driven.
For instance we have seen coils fail prematurely because the car’s PCV system is clogged, causing engine oil to be pushed out of the oil filler cap and into the spark plug tubes. This can cause the coils to short. Or if the spark plugs are worn out, they can cause the coils to have to ramp up the voltage to get through the extra resistance, causing the coils
to overheat.
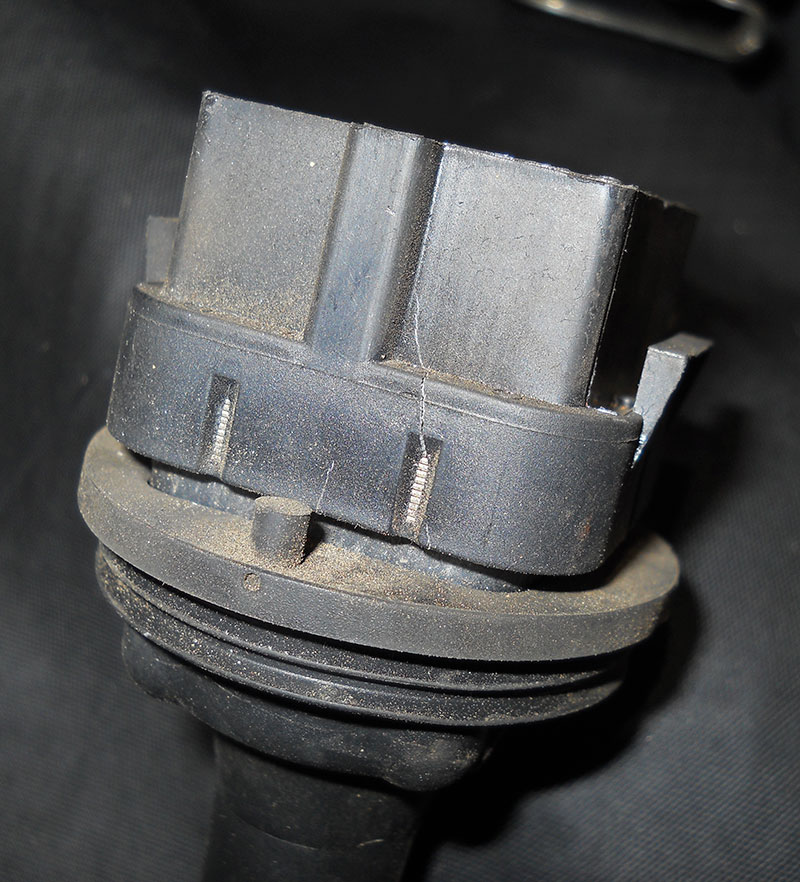
When you are checking out a Volvo that has a misfire problem, make sure you inspect the coils closely. The coils can develop tiny cracks around the plastic housing on top. This is a sure sign of a bad coil. If you pull the rubber insulator boot down on a weak coil, sometimes you will see carbon tracks from voltage leakage. If your diagnosis shows that a car has a defective coil and the car has over 60K miles, it’s best to replace all the coils.
Some technicians may disagree with changing all the coils at once and only sell the one or two coils that happen to be failing at this time. This can be a slippery slope, because the original coils are the same age and have the same mileage on them. So if you replace only one or two, you’re most likely going to get a call from the customer in a few weeks or a few months, saying something like, “My car is doing the same thing it was before you fixed it last time,†and when they bring it back in and you find out that one or two of the old coils has now failed, you will be the one holding the bag. The moral of the story is, replace the coils as a set with only high quality OE Volvo coils and a set of new Volvo spark plugs, to keep your customer’s Volvo running the way it was designed.
Download PDF


0 Comments