


As a technician, you either love this kind of job or you hate it.
It’s not for everyone.Â
Working on windows and locks can be more of an art than a science. This kind of work takes skill, patience, creativity, and X-ray vision would help too. But there is hope if you find this kind of work difficult or frustrating because, just like a lot of jobs, the more experience you get doing this kind of work, the better you will become at doing it.Â
You will get to know how things look and feel, like how to remove old plastic door parts without damaging them, or the difference between a lock cylinder that needs to be lubricated and a lock cylinder that needs to be replaced just by the way it feels.
As we all know, it’s easy to break expensive clips and damage door panels if you don’t know how to disassemble the door and window parts the right way. It’s because, in most cases, this kind of work requires finesse, not force.
As with all customer complaints, you or your service writer should get as much information about the problem as possible, especially if the problem is intermittent or not easily duplicated.
Your shop should have a system in place to confirm which door or window is involved, R/F, L/R, Driver’s Window, etc. And make sure that it is clearly and correctly stated on the RO.
Has this ever happened at your shop?
You may be handed a repair order from the service writer that says something like, “Customer complains that R/R door lock sticks, remove door panel and estimate needed repairs.†You then go get the car, pull it on your rack, lock and unlock the right rear door a couple of times and don’t get the symptom, so you go to work disassembling the R/R door panel.
Once you get down to the lock actuator, you check the wires, check the linkages and try to replicate the symptom. Of course there’s still no symptom, so you take the RO and go talk to the service writer about your findings.
You tell the service writer that you can’t find anything wrong with that right rear door lock, the service writer looks at you strangely and says, “I wrote L/R on the RO,†then you look at the service writer strangely, hold up the RO and point out the letters R/R that are written there.
This never happens at your shop right?
And remember, it’s not always the service writer’s fault; often times the customer can be confused and give the service writer the wrong information.

Volvo Key & Remote Programming
Volvo started using laser cut keys back in 1992, but the keys did not have immobilizer communication chips inside until 1999. They also started offering a keyless entry remote as an option in 1992.
These early security measures were very effective and made stealing a Volvo very difficult. But when Volvo introduced the immobilizer system into its cars, it became darn near impossible to steal a Volvo without a key or a tow truck.
In the early days you could only get the laser keys from Volvo. You would call up your Volvo dealership parts department and give them the VIN of the car you wanted the key made for.
Then the parts person would transmit the order details to someone overseas, who would enter the VIN into Volvo’s Magic Master Key Cutting Machine (at least that’s what they should have called it).
There would be a flash of light, a puff of smoke and “VOILA,†you would receive the new key in about a week.
These days you get the keys a lot faster from Volvo.
In 1999, Volvo upped the ante for car thieves, with the addition of the immobilizer and chipped keys that communicate with the immobilizer through an antenna ring on the ignition lock.
To get a 1999 – 2017 Volvo to recognize a new key and do more than just unlock the steering wheel, you will need to download a software package with Volvo’s VIDA program.
So if you don’t have VIDA, you will have to send your customer to your local Volvo dealership to have their keys and remotes programmed, along with all the other things you won’t be able to do without this valuable tool.
It’s just yet another reason to get a VIDA subscription up and running at your shop. Volvo’s VIDA software, along with the DICE communication tool, is invaluable if your shop works on Volvos, even if you have no interest in key programming.
DID YOU CHECK THE BATTERY?
Volvo has been offering keyless entry remotes on their cars since the early 1990s; early Volvo remotes were very tough and simple.
Volvo keyless remotes that were used on 1992-1998 960, 850, S/V 90 series cars are very easy to program.
HERE’S HOW….
 With all the doors, hood, and trunk closed and with other electronics such as lights, radio, HVAC turned off, insert the key into the ignition and turn the key to the “On†position and back off 5 consecutive times. Do not turn the key to start the engine, or turn the key as far as to engage the starter.Â
On the 5th time the key hits the “On†position, the red alarm light located on the right hand top of the dash should start blinking.
Within 15 seconds, press either button on the remote. If the remote is successfully recognized, the alarm light will stop blinking and become solid.
If you have additional remotes to program, you can push the buttons on them within a maximum of 10 seconds of each other. If you are too slow or interrupt the key in the ignition, you will have to start over again.
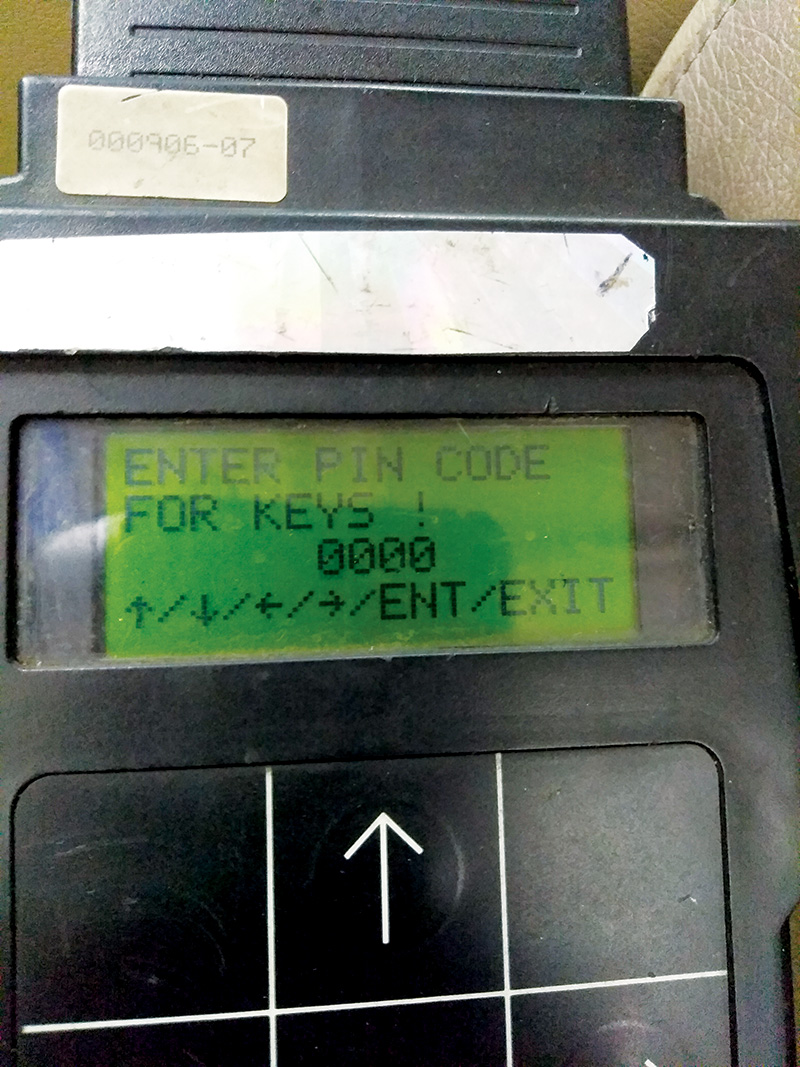
In 1998, with the introduction of the S/V 70 series Volvos, remote programming got a little trickier. The type of keyless remote that was used in the 1998 S/V 70 was only used for one model year.
To program one of these remotes you will need a Volvo System Tester (VST) and a four digit code from your Volvo dealership.
The VST is very useful when working on pre-1999 Volvos. But if you don’t already have one of these early scan tools, you may have difficulty finding one. Volvo no longer sells the tool, however they have an arrangement with Ohio Diagnostics in the USA for repair of Volvo Scan Tool, VST 9988686, Multi-tester Pro 9511532 and VDII adapter 9511457. For more information contact: Ohio Diagnostics, 631 Brookwall Drive, Suite B208, Akron, OH 44333, Phone: 330.668.1518, info@ohiodiagnostics.com.
But of course, most of the Volvos that independent shops work on these days will be 1999 and newer models, and when theses cars need new keys or remotes, it’s a whole different ball game. If you want to program keys or remotes on these Volvos, you will need VIDA. Here are a few rules to keep in mind when programming keys and remote fobs on 1999 – 2017 Volvos:
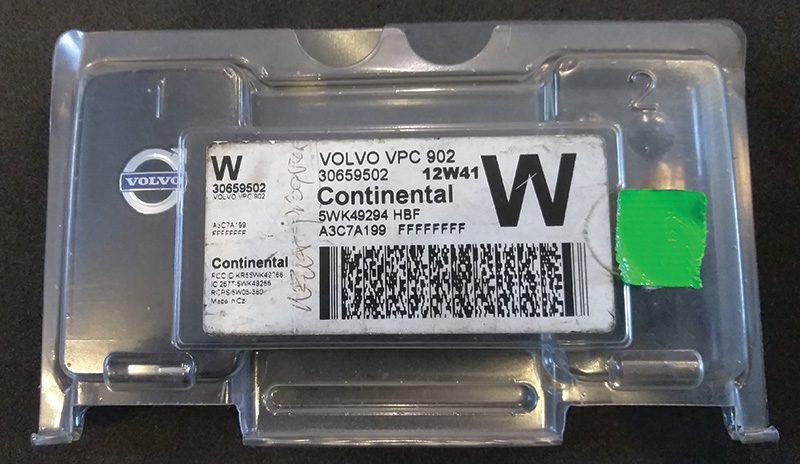
- They have to be new parts from Volvo.
- They have to be blank, meaning not previously programmed.Â
- Make sure part came in the unopened original factory packaging. (In later Volvos you will be prompted in VIDA to enter two rows of numbers off of the key fob’s packaging, so don’t throw it away!)
- You can’t bring the customer’s old broken keys or remotes back to life by trying to “reload†the software. (Remember to check the battery in the old remote before tossing it.)
- If your customer needs more than one key or remote added to their Volvo, in most cases they will save money on software by downloading all the new keys at the same time, because some of the key software packages will allow you to load all the new keys into the available spots during programming.
- A common mistake that happens in a lot of busy shops, is when the person that orders the parts ends up giving the wrong VIN to the Volvo parts person.
When the key that was ordered with the wrong VIN shows up a few days later, you need to check the fit in the ignition right away. If it’s the right one it will turn the ignition lock freely.
Some independent shops choose to purchase their VIDA subscriptions for just 3 days at a time. If this customer’s key download is the sole reason for activating the 3 day subscription and you don’t verify that the key is correct for the Volvo in question before you purchase and activate a 3 day VIDA subscription, you will not only lose money on the software purchase and key, but you will have wasted the customer’s time and will have to have them come back in a few days when the correct key arrives.
COMMON VOLVO KEY LOCK AND DOOR PROBLEMS
FLIP OR FLOP?
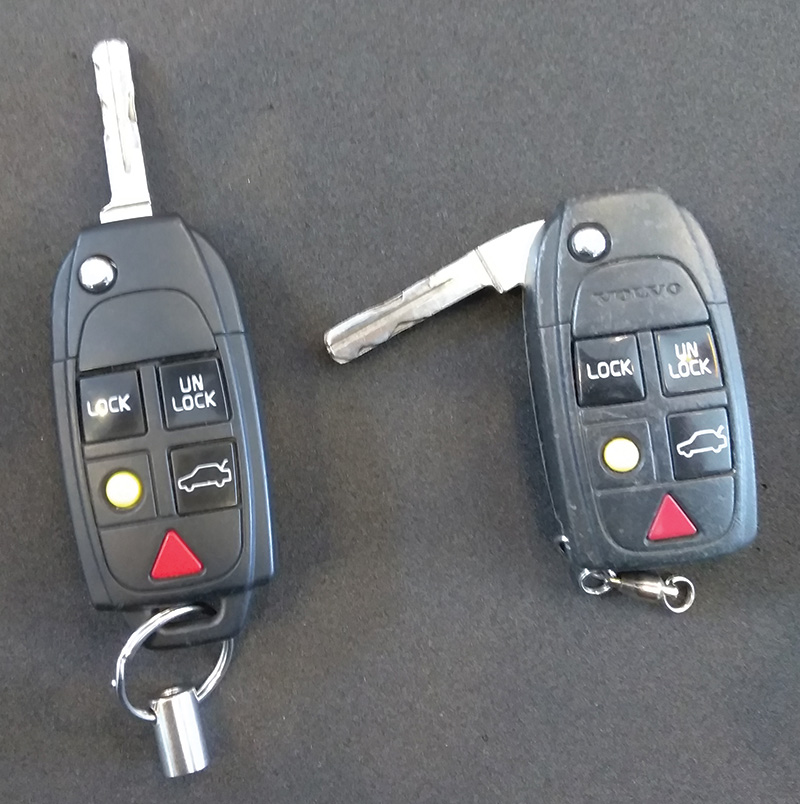
Most Volvo keys and remote fobs only require one software package per key or fob, but there is (technically) one exception. The switchblade type key and remote combo is used in a lot of Volvo models starting in 2004. The switchblade type key comes in two parts. The upper part houses the keyless entry remote section and has a separate transponder from the lower section that has the key blade mechanism and its own RFID transponder. Both the upper and lower parts of this type of key require their own separate software packages if you are replacing the entire key assembly.
If your customer’s remote section is good and you just want to replace the worn-out switchblade part, you can just get a new lower key blade part and just download one software package. Or you can order a valet key without the remote if your customer just wants a backup key with no remote functions.
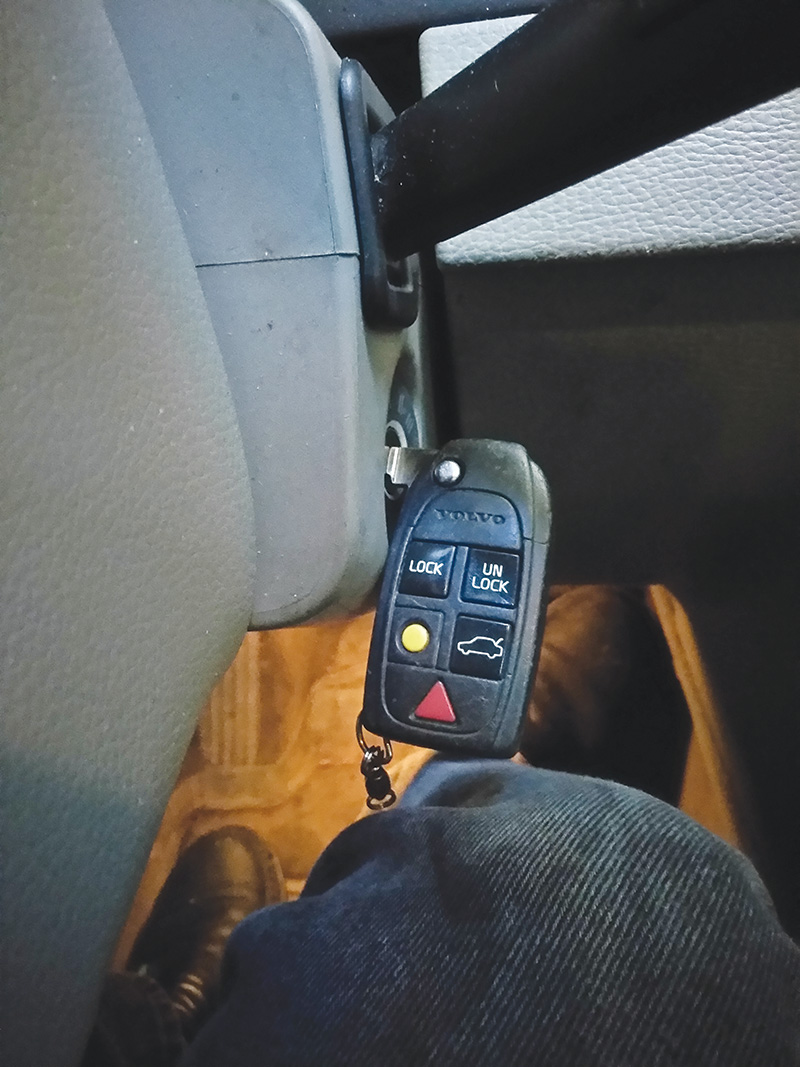
It’s common to see the spring go out in the switchblade part of the key. This causes the key to flop around while inserted into the ignition lock. This can turn into a safety issue, especially in the earlier XC90s made from 2003-2010 that use this type of key.
Some shops have reported customers coming in with these cars, with a complaint of intermittent mysterious stalling, especially at stops. These XC90 customers had a few things in common; they all had baby seats installed on the back seat, they all had no codes stored in the ECM, or any other problems that could cause these cars to stall, and they all had FLOPPY KEYS IN THE IGNITION!
What was happening was that the floppy key was hanging down and, when the drivers would turn around at stops to check on their baby, they would hit the key with their knee and turn off the engine. The driver would not notice they had done this because the natural reaction would be to try to turn the key and restart the car.
STICKY SITUATION
Early Volvo C70 series cars have lock pin bezels that are made from soft plastic. Over the years, the plastic can become sticky and soft. This can be caused by sunlight and cleaning products. When the lock bezels start to break down, they can cause the lock pins to stick down and not allow the doors to unlock, especially after the car has been sitting in the sun for a while. To check to see if a C70 has this problem, just use your fingernail to scratch at the edge of the bezel. If it feels like cheese instead of plastic, it needs to be replaced.

OFF THE TRACKS?
If you have a 1999 – 2016 S60, V70, XC70, or XC90 in your shop with a window that’s off the tracks, jamming, or sticking, the window regulator sliding pivot may be broken or worn.
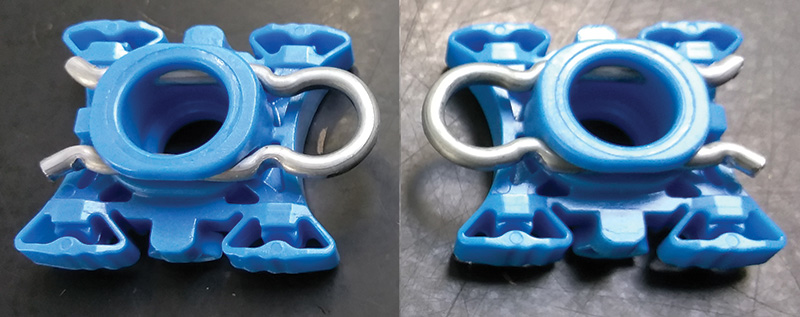
The window regulator pivot is a blue plastic guide with a metal clip that holds the window regulator arm ball socket into the window channel. When these clips break, the window can move off track, causing the window to jam. If the customer continues to use the window with the broken or worn pivot clip, the window regulator can bend the arms to the point that the regulator will have to be replaced.
Replacing the sliding pivots is a fairly straightforward job. Start by removing the door panel. Next, lower the window to about half way down, then casually peel back the sound-deadening foam material from the top down, just enough to access the window pivot clips.
Next, use some blue painter’s tape or a window suction cup tool to support the window glass. If the sliding pivots are still attached to the window channel, use a hook tool or needle-nose pliers to remove the metal clips and pop out the regulator ball sockets. Now make sure the window glass is lined up back in the side channels and moves freely. Remove the old sliding pivots and any bits of broken plastic, then lubricate the channels where the pivots slide and insert the new sliding pivots.Â
At this point you will have to pop the regulator’s ball sockets into the new sliding pivot clips. If you have very strong fingers you may be able to pop these in by hand, but if you don’t have Superman finger strength, you will have to use tools.
A lot of techs have success by using short pliers that will support the window channel from the back while pressing the regulator ball socket into the sliding pivot. You will hear an audible “pop†when the ball socket is seated in the sliding pivot. Now you can hook up the window switch and test the window’s function.
After reassembling the door panel, you should calibrate the window stop point by turning the ignition to the “On†position (KOEO). Use the switch to move the window to the top closed position, then hold the window switch in the up position for 30 seconds. Check the auto up and down for the window and you’re done.
You can also calibrate the windows with VIDA. Just go to Vehicle Communication and select the DDM, then select the Advanced tab.
Download PDF


0 Comments