


Unlike the old butterfly mechanical throttle bodies, when all you needed was a screwdriver to adjust the idle, electronically controlled throttle modules started in 1999 for Volvo models S70, V70 AND XC70. Let’s go over failure symptoms, how to clean, and how to replace an Electronic Throttle Module (ETM) in a Volvo.
These are some of the symptoms of a faulty Electronic Throttle Module in a 1999 to 2001 S70, V70, or XC70:
- Rough idle or stalling
- Idle hunting up and down when stopped at traffic lights
- ETS light is on
- Blowing ETM fuse
- Limp-home mode
- No communication with the ETM
When a customer comes in with one or more of these symptoms, the first thing you should do is to hook up VIDA and check for any codes in the system and also monitor the Electronic Throttle Module (ETM) for any unusual readings.
If a vehicle comes in with the ETS light on and the car is in Limp mode, it will likely exhibit very little response from the accelerator. Limp mode is designed so that the car does not come to a sudden halt and can still be driven at low speed to a position of safety.
There are a number of possibilities.
- The Electronic Throttle Module can be cleaned and refitted.
- The Electronic Throttle Module can be replaced with a new one.
- The Electronic Throttle system can receive a software upgrade.
In some cases, removing the Electronic Throttle Module and cleaning it can help with the problem, depending on how much buildup is blocking the butterfly.
Removing ETM 1999 Volvo C70
First, remove the negative battery terminal and set it aside. Remove the fresh air hose to air cleaner assembly. Remove the four screws at the top of the cooling fan assembly. Remove both oil and transmission dipsticks, being careful not to break them.
Disconnect the hose at the top charge air fitting for the intercooler. Disconnect the relay electrical connectors and set aside. Also disconnect the electric cooling fan. Remove the evap valve from the shroud and move it out of the way. Push the cooling fan assembly towards the firewall and pull it straight up and out. Set the cooling fan assembly to the side.
Using a 7 mm flexible hand tool, disconnect both clamps at the hard plastic hose to throttle module to intercooler. Disconnect the air sensor connector and MAP sensor wire connector. Pop off both ends and remove them from the vehicle.
The wire connector for the Electronic Throttle Module harness runs behind the starter, so it will be necessary to remove the bracket at the front of the starter to get it out.
With a 10 mm deep socket and ratchet, remove the four bolts that hold the throttle module to the intake manifold, and remove the throttle module from the vehicle.
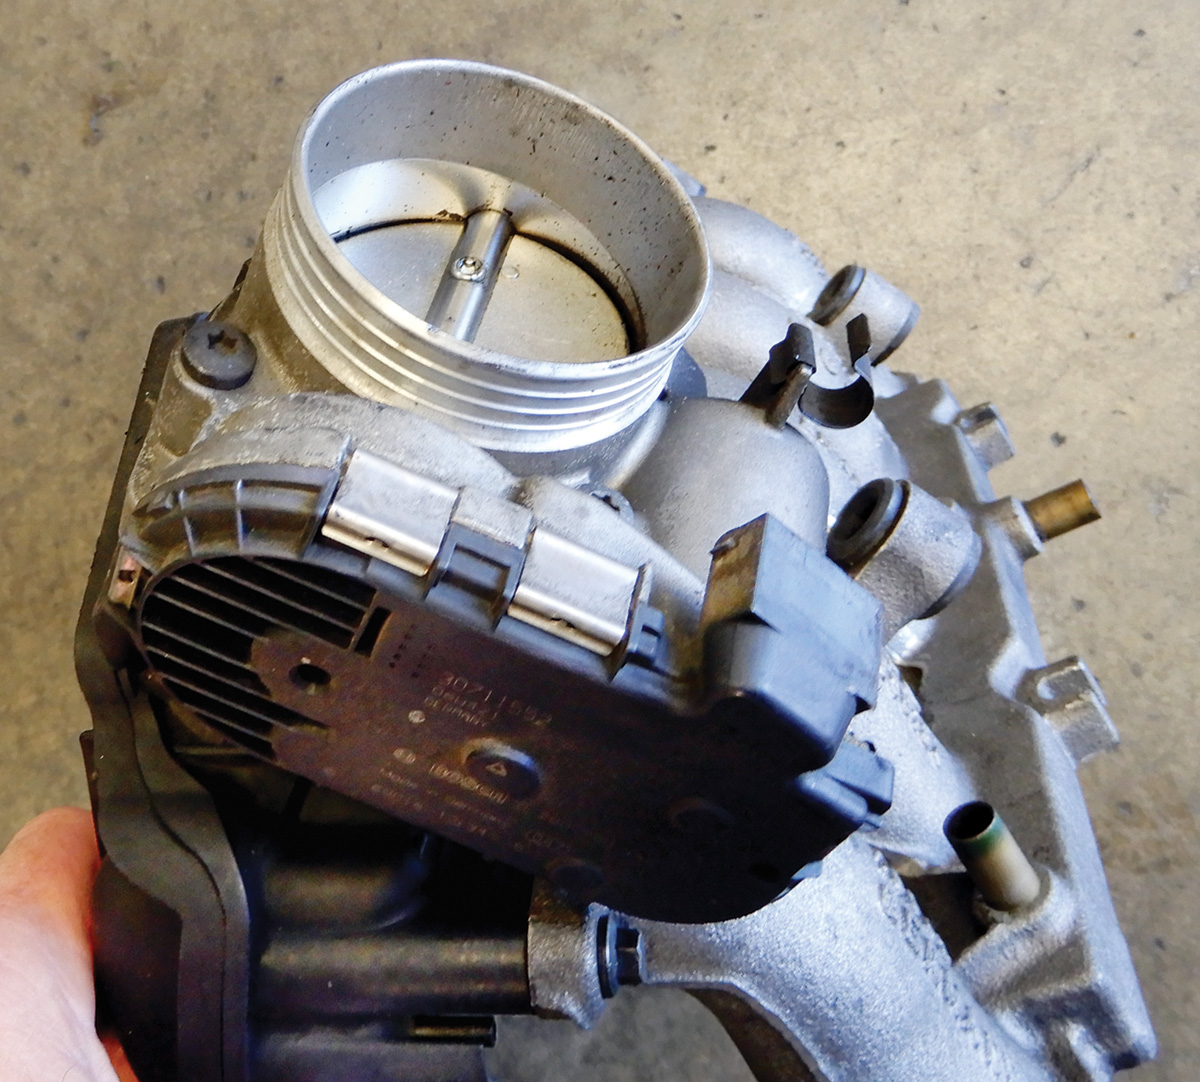
Clean the throttle module with cleaning agent Volvo Genuine Part number 1161826 and a small brush. Make sure to clean all surfaces, open the butterfly and clean the edges. Carefully clean the complete area and wipe clean. Do not use compressed air when cleaning.
Install the throttle module with new gasket Volvo Genuine Part number 31430474 and secure the throttle module to the intake manifold. Connect the throttle module electrical connector and route the harness back into place. Secure the starter bracket. Install the plastic pipe at the throttle module and at the intercooler and tighten both clamps. Connect the electrical connectors at the air and MAP sensors.
Set the cooling fan back into place. Connect all electrical connectors to their original connectors. Secure the relay at the shroud. Tighten down the four screws holding the fan assembly in place with the shroud. Secure the evap valve to the shroud. Connect the top hose at the intercooler. Tie wrap the wires into place. Install the fresh air hose to the air cleaner housing.
After cleaning the throttle module, if any problems occur it might be necessary to replace the module and download software to match the VIN number. If replacing use the same method as cleaning.
In some instances, just updating the software may cure all your problems. This can be checked by using VIDA.
Volvo vehicles affected include the 1999-2004 Volvo C70 and the 1999-2000 Volvo S70,V70 and XC70.
Troubleshooting Electronic Throttle Module
If the ETM has been replaced and still the same problem occurs or worse, a combination of any of the following diagnostic trouble codes may be stored in the Engine Control Module: ECM-902B, ECM-902A, ECM-903F, ECM-912A, ECM-532D, ECM-9150. ECM-9160, ECM-951F. An ETM sweep test graph may show faulty sensor readings.
Cause of problem inadequate current supply to ETM
There are a few common areas that can cause significant current loss: the engine management relay, the ETM relay (only on 1999), the B+ terminal, or possibly a corroded ETM power supply.
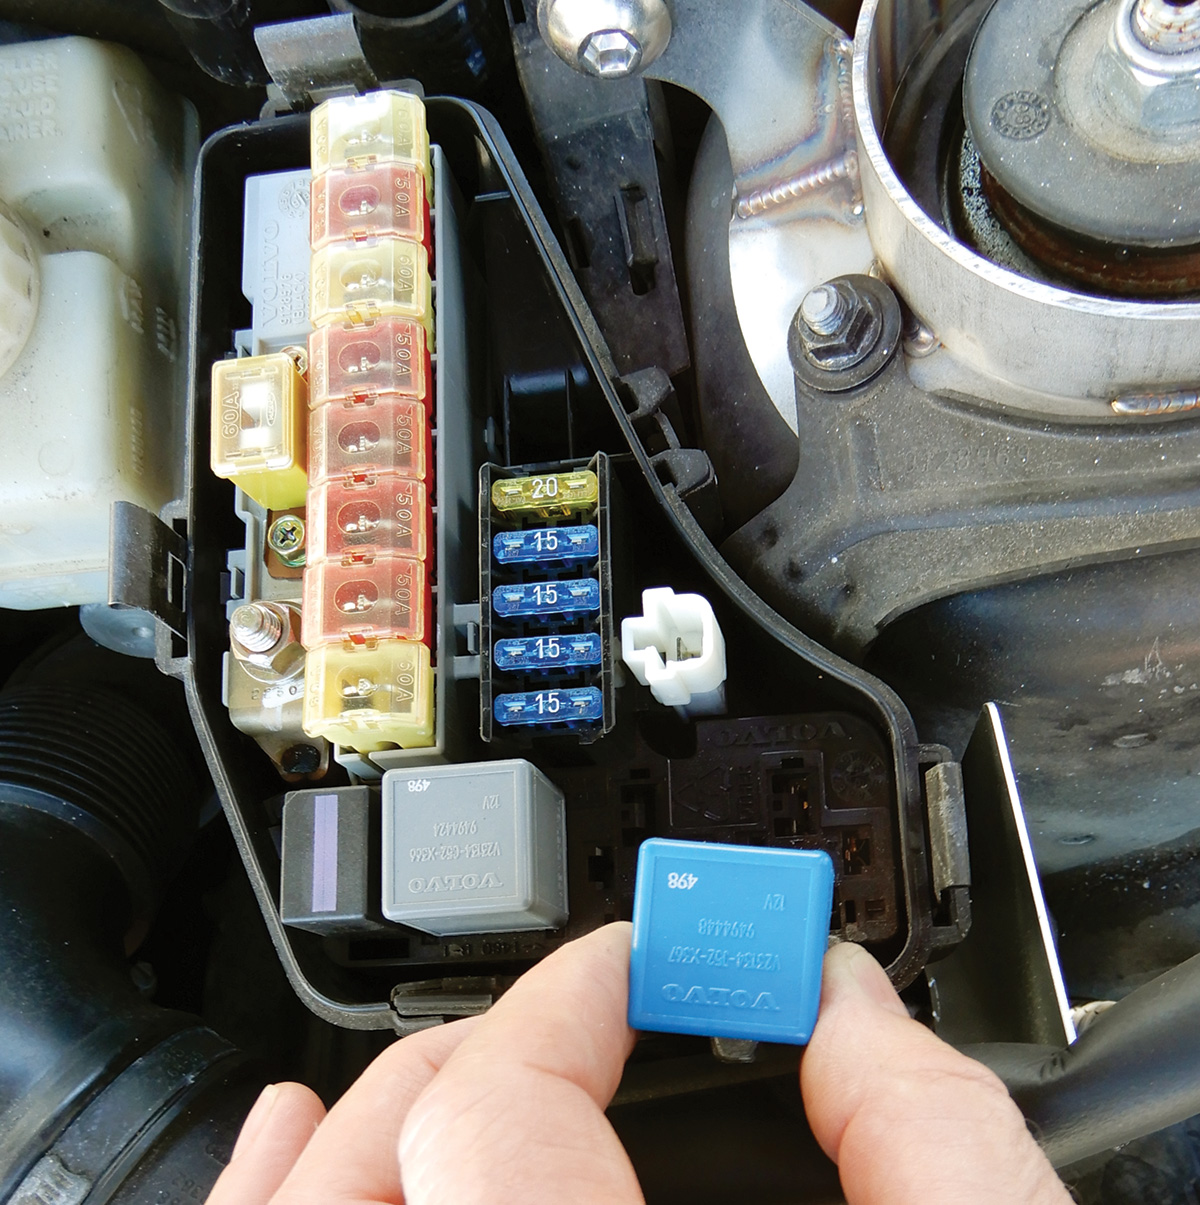
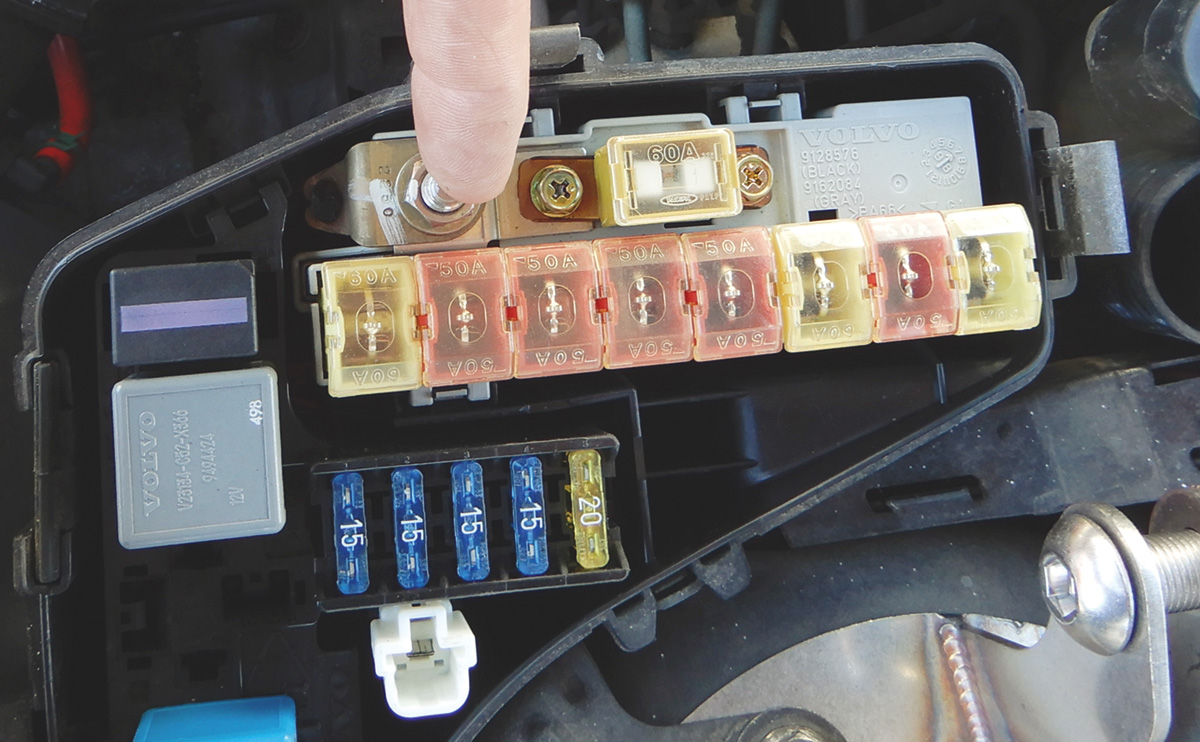
Check the fuse at the fuse box at the left strut tower; check fuse #2 and replace if necessary. If this fuse is good check the engine management relay. 1999 Volvo vehicles had an ETM relay also. Replace both relays and check the vehicle. If the system continues to have problems there might be a problem with terminal B power supply. If the terminal looks to be corroded or burnt it will need to be replaced.
To replace this harness, use Volvo Genuine Part number 8628771. Separate the fuse box and remove the 13 mm nut that holds the cable to the fuse box. Remove the air filter box. This harness runs from the battery to the fuse box. Remove the plastic liner around the wire harness.
Install the new harness, connect it at the battery and at the fuse box, and secure the harness. Snap the fuse box back together and install the air filter housing. Start the vehicle and make sure all codes are gone from the system.


0 Comments