


This oil trap system allows the engine to breathe properly during operation. Here’s what it does and how to replace it.
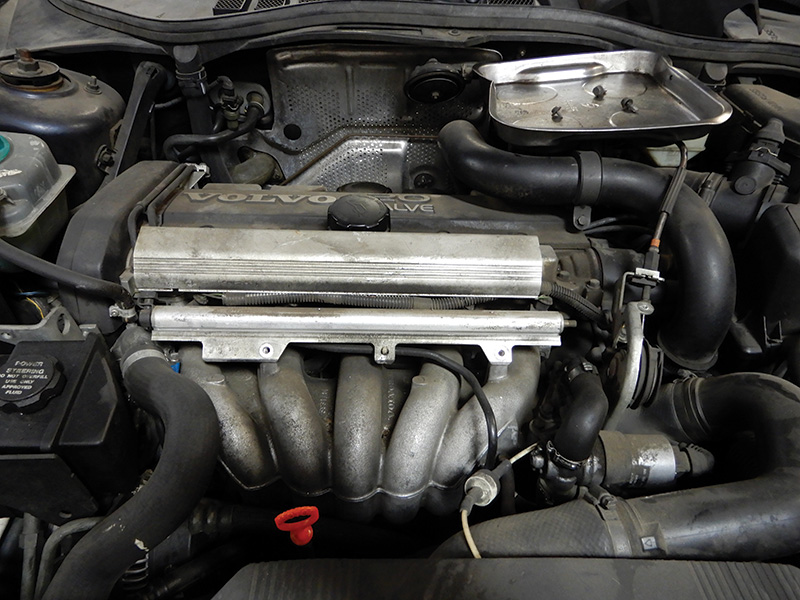
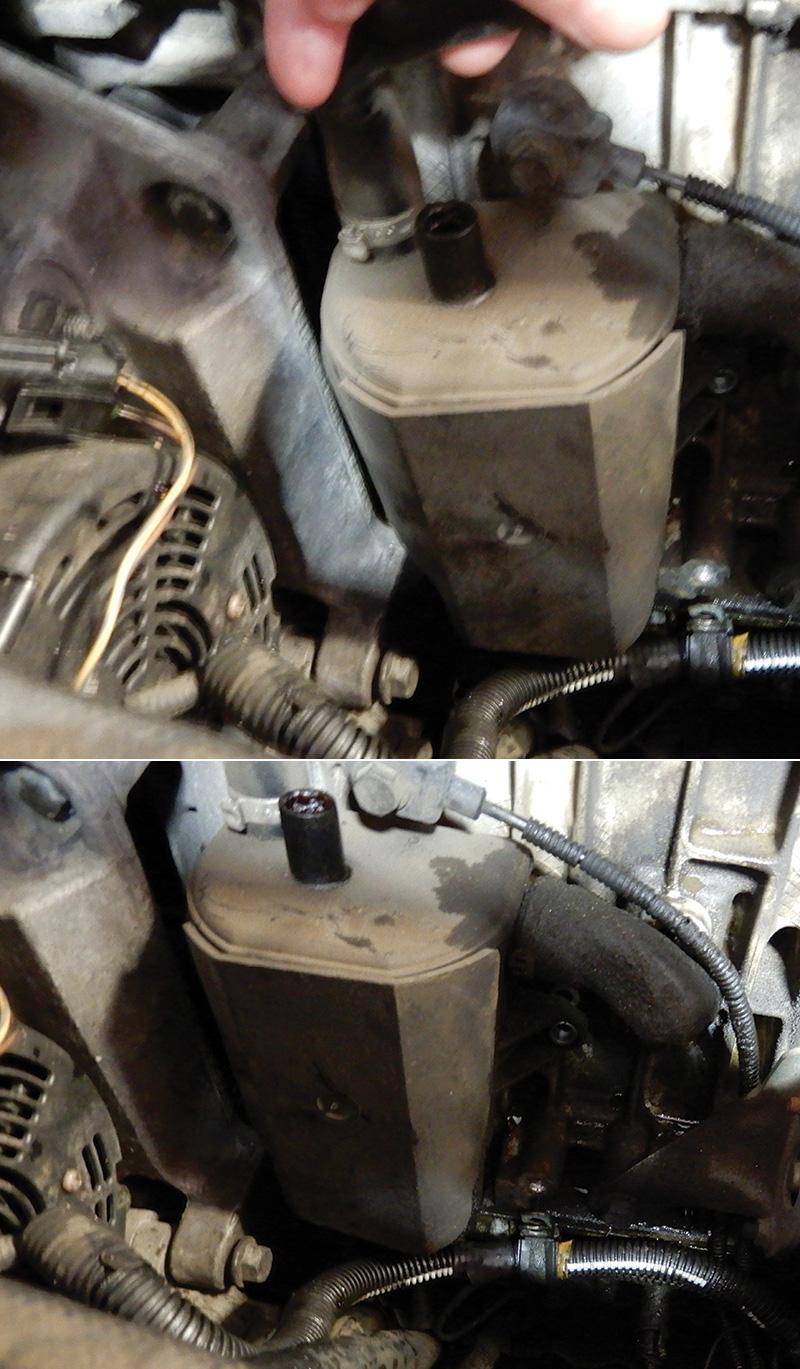
Volvo has been using an oil trap for Positive Crankcase Ventilation (PCV) on Volvos for many years. The oil trap sits under the intake manifold and is connected to the block via hoses and clamps. A few exceptions are when the oil trap is actually built into the oil filter housing on Volvo C30, C70 2006-up, S40 2004.5 – up, and V50 models. This oil trap system allows the engine to breathe properly during operation.
A PCV breather system, or oil trap, is designed to reduce the volume of hazardous fumes from a vehicle. As the engine runs, combustion gases escape from the combustion chamber, finding their way into the crankcase. This unused combustion gas, also referred to as blow-by, can be a huge cause of smog. A PCV system prevents pollutants from escaping into the environment.
Why does a Volvo engine need to breathe? Well, not to get too technical, but similar to fire, the combustion engine needs three things: oxygen, fuel, and spark. It gets oxygen by drawing air into the combustion chamber intake manifold. Once the air gets inside the engine most of it exits via the exhaust, but some of it gets trapped into the crankcase and needs to get out. The problem is, it is no longer clean air because it has picked up oil residue and gunk along the way. So it has to be cleaned or burned before leaving via the exhaust.
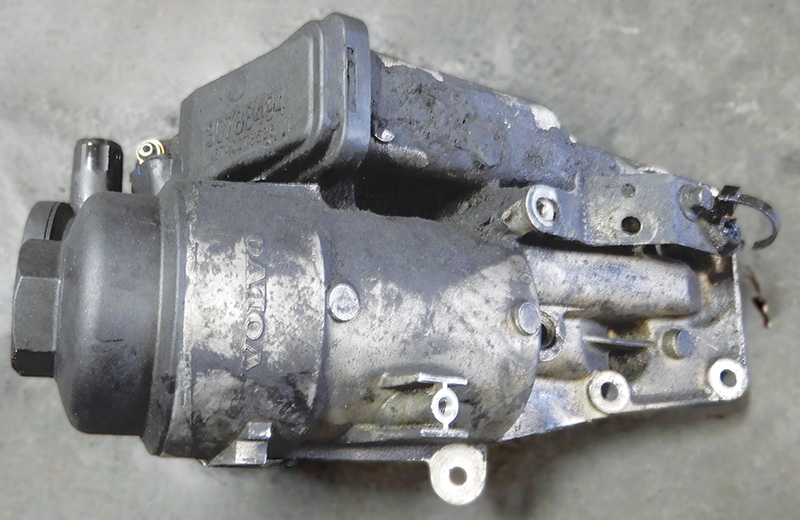
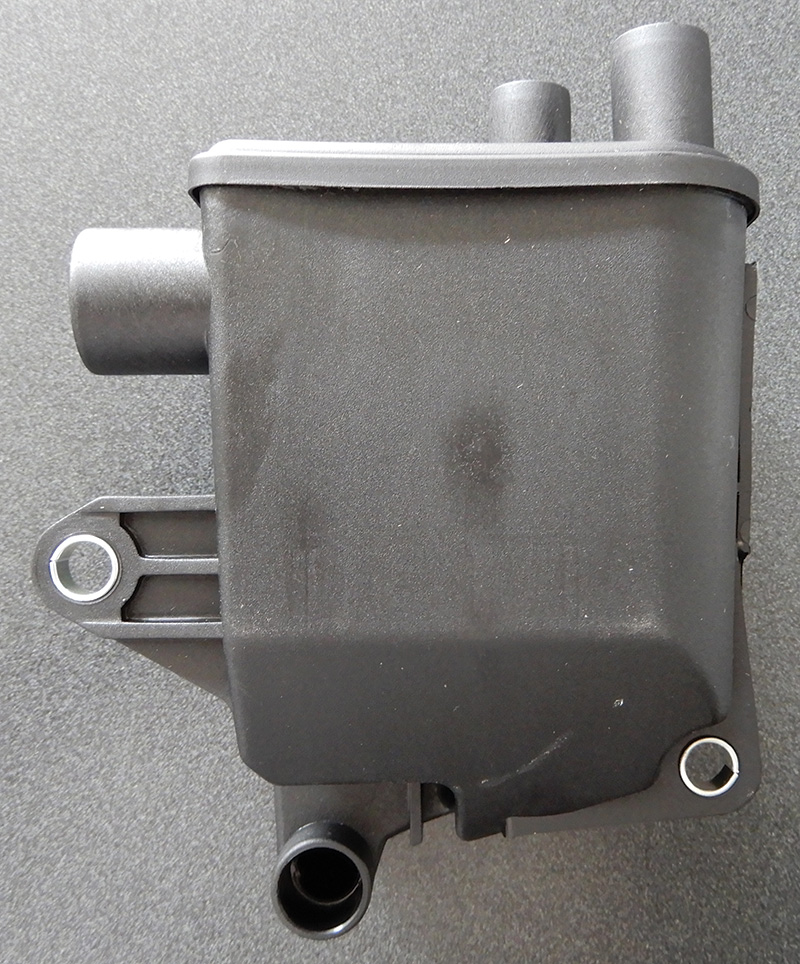
The oil trap is part number 1271988. This genuine Volvo PCV valve oil trap is an essential component of your Volvo’s power train. It allows internal pressure built up in the engine to be released safely instead of popping seals or gaskets that could be costly and timely to replace.
In naturally aspirated engines, the oil trap is connected from the crankcase to the intake manifold, and on turbo models, it is connected from the crankcase to the turbo as well as to the intake.
What causes the engine oil to thicken and leave behind deposits or sludge in an engine?
- Wrong oil grade, quality, and/or viscosity
- Too many miles between oil changes
- Vehicle frequently driven short distances with many cold starts
- Excessive idling
- Fuels of low quality or with a high alcohol content
- Additives added to oil or fuel
- High ambient temperature
- High air humidity
What are some of the symptoms you can expect if the breather system is clogged?
- Illuminated oil pressure lamp. This is due to a clogged oil suction strainer to the oil pump or oil filter.
- Illuminated check engine lamp. This is due to incorrect engine fuel trim level parameters.
- Noise like a whistling. Noise due to high pressure in the crankcase. This noise will stop if the oil filler cap is removed.
- Poor drivability. This is from a clogged crankcase ventilation system and can reduce engine performance.
- Uneven/oscillating idling. Caused by clogged crankcase ventilation.
- Oil leak. From engine seals due to restricted crankcase ventilation.
- Noise Knocking. Low oil pressure can cause premature bearing wear and lead to internal engine component failure.
- High oil consumption and noise from the turbo. Damaged bearings or seals in the turbo can cause these symptoms. Chances are the customer will know they have a problem at this point as the vehicle will either have little to no boost, or blue smoke will be pouring out of the tailpipe, or both, potentially.
Checking for a clogged oil trap and possible clogged oil pan sump
The first step is to inspect the oil filter to see if it is abnormally dirty. An abnormally dirty filter is easily recognized by its thick black deposits.
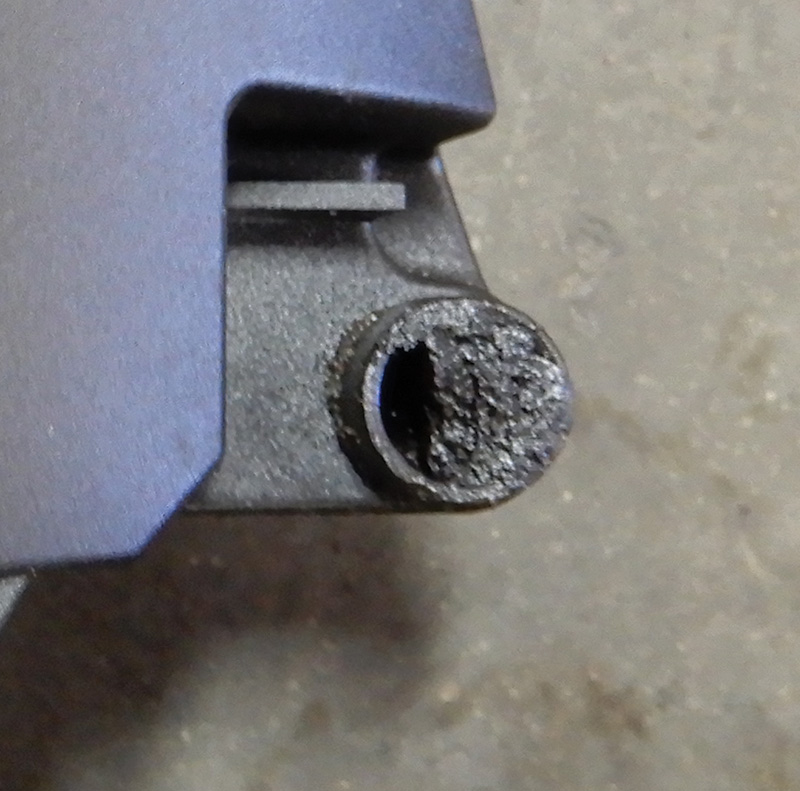
If the engine has a problem with carbon deposits, the passageways in the engine block and oil trap may be completely or partially clogged. Remove and check the oil trap, hoses, and their passageways in the engine block. There shouldn’t be any major collections of carbon deposits in the hoses or in the passageways in the block.
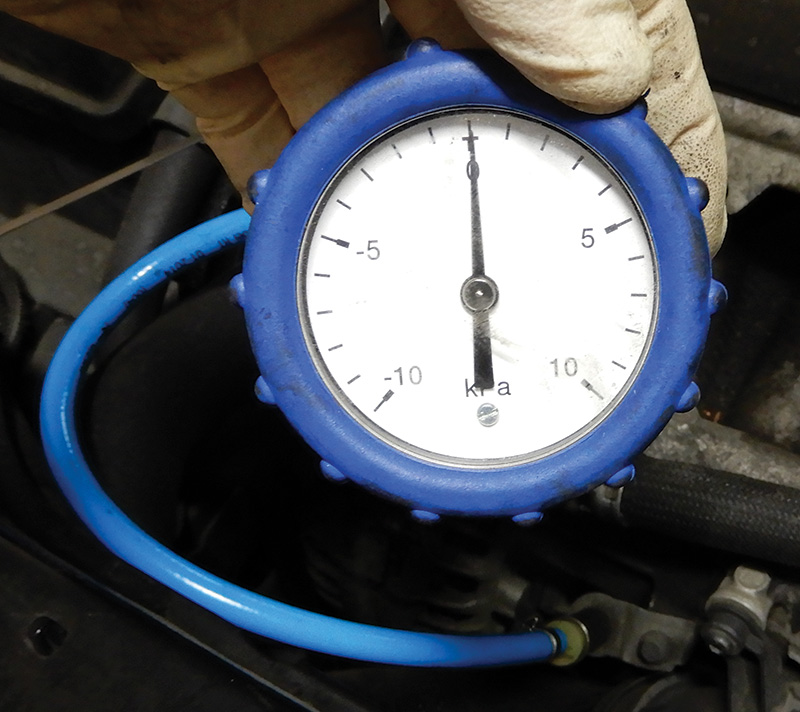
Use Volvo special tool number 9997514 to check for positive pressure through the dipstick tube.
Drain the engine oil. Remove the oil pan and check the oil pan and crankcase for deposits. Normally there should not be any deposits. Also, check the oil suction strainer on the oil suction line for contaminants and deposits.
You probably want to know how to replace the oil trap and what parts are required. It varies slightly, but most often you need an oil trap, intake gasket, oil trap to valve cover hose, oil trap to block seal, and any hose that, upon inspection, looks cracked, brittle, or has holes already caused by hot burning oil and air trying to escape.
In most cases you will need to remove the intake manifold just to reach the oil trap, and then the actual removal of the oil trap and parts is very easy. The job only requires a ratchet and socket to remove the four or five screws and a screwdriver for the hose clamps.
The oil trap and hoses should be replaced at 100,000 miles. Here are some reasons why to change the oil trap.
- It’s a filter. Filters only last so long and therefore should be replaced on regular intervals. The factory recommended interval for cleaning the PCV system is 120,000 miles, and can be replaced as necessary.
- It’s a relatively inexpensive repair. To replace the oil trap is a pretty straightforward job for any technician, especially when you consider how much repairs will cost if you don’t replace it.
- Major engine damage. A plugged up oil trap can do major damage to the engine, so even if you catch it soon the damage may be done which can drastically reduce the life of the engine.
- Costly repairs if not replaced. If the engine can’t breathe it starts to look for the weakest place to release built up air pressure. That means a hose could get a crack in it or even blow off. It can also compromise a seal like rear main and cam seals.
- Engine runs rough. If your Volvo engine idles rough and appears to have a misfire it could be a clogged oil trap or even a clogged oil pan. Suppose a customer comes in looking for a hose but doesn’t know which one. How does he know it needs a hose? He says it blew off. Well, there must be a reason for that. So he makes an appointment, brings it in, and the oil trap is plugged. After the system is cleaned and the oil trap is replaced with new Volvo parts, the vehicle runs better and has better fuel economy.
- Bad fuel economy. As mentioned earlier, a clogged oil trap can cause poor gas mileage because the engine has to work much harder due to the pressure buildup inside the crankcase. The funny thing is, many customers report back saying that gas mileage has been restored and is even better than they remember once the oil trap has been replaced.
- Oil leaks. A clogged oil trap will build up air pressure, and the pressure will look for the path of least resistance which is often the cam seals or crank seals, and both are very costly repairs. Once the oil trap is replaced, the pressure in the block will come down and possibly some of the oil leaks might go away.
- Turbo damaged. When pressure builds up in the crankcase, it starts throwing junk (like clogs of old oil residue and debris) into the oil pan, which the engine picks up and distributes throughout the oil system. The turbo requires oil to stay cool, but it has small tubes that feed oil to it. These are the most common places for debris and oil clogs to land which clogs up the pipes and restricts oil to the turbo. Once oil is restricted, the turbo gets hot and burns up. Most turbos are very expensive, not including labor and other parts.
- Oil dipstick problems. One of the common signs that notify you the oil trap may need to be replaced is the oil dipstick keeps popping up causing oil leaks. This doesn’t happen every time, but if it does, it means the engine is blowing the dipstick up out of the tube so it can breathe.
- Engine Failure. Like mentioned before, a clogged oil trap can cause a lot of problems, from oil leaks to damaged parts, etc. But you need to know that if a Volvo is driven long enough with a clogged oil trap it can cause engine failure. No doubt it will reduce the life of the engine, and it’s very common that other parts are destroyed in the process. If the engine struggles long enough against internal air pressure, it will cause seize and cause bearing failure.
Replacing the oil trap and removing oil pan to clean and reseal sump in a 2007 XC70
The chart below shows the parts and part numbers to do this job correctly.
| Part | Part Number |
| Oil trap | 8692211 |
| Breather hose from oil trap to top of valve cover | 8692217 |
| Oil trap breather hose from back of oil trap to cylinder block | 8653339 |
| Breather hose at side of box to block (this could be two different ones depending on the VIN) | 30677388 or 1271653 |
| The hose with the pipe that goes from intake to oil trap and also to turbo “medusa” part number | 30731068 |
| Intake manifold gasket | 32213805 |
| Oil pickup tube o-ring | 30637867 |
| Oil sump o-rings | 8642560 8642559 |
| Intake banjo bolt | 31325709 |
Drain coolant from the vehicle via the drain plug at the bottom of the radiator. Disconnect the battery in the trunk area. Remove two bolts that hold the injector rail. Remove the air filter assembly and move it out of the way. Disconnect the main fuel line into the injector rail. Disconnect the electrical connectors at each injector. Pull up on the injector rail to remove it and set it aside.
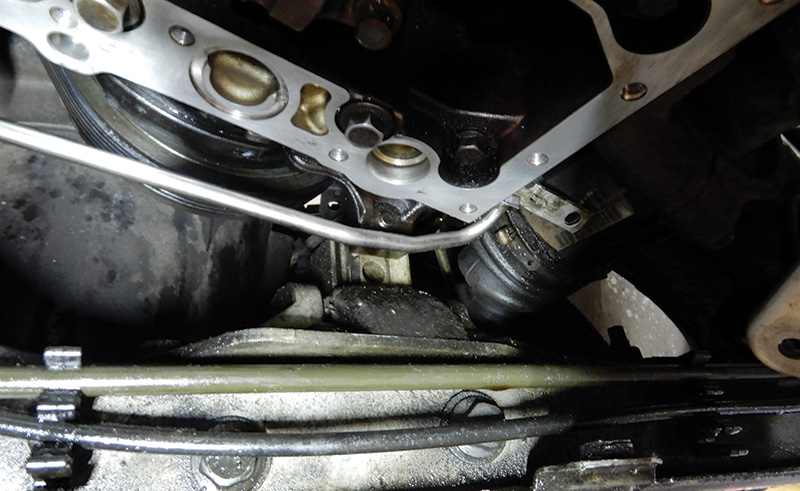
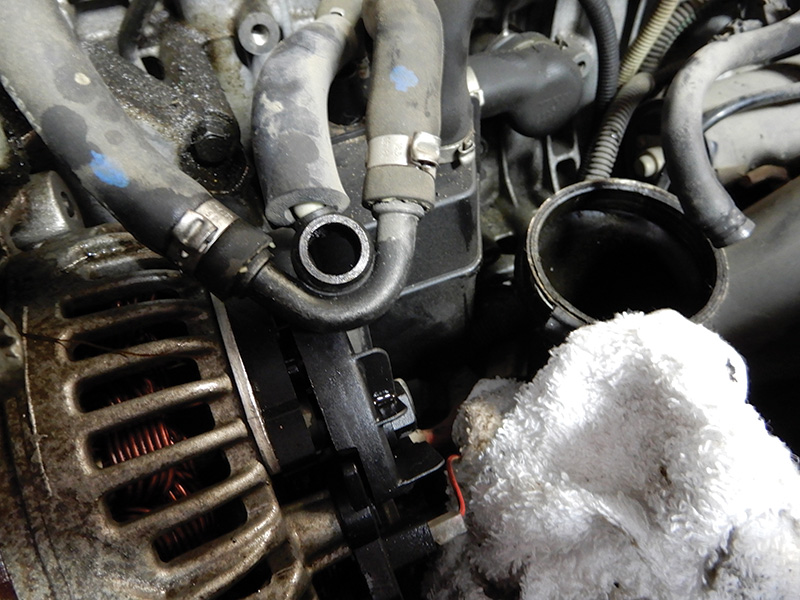
Disconnect the intake manifold and all its hoses and connected parts. The banjo fitting on the bottom of the intake can be challenging. To make this a little less painful it helps to remove the power steering pump.
Removing the front fan assembly can definitely give you more room to complete the job. Just remove all electrical connectors and set them aside.
Disconnect the throttle housing module hard plastic hose that goes to the intercooler. Remove the intake manifold from the vehicle. The oil trap will now be visible and easy to remove.
Once the oil trap is removed, clean out all of the passages at the engine. If the bottom passages are plugged and the oil trap looks really plugged, you will have to remove the oil pan and clean it out. This usually occurs from not changing the oil regularly.
So now let’s say the bottom passage to the oil pan is plugged and we need to clean it out. We will need to remove the oil pan. Lift the vehicle into the air on a hoist and drain the oil. After the oil is drained, you will need to remove all bolts around the oil pan that secure it to the block. Also remove the oil cooler on the side of the oil pan.
Remove the bolts from the mount near the front of the engine. Lift the engine up just enough to insert the top mount bolt into the bottom engine mount threaded hole.
Remove the oil pan. Set the oil pan in your parts washer and clean it thoroughly. If the passages in the oil pan are too restricted and you can’t get the passages opened, you will need to install a new oil pan. Make sure the passages are very clean. Now clean out the block passages up to the oil trap. Use a small brush that will reach all the way to the oil trap.
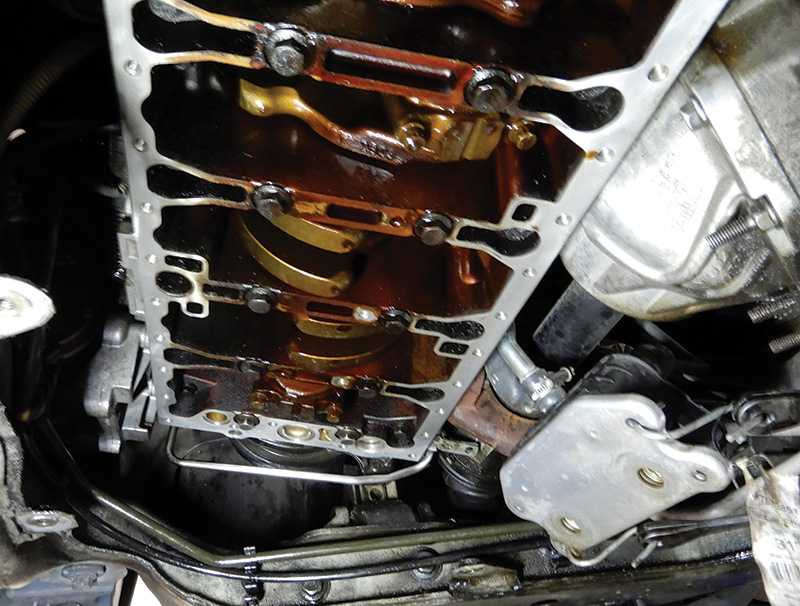
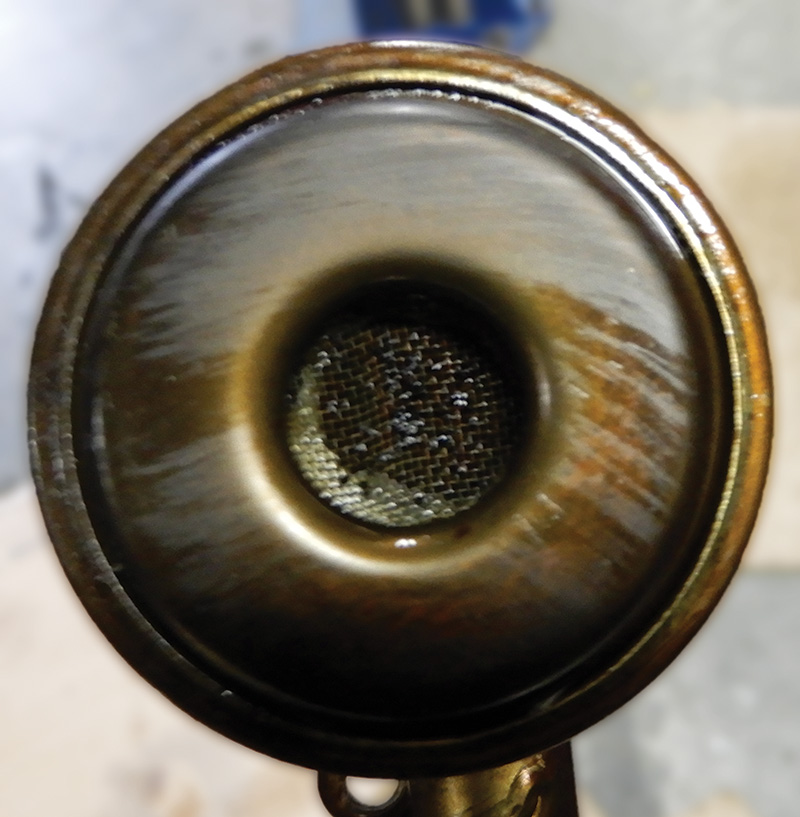
Remove the pickup tube and clean out the metal mesh. This can become very dirty and plugged up, and if this tube is plugged, oil pressure will be bad and could cause series engine problems.
Now that everything is clean, use chemical gasket and roller it onto the oil pan surface lightly, using Volvo part number 1161059. Make sure to use a new o-ring for the pickup and secure it. Install new o-rings for the sump and secure it so the oil pan can be lifted into place. Hold it up in place and insert all of the bolts around the oil pan surface and torque down. Put a dab of silicone onto the threads of the three longer front oil pan bolts so no oil will leak through. Install a new Volvo oil filter and secure.
Install the oil cooler on the side of the oil pan and secure. Remove the front engine mount bolt, lower the engine down and install the two bolts and tighten.
Lower the vehicle down and install the hoses and oil trap. Make sure to clean the banjo fitting and all hoses or replace them if needed.
Install the two bolts that will hold the intake gasket in place. Set the intake manifold into place with all its bolts and tighten. Secure the banjo fitting underneath the intake. It’s a good idea to replace the banjo bolt at this time since they can break and be sucked into the engine, causing cylinder and turbo damage.
Connect the throttle housing hard plastic pipe and secure it with a hose clamp. Connect all vacuum hoses, and run the hose from the oil trap to the valve cover through the intake manifold. Secure both ends with clamps. It’s a good idea to use clamps on all hoses at the oil trap and on the hoses. Do not use plastic ties for clamps.
Install the power steering pump and install the belt. Install the injector rail. Attach all electrical connectors and connect the fuel line to the rail. Install the auxiliary fan assembly, including all electrical connectors. Tie wrap the wires to look factory. Set the air cleaner assembly into place and secure it, tightening the hose at the air mass meter.
Add coolant to the system until full. Fill the engine with engine oil to specs. Connect the battery and start the vehicle. Let it idle until it warms up and top off the coolant. Test drive and check all fluids again just to be sure everything is full and there are no leaks.
The oil pan sump and oil trap go hand in hand, so it’s very important that both are clean and all o-rings are in good shape. The proper pressure inside an engine makes for a well-oiled machine.


when using the special tool looking for pressure, what are you supposed to look for?
After speaking with our contributor, he said, “any kind of positive pressure at any speed indicates plugged oil trap or more. If needle on gauge fluctuates fast this to is plugged oil trap.”