
It’s possible to do everything right and still find the Prius you just fixed waiting for you on a flatbed Monday morning.
Battery Testing
A blue 2008 Prius was waiting for Jim when he returned from lunch. (Actually, it was Seaside Pearl Metallic color code 8S2, but who’s keeping track?) This Prius was in good shape overall, especially given that the odometer was at 299,999 miles.
The work order had the following customer concerns:
Client states the Check Engine and Red Triangle lights are on and suspects a hybrid battery failure. In all conditions the vehicle lacks power and does not brake quickly anymore. The catalytic converter was recently stolen and may have been replaced with an aftermarket unit. Check and report on findings.
Jim didn’t consider himself a hybrid specialist, but he was fairly familiar with them. He had performed many hybrid repairs, especially on the Toyota Prius, and he had recently passed the ASE L3 Light Duty Hybrid/Electric Vehicle certification test.
As with all diagnostic work, Jim started by verifying the customer concerns, in this case the warning lights and lack of power. He followed this with a full Health Check scan using Techstream, Toyota’s diagnostic software. There were two faults stored for the Hybrid System:
- P0A80 “Replace High Voltage Battery Packâ€
- P3021 “Battery Block 11 Becomes Weakâ€

Jim reviewed service information for the code descriptions and setting criteria. The codes indicated a problem with the HV battery pack and a problem with one or more cells in block 11. He also found a Technical Service Bulletin from Toyota indicating that overheating due to debris in the HV cooling fan could cause a P0A80 to set.
Toyota recommends using freeze frame data to determine whether a P0A80 is caused by an issue with the battery, wiring, or battery control unit. A staggered pattern of low and high blocks indicates an issue with the A/D converter in the HV battery control unit. A block that’s about 1.4V lower than the others indicates a shorted cell. The freeze data (previous page) indicates a shorted cell in block 11. Since the battery temperature sensors didn’t indicate overheating, the issue is with the battery rather than overheating as mentioned in the TSB.
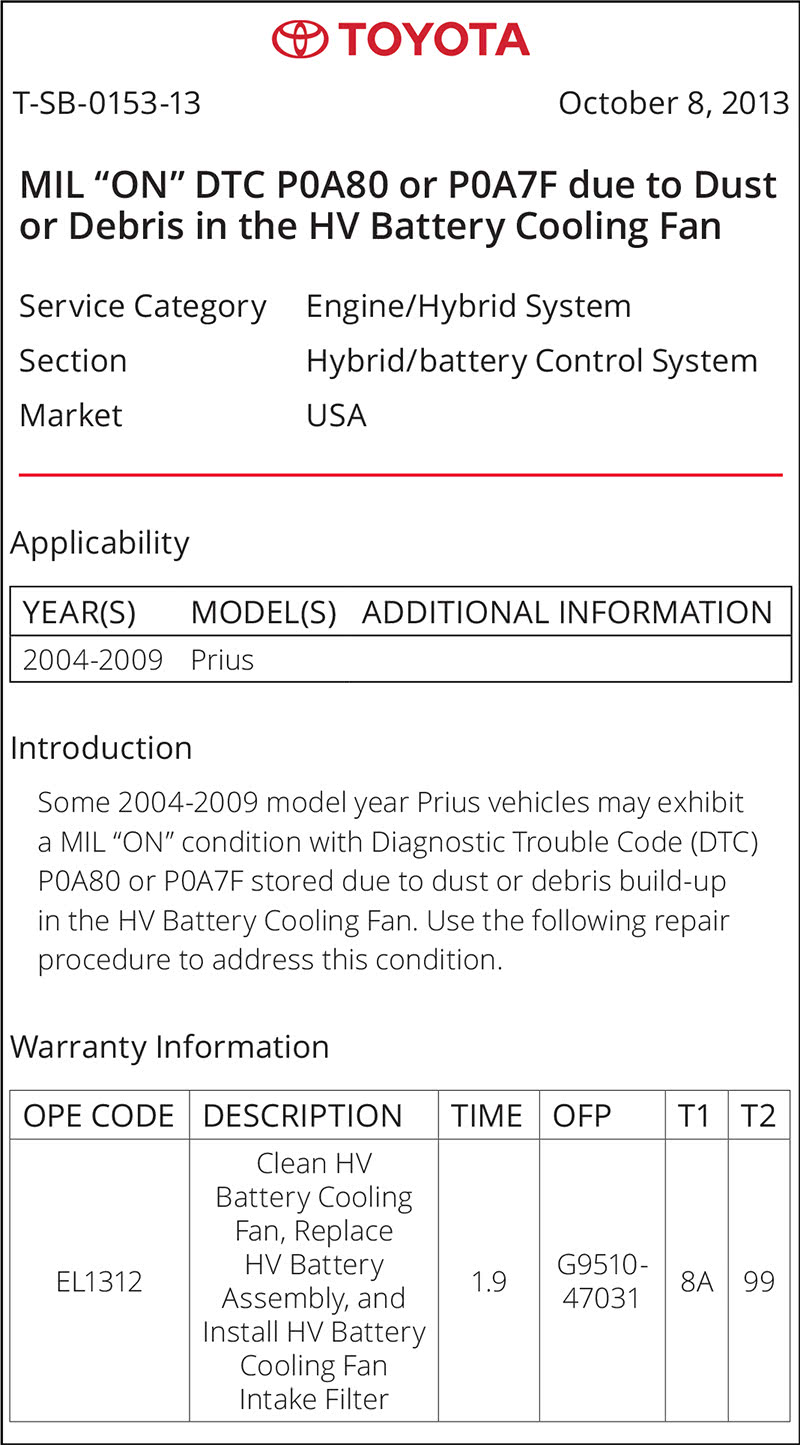
For added confirmation, Jim decided to use the test procedure for the Gen 1 Prius, loading the battery pack while monitoring the minimum and maximum block voltages. He cleared codes and then graphed the following PIDs:
- State of Charge (SOC)
- Delta State of Charge (Delta SOC)
- Battery Block Min. Voltage
- Battery Block Max Voltage
He readied the vehicle and shifted into reverse with his left foot on the brake pedal. Once the gasoline engine turned off, he pressed the accelerator pedal to load the battery with the MG2.
As the SOC decreased, the Delta State of Charge began to rise and the disparity between Battery Block Minimum and Maximum voltages rose as well.
Delta SOC% is the difference in state of charge between the highest and lowest blocks and should read 0% on the Gen 2 Prius and all later Toyota hybrids. The Min. and Max. Voltages are typically within 300 – 400 millivolts of each other on a good battery pack.
The fact that the difference between the minimum and maximum block voltages was about 1.4V, and that that the Delta SOC% began climbing during testing, confirmed the battery was bad. Jim documented his findings for the front office so they could create an estimate and get approval.
The car’s owner was not shocked or upset to hear that the HV battery pack needed to be replaced. He accepted that part of the cost of ownership for a Prius included eventual replacement of the battery pack. He approved the repair and the HV battery was ordered from the local Toyota dealership.
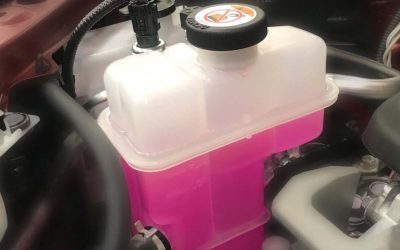
A large shipping crate was delivered from the Toyota dealer the next morning. The Durable Reusable Container, or DRC as they are referred to by Toyota, housed the new High Voltage battery for this ‘08 Prius.
Battery Replacement
After disconnecting the 12-volt battery it was time for some Personal Protective Equipment (PPE). He knew his rubber insulating gloves were close to the six-month deadline to be retested, but they should be fine for this job. Just to be sure, Jim reviewed the safety message which was included when he originally purchased the set of gloves.
| Warning |
| Safety gloves must be inspected prior to each use in accordance with ASTM Standard F1236 and the applicable service manual for the vehicle being serviced. Rubber insulating gloves must be retested electrically at least once every six months using the test procedures described in the most recent editions of ASTM Standard F496. |
He tested the gloves by pinching the opening together and rolling the ends up, thus trapping air in the fingers of the glove and inflating them. After watching the gloves and listening for any hissing, Jim was confident there were no leaks. With his shop area marked with caution tape and High Voltage signs he was ready to begin.
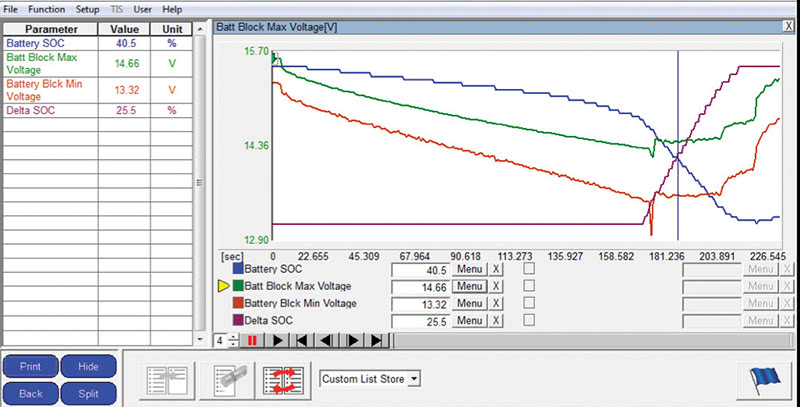
Jim removed the Service Grip Plug and waited five minutes as instructed in service information before proceeding.
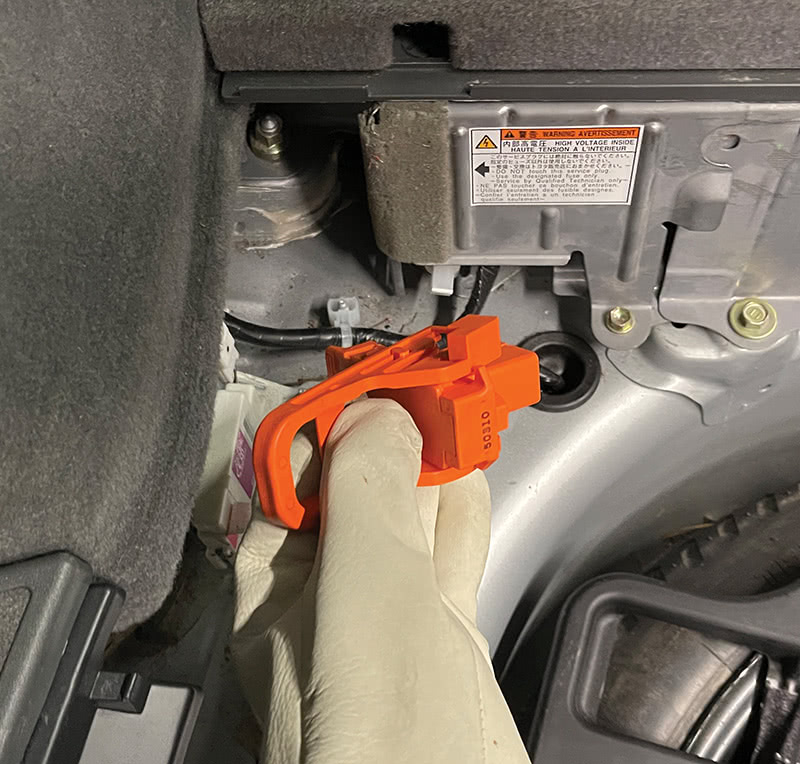
The floorboards, storage compartment and deck trim side panels came off quickly, exposing the Hybrid Drive Battery.
Jim removed the DC cables to the inverter from the system main relay terminals in the battery pack.
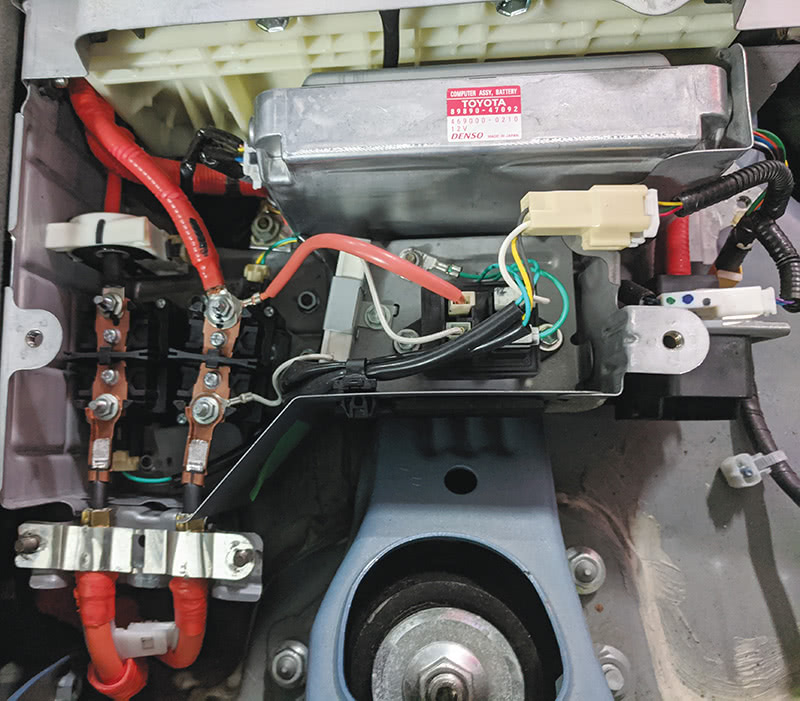
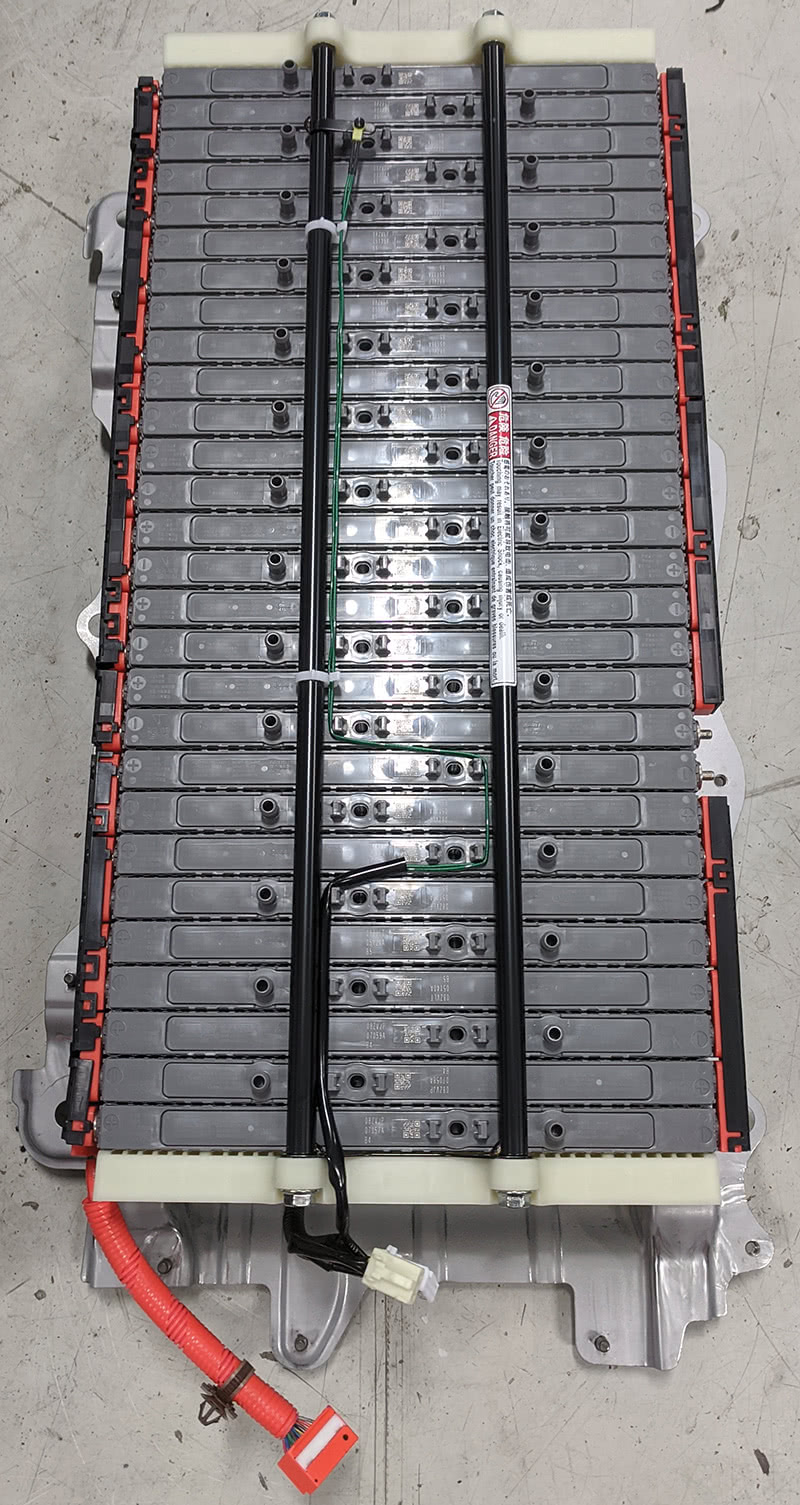
The new hybrid battery required some components to be transferred over from the old pack. The battery carrier which housed the Battery ECU, system main relays, resistor and current sensor had to be moved over along with the ventilation hose.
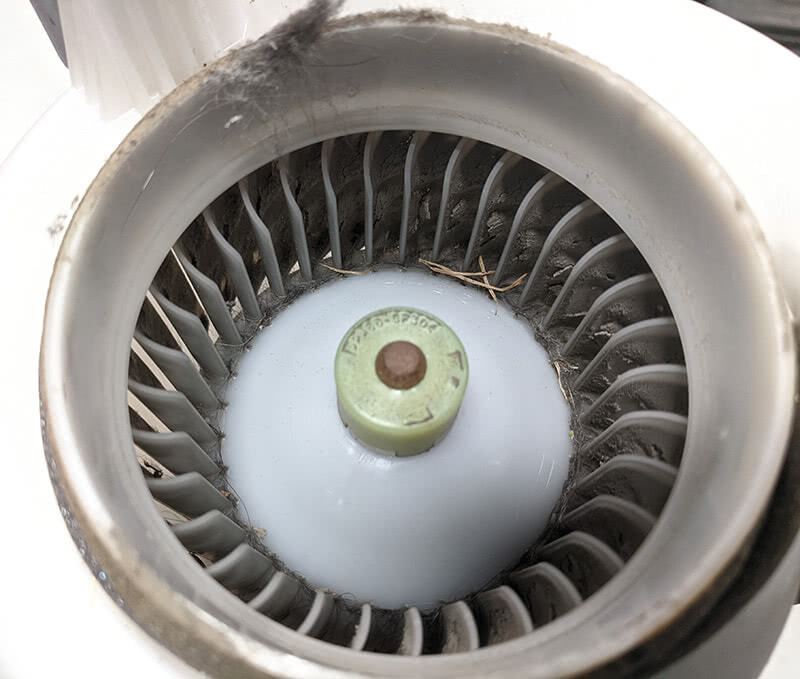

Before reassembly, the HV battery fan needed to be cleaned and the new intake air filter screen installed per the Toyota Service Bulletin.
With the fan cleaned and all components transferred to the new battery pack it was time to install everything back in the vehicle. Jim had a satisfied feeling with the last click of the torque wrench.
After an extended road test everything checked out fine, no warning lights or pending faults. In fact, all the Readiness Monitors ran except for Evaporative Emissions. The shop delivered the Prius back to its owner and the shop closed out Friday on a high note after reaching their sales goal for the week.
It Came Back
Jim’s heart sank when he arrived at the shop Monday morning. A tow driver was unloading a blue Prius that looked a lot like the one from last Thursday.
‘I’m sure it’s a different Prius,’ he tried to reassure himself while walking out to take the keys from the tow truck driver. It wasn’t a different Prius though. The bumper stickers all matched. It was the car he had just repaired.
The new work order read:
Vehicle towed into shop with the red triangle light back on the dash. The vehicle is not running on the combustion engine, only electric at the moment. The engine stalled out while making a left turn and has not restarted. We just replaced the hybrid battery.
There were a myriad of questions going through Jim’s head. What did I do wrong? What did I miss? How long had the vehicle been running on only the battery pack? Was the new pack already discharged? He knew he would need a clear head though and pushed worry aside.

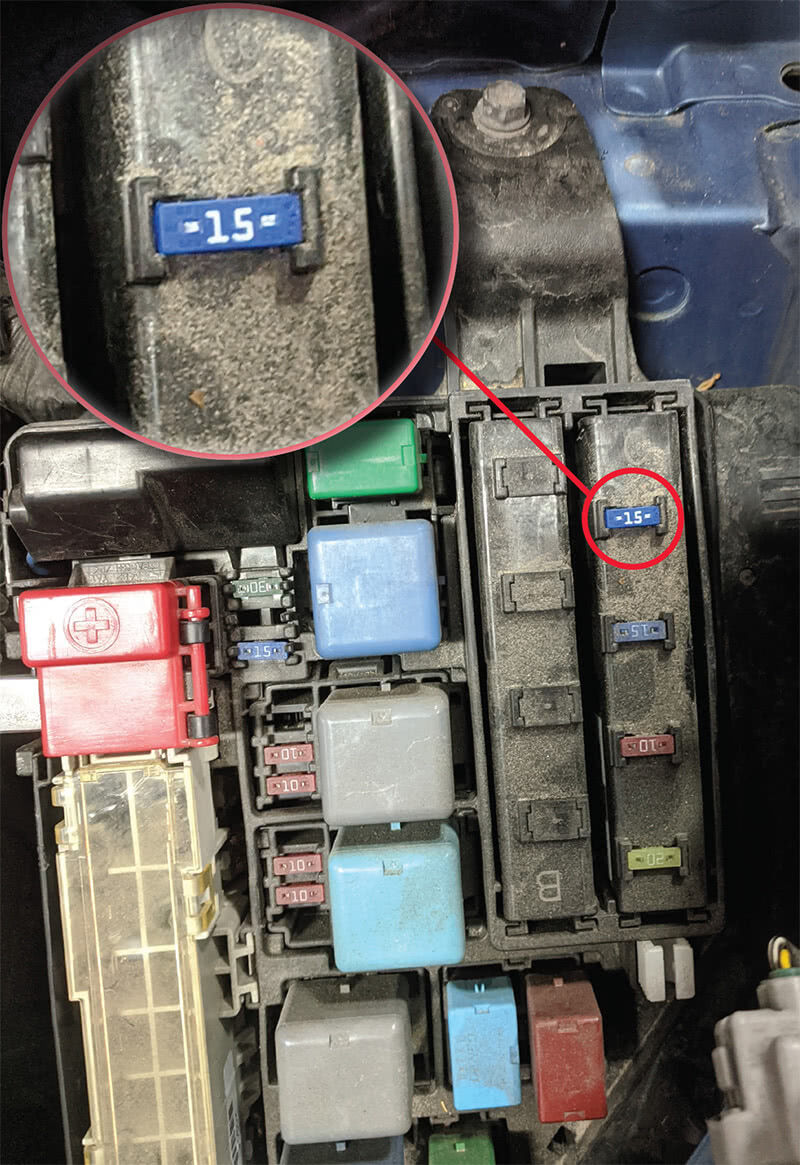
He started with a Health Check. The faults were different than the original visit. There was a generic P3000 Battery Control System Fault and a U0100 Lost Communication with ECM/PCM. A loss of communication with the engine computer would certainly explain why the ICE wasn’t starting.
Even though he was flustered, Jim started by checking the basics. He went through all the fuses in the under-hood power junction block and the in-dash fuse panel. Checking the basics first paid off! The 15 Amp EFI fuse was blown.
Jim installed a new fuse and started the Prius. This time the ICE started up after a few moments and the new battery pack began charging. While he was glad the engine was starting and the fuse had not blown again, he still needed to figure out what was going on. He couldn’t release the Prius just to have it come back again.
He needed to find out the components that were on the EFI fuse circuit and then try to track down why the fuse blew. Jim printed out the four pages of wiring diagrams associated with the EFI fuse and traced out the circuit. There were eight major components on the circuit including the purge solenoid, leak detection pump, air fuel sensor and the downstream Oxygen Sensor.
Jim had remained calm until now, but that was fading fast. He couldn’t test all these components and the wiring, especially when the vehicle was working correctly right now. He couldn’t drive this Prius around the rest of the day either hoping that it would act up again. Then it hit him… A small detail he had originally overlooked and then forgotten about, the stolen catalytic converter.
When the Prius was first dropped off the owner mentioned the converter had been stolen a few months ago and replaced with an aftermarket part. Jim hadn’t given it a second thought before. He was seeing at least two Prius vehicles a month for stolen converters. There were guys out every night stealing them. The detail he had overlooked before tied it all together now. It had to be damaged oxygen sensor wiring.
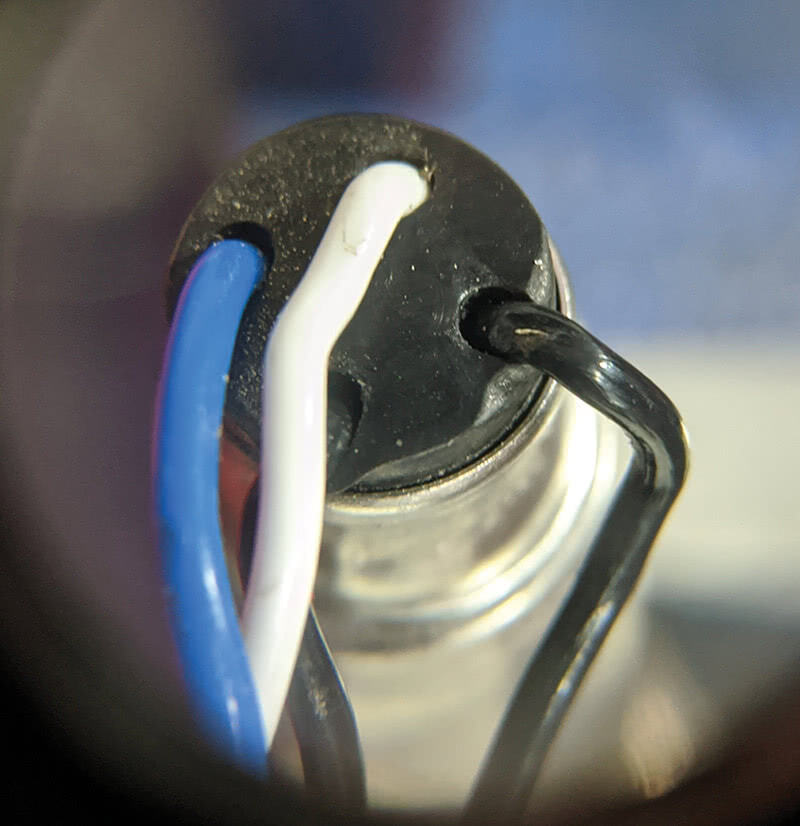
With bated breath, Jim set the lift arms under the Prius and raised it up into the air. Once the vehicle was all the way up, he inspected the downstream oxygen sensor and found exactly what he was hoping to see. The wiring for the O2 sensor was rubbing on the underbody heat shield. The aftermarket catalytic converter had been poorly installed and set too far to the right so the wiring was pressed up against the sheet metal.
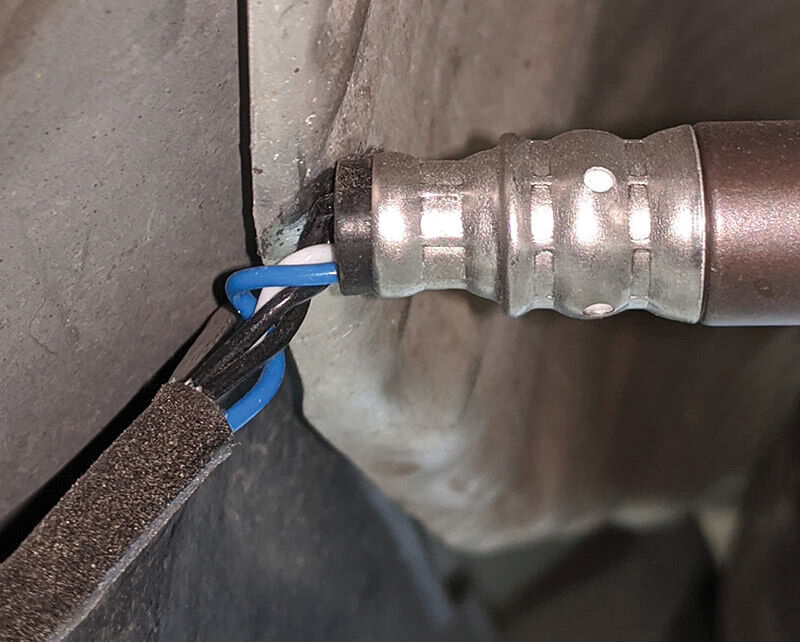
With the oxygen sensor removed, Jim checked the wiring harness. At first, there was no obvious exposed wire. Ultimately, he needed some magnification to see the tiny bare spot of copper, but it was there. That tiny bare spot of wire that caused so much turmoil.
The cause of the blown EFI fuse was identified and thankfully, it was unrelated to the hybrid battery installation. Jim applied liquid electrical sealant to the wire and removed a small section of the heat shield to prevent the harness from rubbing again. The best repair would be to install an OE catalytic converter, but this would do for now. The repair was explained to the owner and in the end, he was grateful to have his Prius back road worthy again.
By Jordan Hill
0 Comments