


Different terrain, temperatures, and road conditions affect vehicles differently. Here are some common problems found in high mileage Volvo vehicles.
Like all cars, as Volvos get older and start to clock a lot of miles on the odometer, some common problems can start to arise.
If your shop is a Volvo specialist, or if you just take in a lot of them, you may start to see some of the same problems on the same models come your way.
Of course, if you ask five different Volvo technicians from around the country what common problems they see the most, you will probably get five different answers.
This can be due to the different terrain, temperatures, and road conditions that their customers encounter.
One example of this is when it come to direct injection cars that are driven in different states that have very different additives and octane levels in the fuel sold in those states.
In California, for example, the highly regulated clean emission fuel that is sold is much more likely to leave heavy carbon deposits on the valves over time than, say, in a state like Arizona, where the fuel is not as regulated. Of course, temperature has something to do with it too.
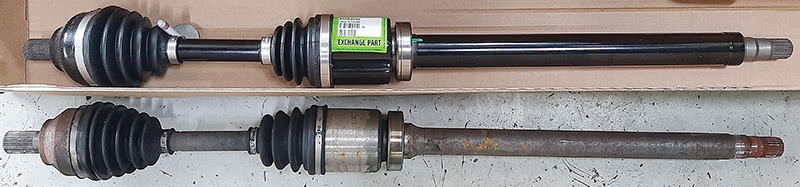
Axle assemblies on Volvo P1 chassis cars (including 2006–2013 C70, 2004–2012 S40, 2004–2012 V50, and 2006–2013 C30)
Axle shafts with constant velocity joints have been with us for a long time, in all makes of cars, but Volvo has been using them in almost all their models since 1992.
Over the years, the basic design of these axles has not changed much, with a few exceptions.
On all cars, the C-V boots will crack and leak out their lubricant over time, causing the joints to wear and eventually fail.
When the axles start to fail, the symptoms can be numerous and varied, depending on driving conditions and the condition of the C-V joints.
Volvos don’t tend to display the same symptoms as Japanese cars when their C-V joints fail; most of them make a loud clicking sound when the cars are turning with the steering at full lock.
A more common symptom for a Volvo with worn C-V axles is a vibration on acceleration when at freeway speeds. This is especially true on the P1 chassis Volvos.
The Volvo P1 was developed during the Ford years at Volvo as part of the Ford global C-car platform series.
All the P1 Volvos are pretty much the same, from the A-pillar to the front bumper, and they all share a lot of parts and systems.
Including the front C-V axles, these axles are not unique among other C-V axles but, for some reason, the P1 chassis Volvos are very picky when it comes to the brand of replacement axles that are used.
The aftermarket parts manufacturers do make axles for these cars, but if you don’t want the car to come back, you better use only Volvo OE axles from your local retailer.
Yes, aftermarket axles may be cheaper, and some may be well-made parts, but if you use any of these, you may be in for a disappointment, because the fact is that nine out of ten times, the use of anything but an OE Volvo axle will cause problems such as high speed vibrations. It may not happen right away, but there’s a good chance that it won’t last a year without a problem.
Volvo actually has issued a few Technical Journals (TJs) about various issues having to do with P1 Volvo axles.
Most of the TJs have to do with noise complaints.
Do yourself and your customer a favor and only replace the C-V axles on these cars with factory Volvo replacement parts.
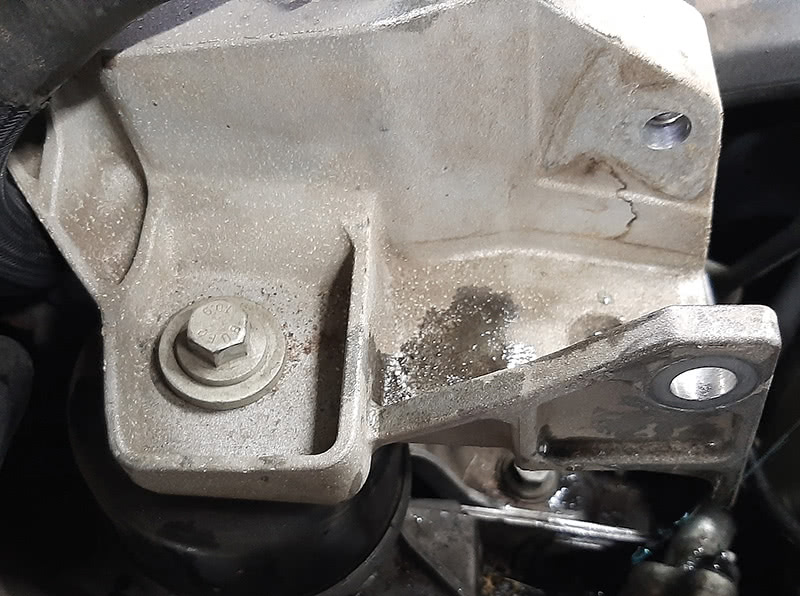
Late 2007–2012 XC70 with the 3.2L engine: Right hydraulic motor mount wear causing vibration and clunking noise on sharp U turns
This one can be hard to spot and can easily be mistaken for something else, like a worn C-V axle joint, or even a problem in the transmission or angle gear.
That’s because the symptoms of one of these worn motor mounts can be intermittent because of the temperature of the engine and even the ambient temperature.
If the worn hydraulic motor mount has not completely failed, it may still have some fluid in it, causing it to partially do its job when the temperature is right, which makes the symptom hard to experience.
And, in most cases, you won’t see any trace of hydraulic fluid leaking out, like the older Volvo hydraulic motor mounts that usually show when they are failing.
You should make checking the condition of all the motor mounts part of your standard inspection procedure when you get one of these older Volvos in your shop.
It’s not like the old days when you could just look at a motor mount and see that the rubber was cracked or even torn in half; these days you have to look a little closer.
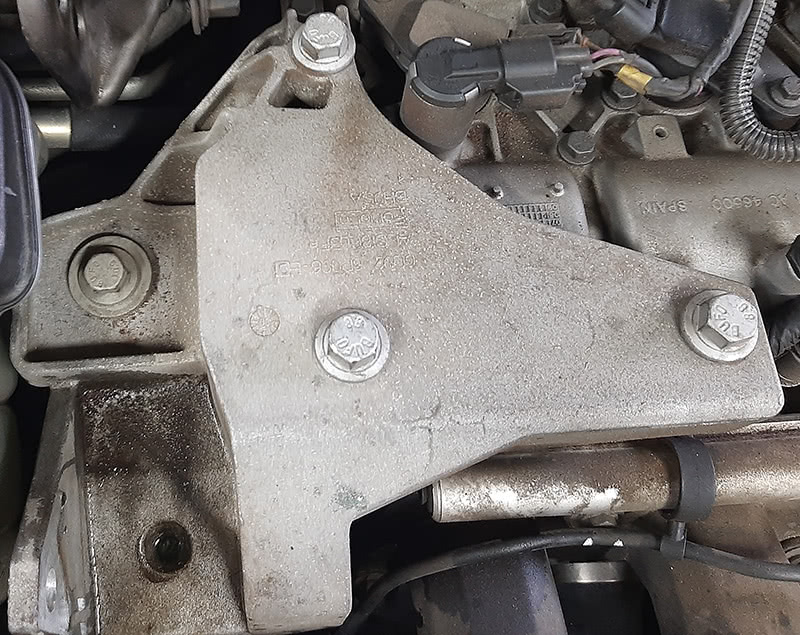
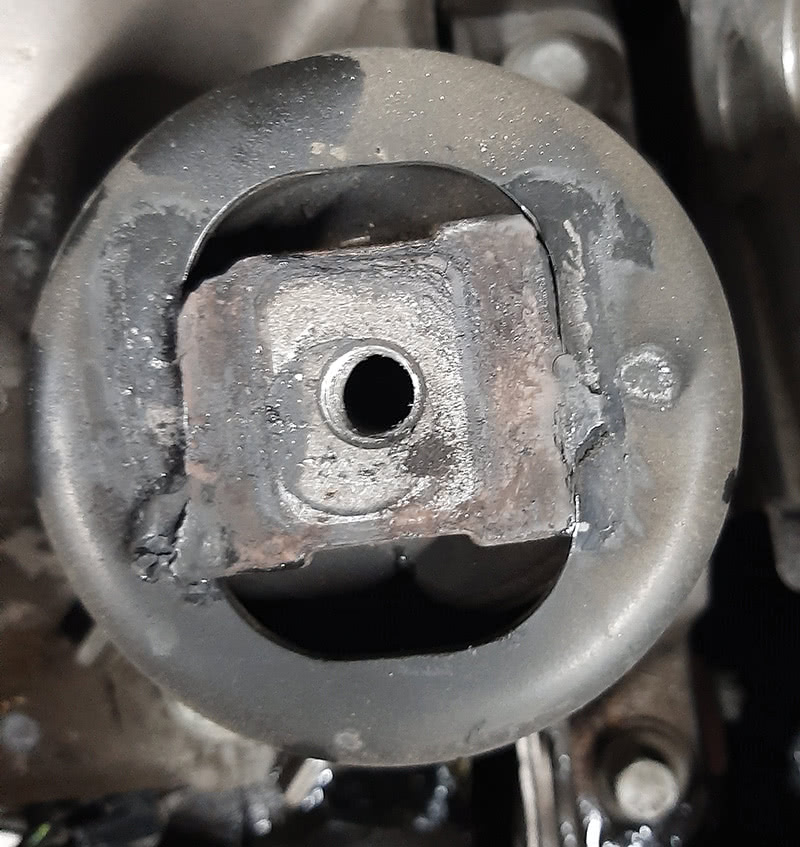
If you suspect one of these right hydraulic mounts is bad, you may have to remove the upper bracket that holds it to the engine to confirm it.
Before you remove the mount’s mounting bracket, you should support the engine from the bottom first.
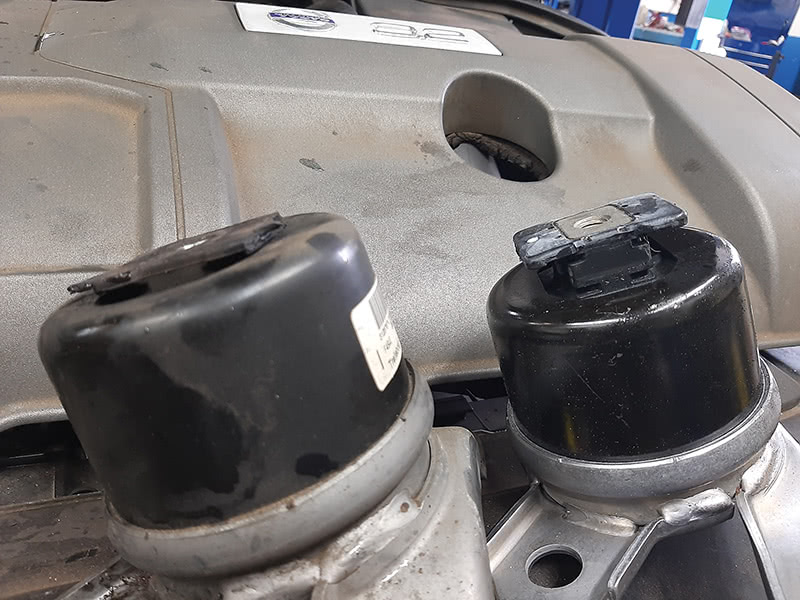
Once you get the upper mounting bracket removed, you will see that the center of a worn mount has collapsed into the mount’s housing.
When you compare a new factory Volvo mount to the old worn out one side by side, the problem is obvious.
Hard to find intake air leaks on early turbo cars
A lot of the Volvos that are coming into independent repair shops these days are older high mileage cars that still have a lot of life in them.
That being said, the problems with age and high mileage can sometimes be challenging to diagnose, because wear on older parts is not always easy to quantify.
If you are diagnosing an issue like a Check Engine light on an older Volvo and you see that a lot of the parts in the affected system are old or even original, you’re not going to tell the customer that they will need to replace all the parts in that system just because they’re old, are you?
Probably not. In a perfect world, that would be an option, but it’s not a perfect world and, unless your customer wants to give you unlimited funds to do a complete restoration, you’re going to have to do some testing.
One of the more common issues that you will see with older Volvo turbo models is intake air leaks. And sometimes these leaks can be small and hard to find.
Most of Volvo’s turbo-equipped engines use a combination of plastic pipes and silicone hoses to move the intake vacuum and turbo pressure around.
When it comes to the silicone hoses, leaks are usually easy to spot, with age problems like cracks, breakage, and oil contamination causing the hoses to collapse.
Air leaks in the plastic pipes can be more difficult to pinpoint, especially when one or more of the silicone hoses is leaking too.
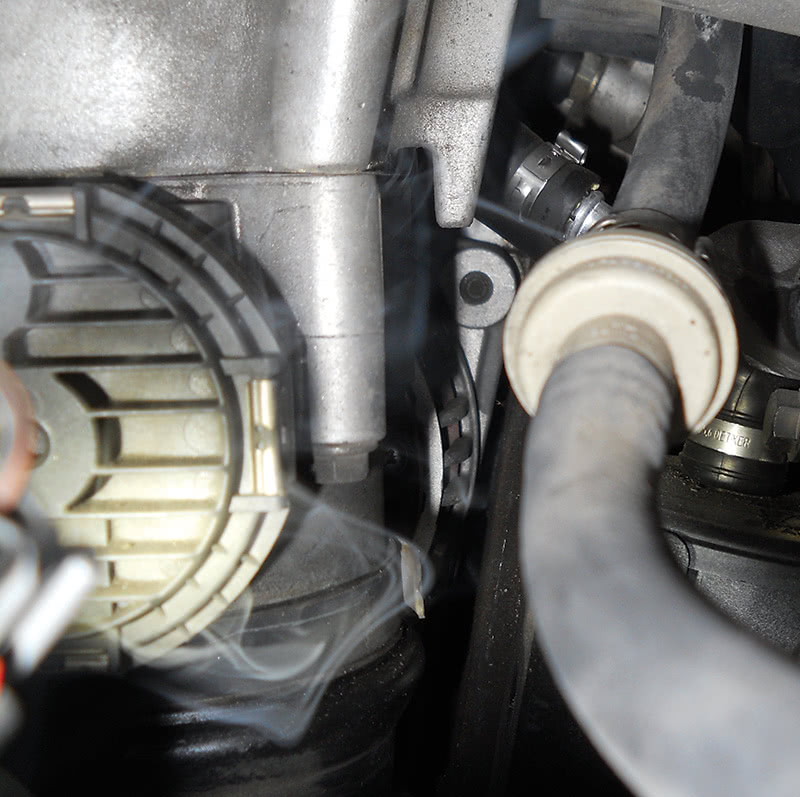
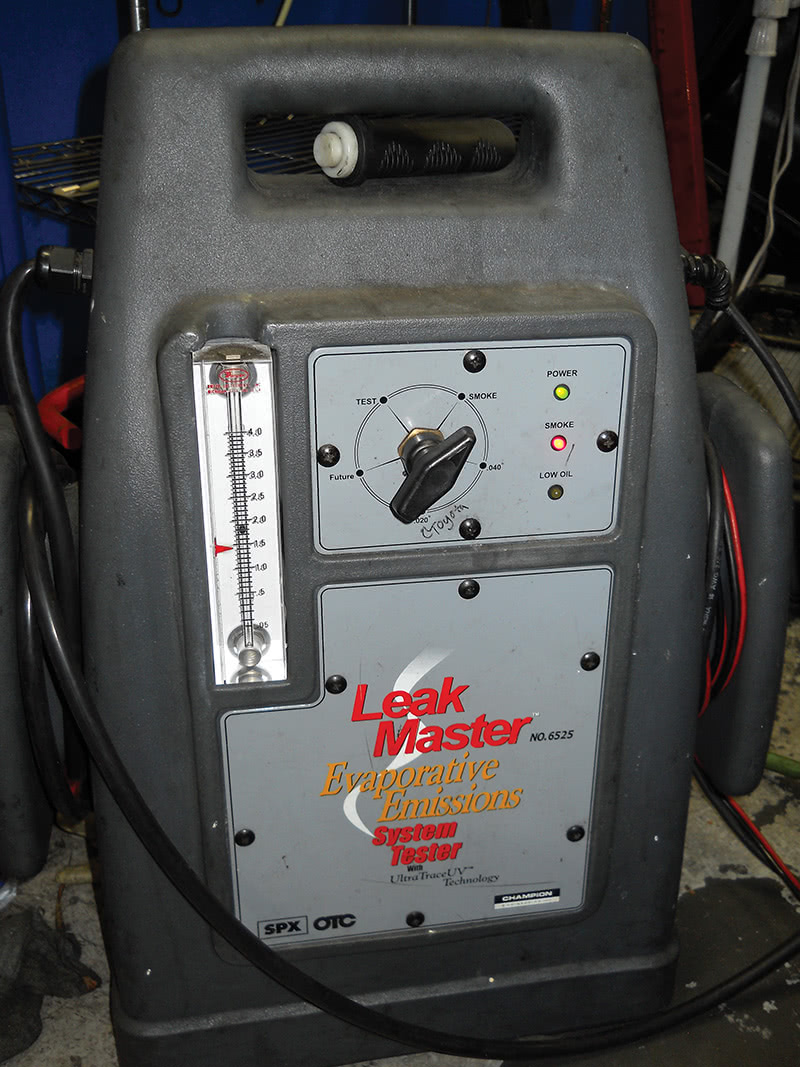
When trying to isolate an intake air leak on a Volvo or any car, the best tool is still a good diagnostic smoke machine. The newer models are very effective, and you can even get smoke oil for your machine that has an ultraviolet dye in it that can leave a trace residue at the site of the leakage that can be seen with a UV inspection light.
The best way to find an intake leak on a Volvo is to try to isolate the intake system that you want to test as much as possible before applying smoke to the intake.

In most cases, the best way to start is to disconnect the intake pipe from the air filter box and plug it with a tight-fitting cap or even a rubber glove.
The more you can isolate the area of the part of the engine that you will be testing, the better. If there was some way to close all the engine’s intake valves at once, that would be great, but of course we can’t do that. So you have to do what you can to keep the smoke machine’s pressure and smoke in the right area.
Leaks in the soft hoses are usually easy to spot, but don’t automatically assume that once you replace that soft silicone hose, you have fixed the entire intake air leak problem.
Even small false air leaks (any unmetered intake air leakage) can cause a whole array of problems, even if the Long Term Fuel Trim (LTFT) is keeping up and adjusting the fuel trims to compensate for the extra oxygen in the system.
Intake air leaks of any size can cause serious problems over time, not just poor fuel economy. If the engine is subject to extra oxygen (that is not regulated in open loop operation when the car is cold), the lean mixture can cause excess exhaust temperatures that can not only raise the NOX emissions, but can also damage the catalytic converter and oxygen sensors.
The plastic pipe assemblies that Volvo uses for most of their turbocharged engines are very tough and are built to last. But, of course, with every part that is subjected to the harsh environment that exists under the hood of a car, there is a limit to how long they will last.
These plastic pipes are designed to handle high heat, high pressure, and high amounts of engine vacuum all at the same time.
As they age, they can start to develop leakage, usually at the area where the clamps hold them in place.
The clamps can also stretch and loosen up over time. That’s why you should always order new clamps when you order a new intake pipe or hose from your local Volvo retailer.
Aftermarket vs. OE Volvo intake pipes and hoses—this one’s a no brainer to anyone that has tried to replace one of these intake pipes with an aftermarket copy of a Volvo pipe assembly.
The aftermarket versions of these parts usually look something like the OE Volvo part, but they rarely fit the same, if they fit at all, without a lot of swearing and sometimes modification.
It’s always a great idea to use your smoke machine to verify that you have fixed all the leaks before you deliver the car back to your customer.
It’s also fun and educational to use a scan tool or Volvo’s Service, Parts and Diagnostic Application VIDA (Vehicle Information and Diagnostics for Aftersales) to check out your Short Term Fuel Trim (STFT) numbers before and after you fix an intake air leak.
Early XC70 (2005–2007) wire harness problems

This is a common issue you may see on second generation XC70s and some V70s (2005–2007).
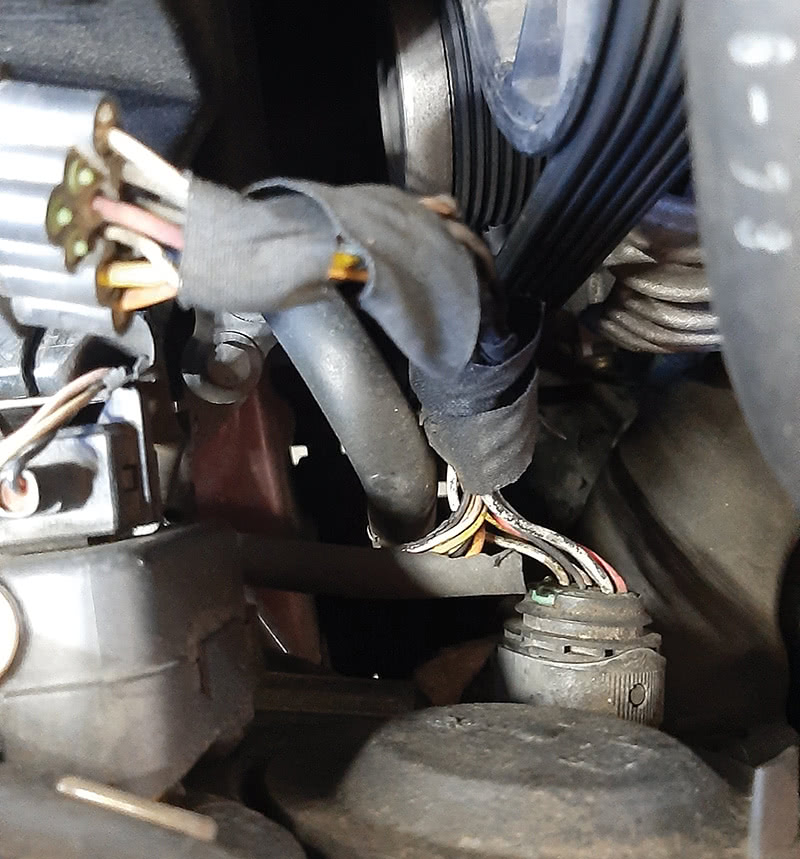
What happens is, part of the wire harness on the right side of the engine compartment behind the right headlight can come loose because the plastic tie downs that hold it in place deteriorate.
Over time, the loose wire harness tends to gravitate towards the pulley and belt on the power steering pump. Then the power steering pump pulley will make short work of the wire harness’s insulation and then start to work on the wires themselves.
If you catch this early, the damage can be fixed easily by repairing the insulation on the affected wires with heat shrink tubing and a new zip tie to secure the harness out of the way.
If the damage to the wire harness is more severe, such as multiple broken wires, you are going to have to ask yourself, is the damage bad enough to warrant replacing the whole wire harness?
Well, that can be a tough question because on these older Volvos, a new replacement wire harness may not even be available anymore.
If there is no new harness available, you’re going to have to repair it.
When it comes to automotive wiring repairs, there are a few right ways and a lot of wrong ways to do them. Of course, this can be a highly debated subject from one tech to the next.
Old-school technicians will tell you that soldering the wires together is the best way to fix a broken harness.
That may have been true in the olden days of car repair (pre-CAN networks). But soldered repairs can crack and even melt in some cases in the harsh environment that’s under the hood of a car.
Constant engine vibrations and temperature variations can wreak havoc on soldered connections due to their inflexibility.
And it can be very hard to use a soldering iron to get a good connection in some tight places in the engine compartment.
Today’s auto technicians have a lot of great options when it comes to wire connectors for splicing two wires together.

One of the best new options for effective splicing of wires is sort of an all-in-one connector. These repair connectors, commonly known as butt connectors, have an outer sleeve that is made out of a high-strength heat shrink material that, when properly installed, can be completely water tight.
When you have a Volvo in your shop that needs some wire harness repair, be sure to check with your local Volvo retailer parts department; Volvo offers a wide range of wire harness and terminal repair parts with which you may not be familiar.


In UK found genuine replacement driveshafts ridiculously expensive. Used motor factor Shaftec Replacement on our own S60 D5, withouit any issues.