


On a Second Generation Volvo XC90 (2016—Present) T6 2.0L B6324S Engine, With Supercharger and Turbocharger
More and more of these remarkable second generation Volvos are coming into independent shops every day, as these cars come off of warranty and dealer service contracts.
If you have worked on a few of these, you know that these late XC90s have very little in common with their ancestors from which their name comes.
In fact, you will need get to know Volvo’s new 2.0L engine very well because, as of 2015, almost all new Volvo models come equipped with some version of this engine.
That is because, like some other manufacturers, Volvo has adopted a new way of making their cars; it’s called Scalable Product Architecture platform, or SPA. It basically means that Volvo can use the same platform for all their models. This cuts down on overall vehicle weight and allows them to standardize their systems across the entire Volvo line.
These modular engines are small but powerful—and they’re also complex. Everything about these newer Volvos is advanced and state of the art. The electrical systems on these late Volvos would put anything that NASA has launched lately to shame.
These Volvos can have more communication going on between its modules in five minutes than all the kids in the average high school with their cell phones in an hour.
The average new Volvo can have over 35 modules and up to 5 networks to run all that data through.
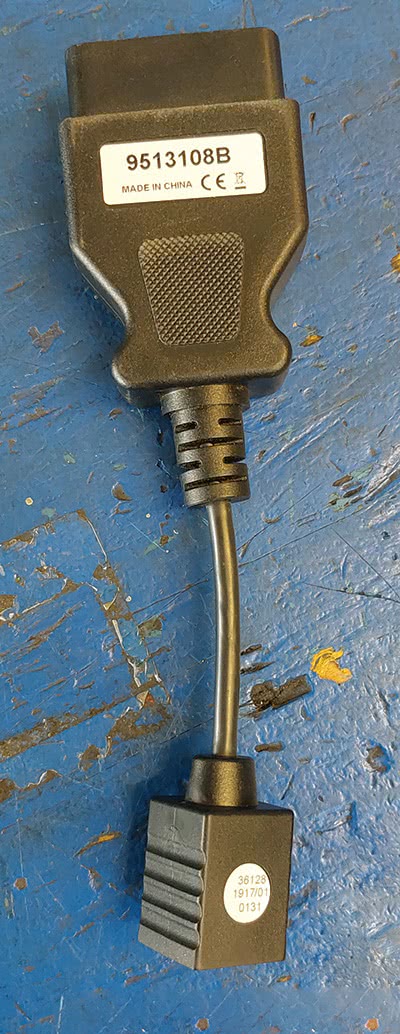
When you use VIDA on theses SPA Volvos, you will have to get a new dongle that attaches to your laptop with a cat 5 type of network cable.
Your old DICE dongle won’t work on the newer SPA Volvos; they’re not fast enough to handle all that data.
Volvo has this tool and all the other Volvo-specific special tools available from the Volvo Car Bookstore at volvotechinfo.com. You can also order any Volvo special tools from your local dealership parts department.
It’s also better to use a hard line connection to the internet rather than Bluetooth, because these cars have a lot more data going back and forth than the earlier Volvos.
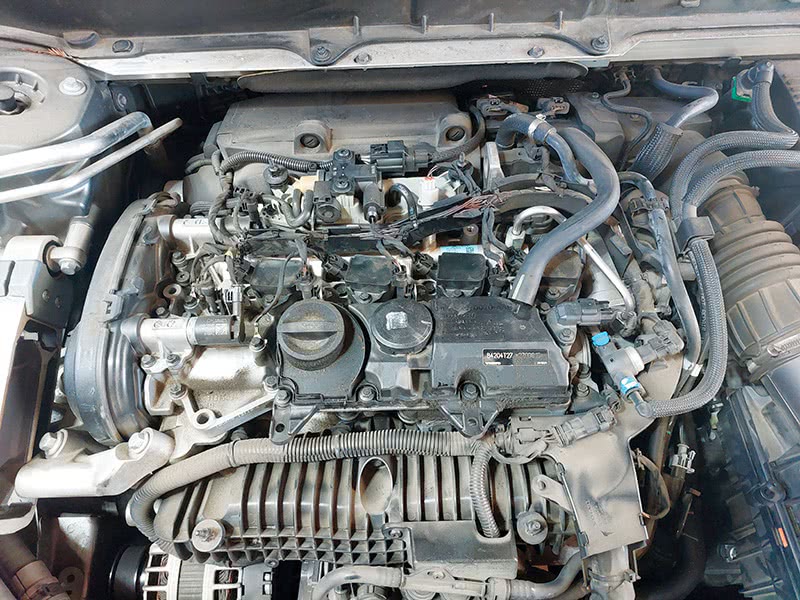
The second generation of Volvo’s largest SUV are BIG! If you are working deep inside the engine bay, you may need a step stool unless you are a former pro basketball player.
When you need to remove the supercharger, turbo, or catalytic converter, you will have to get access deep into the firewall side of the engine.
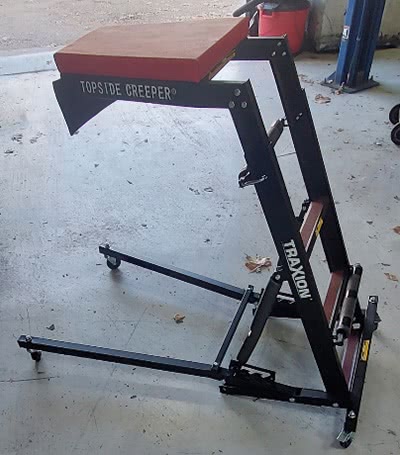
If your shop is not equipped to work on large trucks or off-road vehicles, you may want to invest in a topside creeper. Tools like this will help save your back and avoid damage to the paint on the customer’s fenders because you had to lie across them.
Case Study: 2019 Volvo XC90 T6, With Exhaust Leak Above Turbo
This car came into the shop with a customer complaining of the car being louder than usual while driving and a Check Engine light on.
When the tech moved the car through the shop, an audible exhaust leak was heard at idle.
The tech put the car on a lift and started the engine; the source of the exhaust leak was not visible, but the sound seemed to be coming from the area where the exhaust manifold and turbocharger are attached to the cylinder head.
The technician’s first thought was that one or more of the exhaust manifold nuts had loosened up and the leak was coming from the exhaust manifold gasket at the head.
On older Volvos this can be very common, but it was not the case here.
The tech hooked the car up to a laptop with VIDA, using a cat 5 cable and Volvo’s late-style network dongle.
Some advanced generic scan tools will communicate with the latest Volvos, but you may only get limited functions.
If your shop is going to work on late-style Volvos you need to get VIDA and the communication tools that are required to hook up your laptop to the cars’ data link connector.
This XC90 had stored a few codes in the ECM that could be caused by a large exhaust leak.
The shop called the customer and got authorization for an inspection teardown to pinpoint the source of the exhaust leak.
To get to the place where it sounded like the leak was occurring, it would be necessary to remove the supercharger assembly to get access to all the bolts for the turbocharger, exhaust manifold, and catalytic converter assembly.
When performing this job, you will need a lift because, just like the stock market, there are going to be a lot of ups and downs.
If you have never done this job before, take some pictures with your phone before and during the procedure to help when it comes time to reassemble.
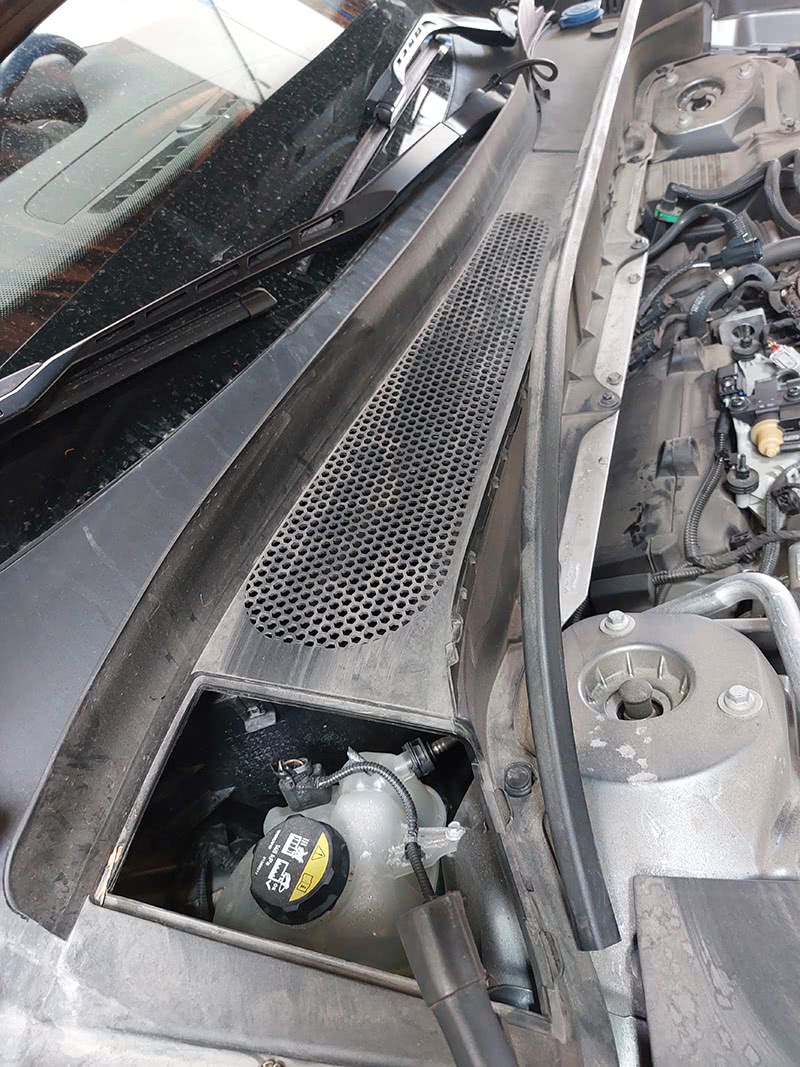
You will have to remove the windshield wiper arms, which are very different than those on other cars you have probably seen before; the washer jets are installed on the arm and the wiper heater wiring runs inside the washer tubing, so don’t just pull them off.
The connectors for the washer/heaters are under the cover on the left side of the engine bay.
Tools Needed
You will be working in tight spaces in some cases, so a good selection of tools will help you out. ¼ inch drive tools are very useful.
Long extensions and swivel sockets will help too.
You will be draining the engine coolant during this job.
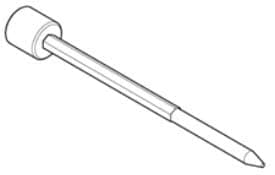
As far as special tools, Volvo has one that you may need, Volvo part #999 7508. It’s a long Allen socket that is used to align the supercharger’s height, by turning a threaded spacer the position of which you will mark when you remove the supercharger from the engine.
You can also use a standard long Allen socket to turn this adjuster if you don’t have the special tool.
A good torque wrench is a must when reassembling parts on this complex Volvo engine; taking the time to accurately tighten the bolts to specs will save you and the customer a lot of possible headaches in the future.
Some of these bolts are hard to reach, so swivel sockets will come in handy.
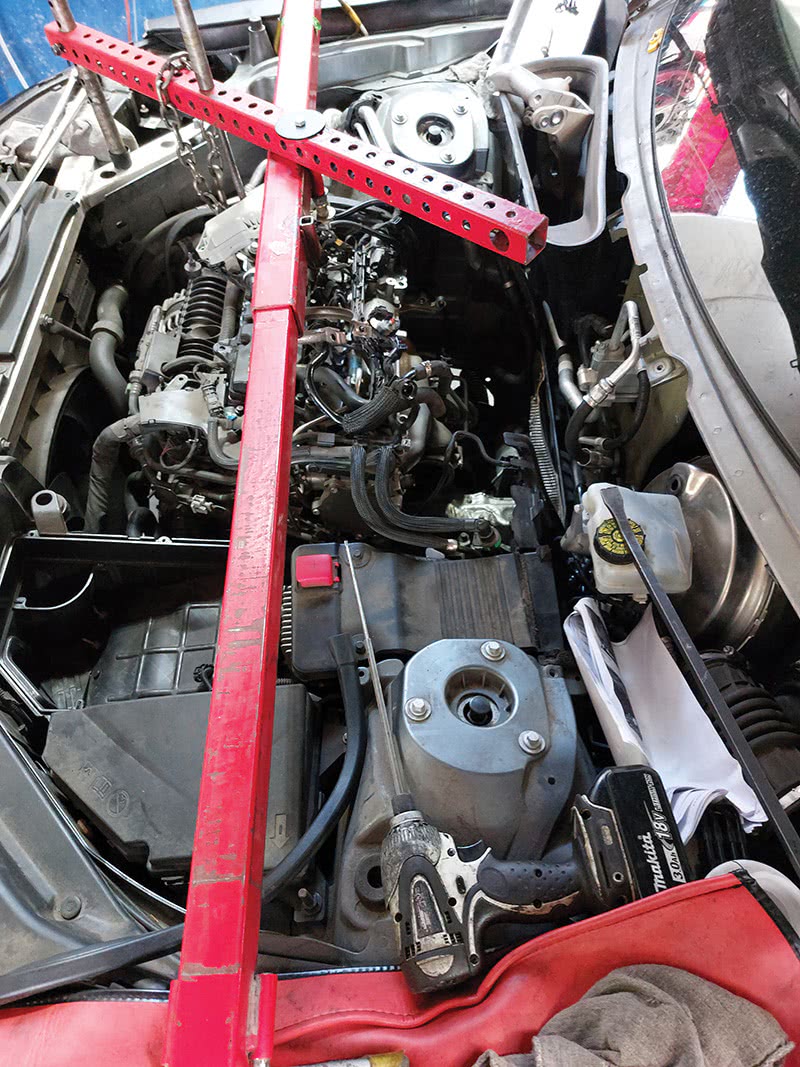
You will need an engine support rig to support the engine when you remove the right side engine mount to give you better access to the belt and the bolts under the supercharger’s drive pulley.
Start this job like all major surgeries on a Volvo—by disconnecting the battery.
If you have to replace one or both of the batteries in this second generation XC90 with automatic start/stop, you will have to use VIDA to reset the battery monitoring system.
See VIDA for battery disconnect procedure.
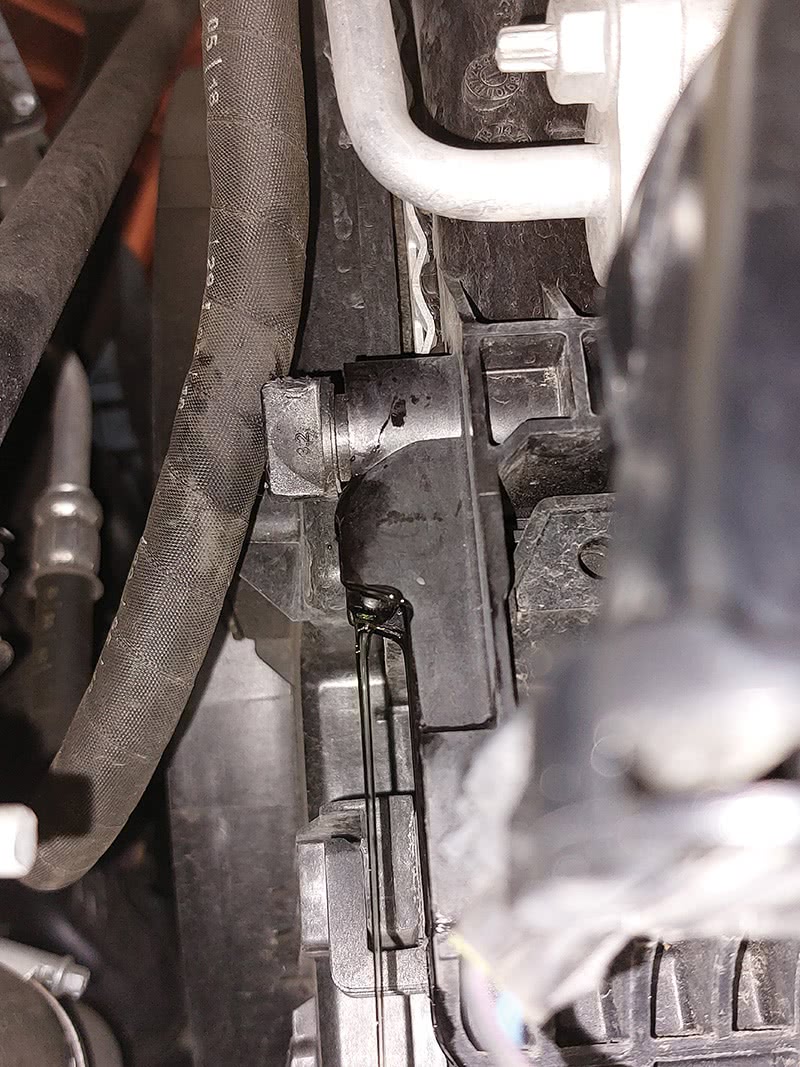
After removing the splash shields under the bumper and engine, drain the engine coolant by loosening the radiator petcock at the bottom of the radiator.
Next, remove the right front wheel and the plastic covers in the inner fender well; this will give you a little more access to the area you will be working in.
Next, lower the car and remove all the cover panels on both sides of the engine bay by removing the plastic clips.
Try to save as many of the clips as you can because replacing them with all new ones can add up.
You will have to remove the wiper arms, cowling, and wiper motor assembly.
There is a large section of the firewall that can be removed to allow just enough room to lift the supercharger up and out of the engine compartment.
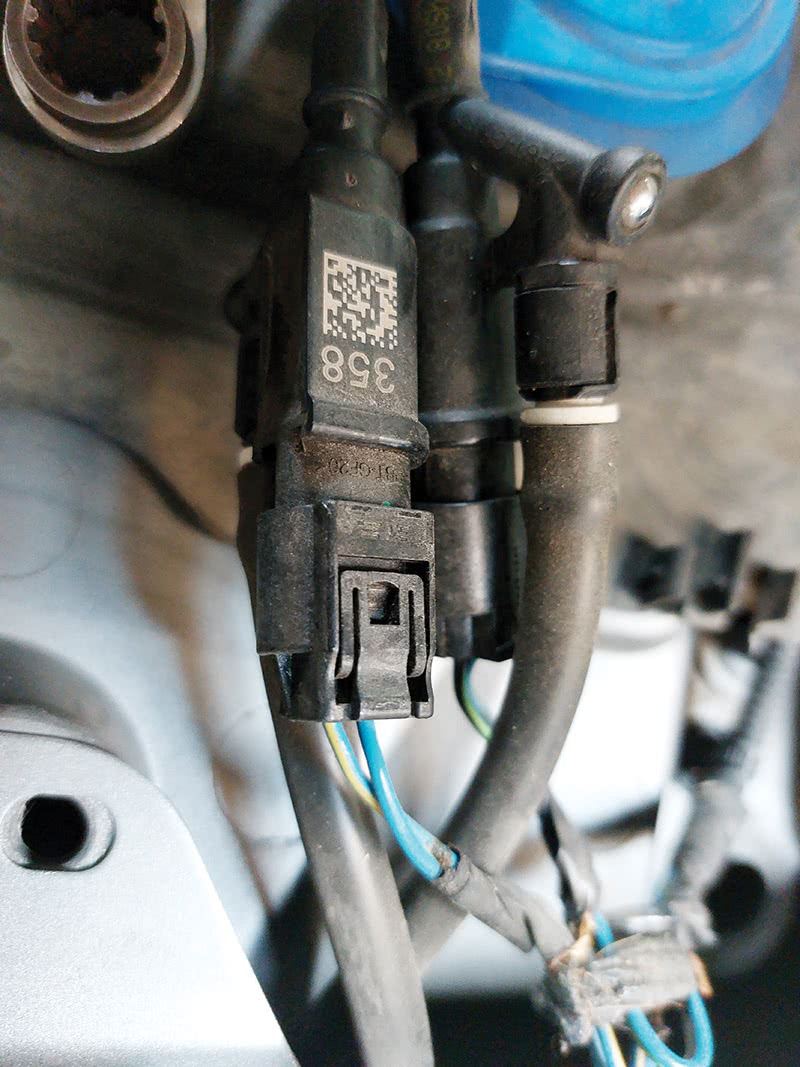
Removing the wiper arms is a little more complex than on the average car because the washer jets are part of the arms; additionally, the washer nozzles have electrical de-icers that are wired through the washer tubing.
The connectors for the whole mess are on the left side of the engine compartment under the left rear trim panel.
Be gentle when you disconnect the washer tubing and connectors since the clips are tiny and delicate.
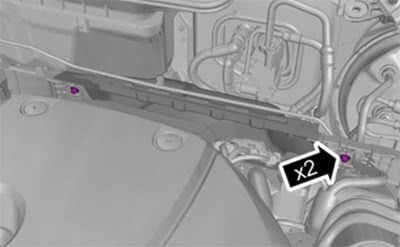
Once you remove the wiper cowl and motor assembly, you can remove the screws that hold the removable part of the firewall. These screws are hard to get to, so be patient.

A long ratcheting wrench will help here; these two screws have 6 mm heads.
Remove the soft plastic sound deadening cover on the back of the supercharger by removing the four fasteners from the top and the bottom.
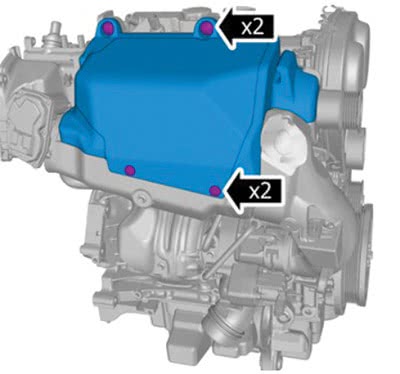
When you get them out, you can lift the panel up and out.
Next, set up an engine support rig to hold up the engine when you remove the right motor mount.
Remove the bolts that hold the right motor mount assembly. When this is out of the way, it will make removing the supercharger drive belt, idler, and the two Allen bolts under the S/C drive pulley a lot easier.
This can be a very difficult job if you try to do it with the mount in place; it’s possible, but why work so hard?
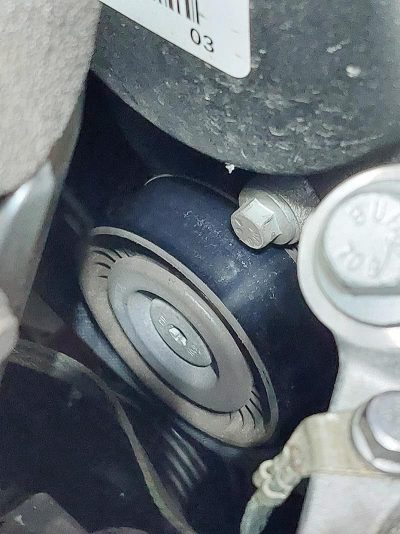
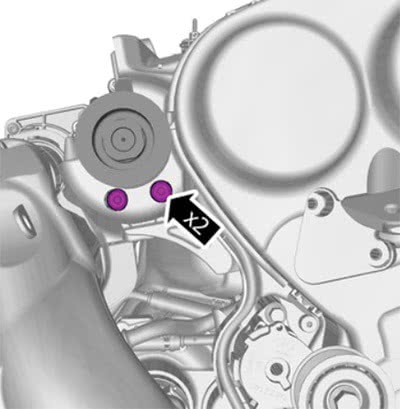
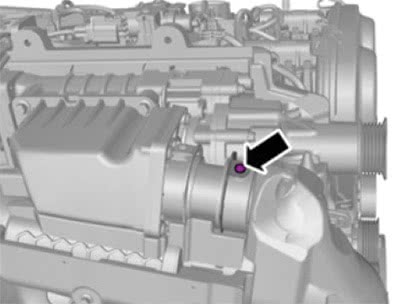
Next, remove the drive belt and the drive belt idler pulley at the rear of the block.
Remove the two 6 mm Allen bolts under the supercharger pulley.
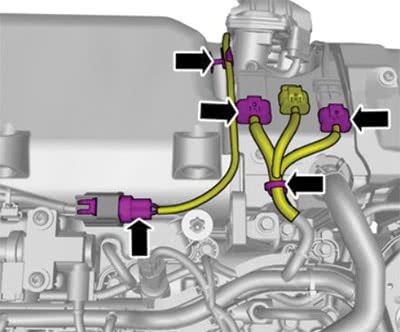
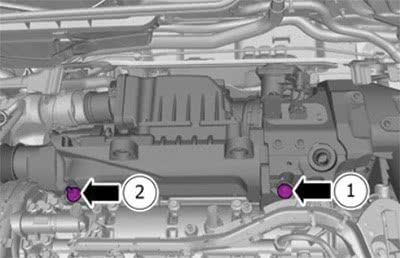
Disconnect the connectors for the oxygen sensors that are on top of the S/C assembly and pop off the wire harness hold down clips that are attached to the S/C housing.
Next, remove the air filter box and intake hose and swing them out of the way.
Next, you will be removing the air pipe that comes out of the front of the supercharger; remove the screw that holds the clip in place and use a pick to lift the wire clip up.
There is also one bolt near the bottom of this air pipe that you will have to remove before pulling the pipe off.
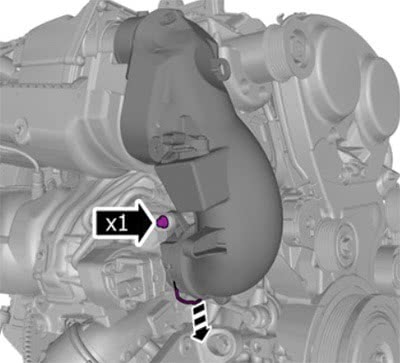
The lower connection of the pipe has a clip that can be a real challenge to keep in the open position while you try to pull the pipe off.
You will need to use three hands to get this pipe off quickly.
When you get this pipe free, just set it to the side because it is a tight fit and is hard to remove from the body at this time.
The supercharger is almost ready to lift off…
Just a few more bolts and you are home free.
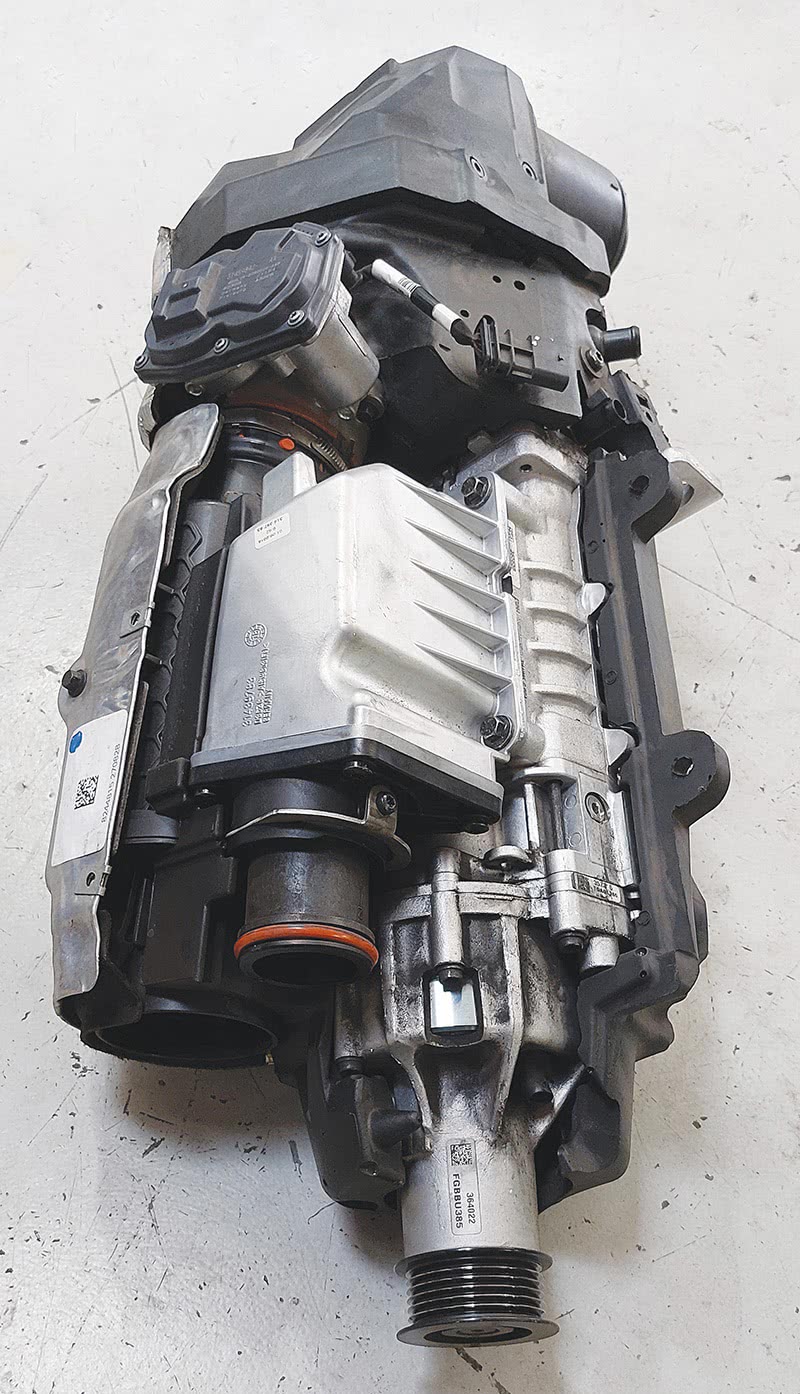
The time has come to lift the supercharger assembly out of the engine bay. You should ask someone for help lifting because it’s a tight fit and you’re going to have to twist and angle the part to get it out.
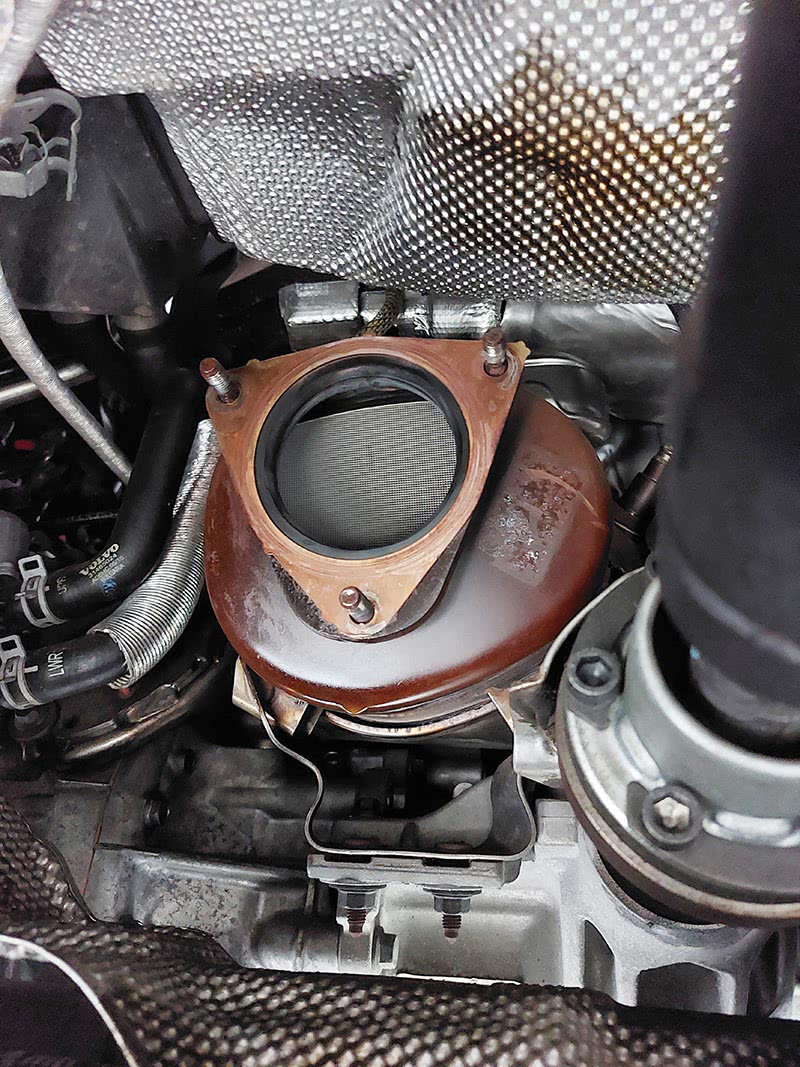
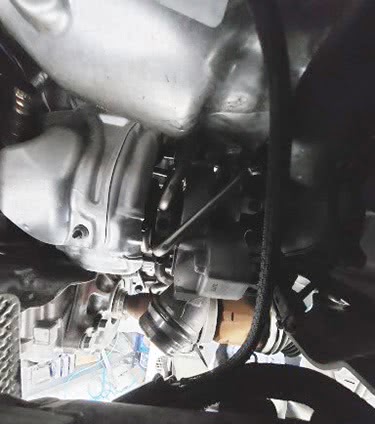
Now that the supercharger is removed, you will have full access to the turbocharger, exhaust manifold, and catalytic converter.
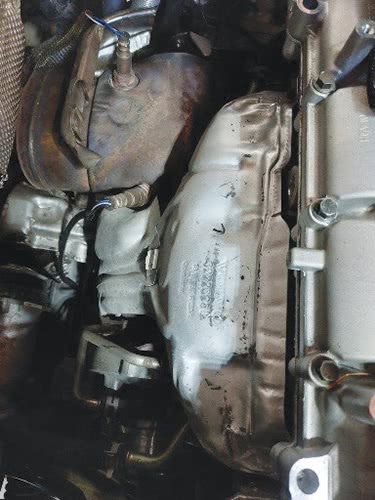
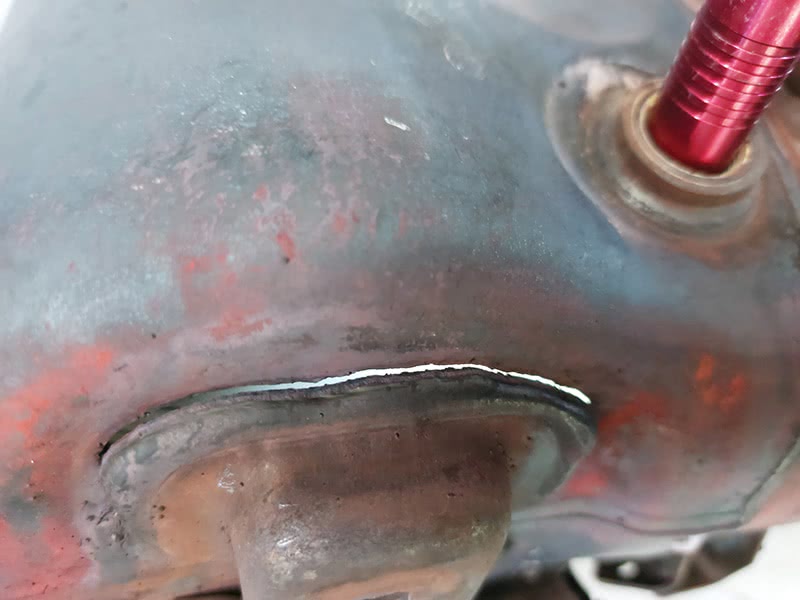
The cause of this customer’s exhaust leak turned out to be a large crack in the side of the catalytic converter.
The shop decided to advise the customer to replace all the other exhaust manifold gaskets while the supercharger and catalytic converter were removed.


“On a Second Generation Volvo XC90 (2016—Present) T6 2.0L B6324S Engine, With Supercharger and Turbocharger”
B6324S is an old, pre-2016 6 cylinder naturally aspirated (without turbocharger!) engine and it is not 2.0L, but 3.2L!