
 This 126 was more than 20 years and over 200K down the road before you could smell and see the sweet antifreeze mist condensing against the inside of the windshield. On a 126 of this vintage, there are no coolant hoses under the dash in the passenger compartment, so the most probable diagnosis was a slow leak from the heater core.
As in most jobs, there is some variability in the work sequence, some but not unlimited variability. You could, for instance, evacuate the A/C system first and drain the engine coolant system next or vice-versa, and that would make little difference to your success or time-efficiency on the job. But if, say, you put the climate control box back in the car before you test or replace any vacuum motors, you may get a second chance to R&R the box to reach those sandwiched between it and the bulkhead. If you’re not thorough, double-checking blend door actuation, you might even get a third chance to do the same thing!
 Yogi Berra, as usual, had it right: “Include me out!” There is no single particularly difficult step in replacing a heat-exchange core, but there are many not-so-easy steps. And if you skip any one of them or do it incorrectly, you’ll probably get it right the next time through, or the time after that, perhaps many hours of your own time later. We’d like to save you that time.
The big advantage to following the factory sequence is that you can expect to do the work from step A to step Z just once from start to finish and have the job done. They’ve done it before, you see. If you improvise a different sequence, that could mean repeating steps because you overlooked some small but essential detail, a detail now buried under later work you have to undo to fix that detail and then redo. If your focus is to ‘beat the book,’ this is probably not the ideal job for you, because rushing will certainly require backtracking to fix mistakes, and repeated backtracking will take much longer than doing the whole job attentively once through.
On this car as on many others, you could quite literally replace a piston ring more quickly and easily than you can a heater core. This is hardly a design fault: How often do you need access to a heater core? You don’t adjust them or repair them or align them; if after many years they start to leak, you replace them – that’s the whole story. The climate control system and the replacement sequence are similar for each model Mercedes-Benz, but we’re looking specifically here at a 1983 300 SD TurboDiesel. This being a real-world repair, the shop replaced various other components at the same time even though some were still functional, this to save all the labor should they require replacement over the next 20 years. The owner, wisely taking the long view, opted for all-new vacuum motors, an A/C evaporator and expansion valve. Other elements, like the seeping auxiliary coolant pump, turned up during the work. Check carefully for burned out dash or illumination lights, nonfunctional switches or anything else that will be easy to replace while you have everything apart. Go over every dashboard control up front: All cars with enough miles and years on them have problems you won’t anticipate at first, problems the owner may have forgotten. Might as well get ’em this time in.
 |
 |
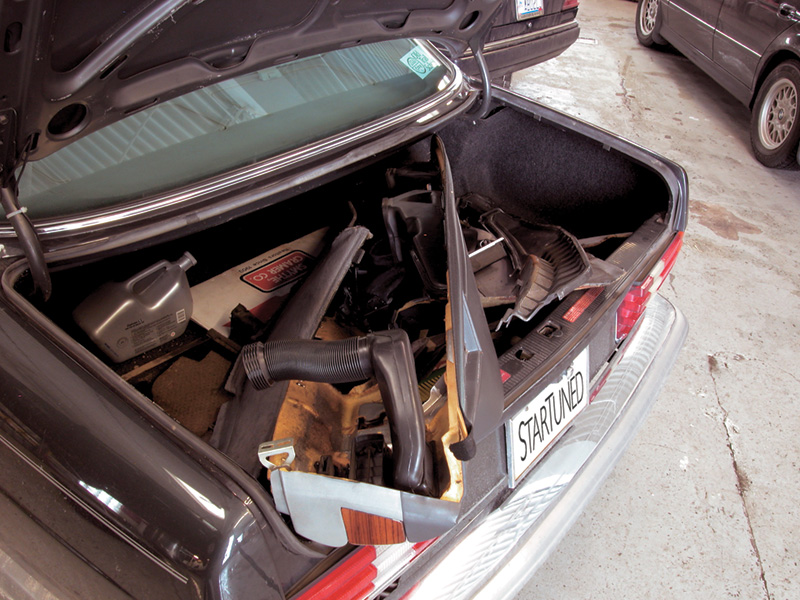 There are some housekeeping pointers useful not only for core replacement but for any mechanically complex job. Have your customer empty the car – the trunk, the glove box, the ashtray, the map pockets and any other places where ‘stuff’ collects. You’re going to either remove those compartments, or you’ll use them to store other parts you remove, from the instrument panel entire to the smallest screws, clips and washers, unless you have an unusual amount of worktable space in your workbay. What’s more, if the car is empty to begin with, it won’t strike the customer as curious that his glovebox oddments are rearranged when he gets the car back in a couple of days.
One more startup observation: While several steps in core replacement require a second and even a third person to complete that step, it’s a good idea to have the same main person do the whole job in a continuous stretch. It’s hard enough to keep track of the many small parts and fasteners as you work down to the heat-exchange cores. It could be virtually impossible if someone else did much of the disassembly before you got there, or if you have to stop and work on problems on other cars in the meantime. This is a job that requires a steady concentration from one technician. The job is not impossibly difficult, but enough interruptions and distractions could make it seem that way. Assign a single painstaking person to the job, and let him work.
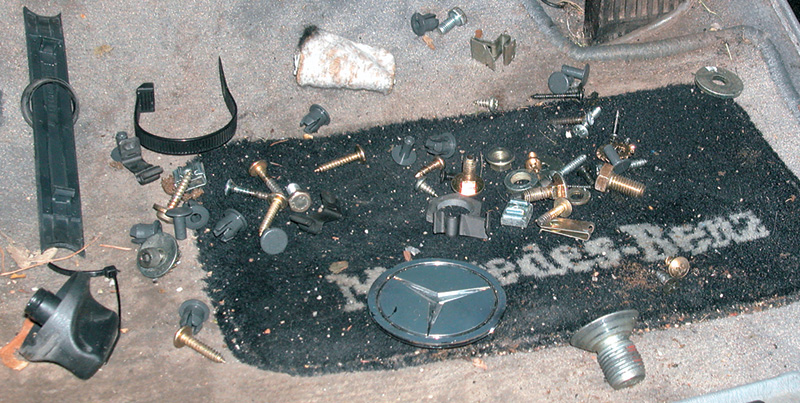
 If that single painstaking person is you, figure out in advance how you will sort everything during disassembly, left to right, top to bottom or whatever. In the more complicated phases, take notes, make drawings or even shoot digital photos (a cheap digital camera is an amazingly useful ‘memory’ tool for unfamiliar, complex jobs). It’s amazing how beautiful even the murkiest photo becomes when it’s the only cribsheet telling you where those vacuum lines came from. A small investment of time at the critical disassembly points can save large-scale hair-tearing efforts later, or even an extended repeat of part of the work. There are countless different ways to put the pieces back together: But only one of them works properly, and you’re not likely to have a second car, identical in model and year as well as color-coding of wires and vacuum lines, to check your guess against.
 There are four major subsections to the job: firewall forward — all the connections for coolant and refrigerant; the center console with the shift panel, heater controls and radio; the instrument panel itself with its internal ductwork and wiring; and the heater/climate-control box with the heat exchangers and air-blend control system.
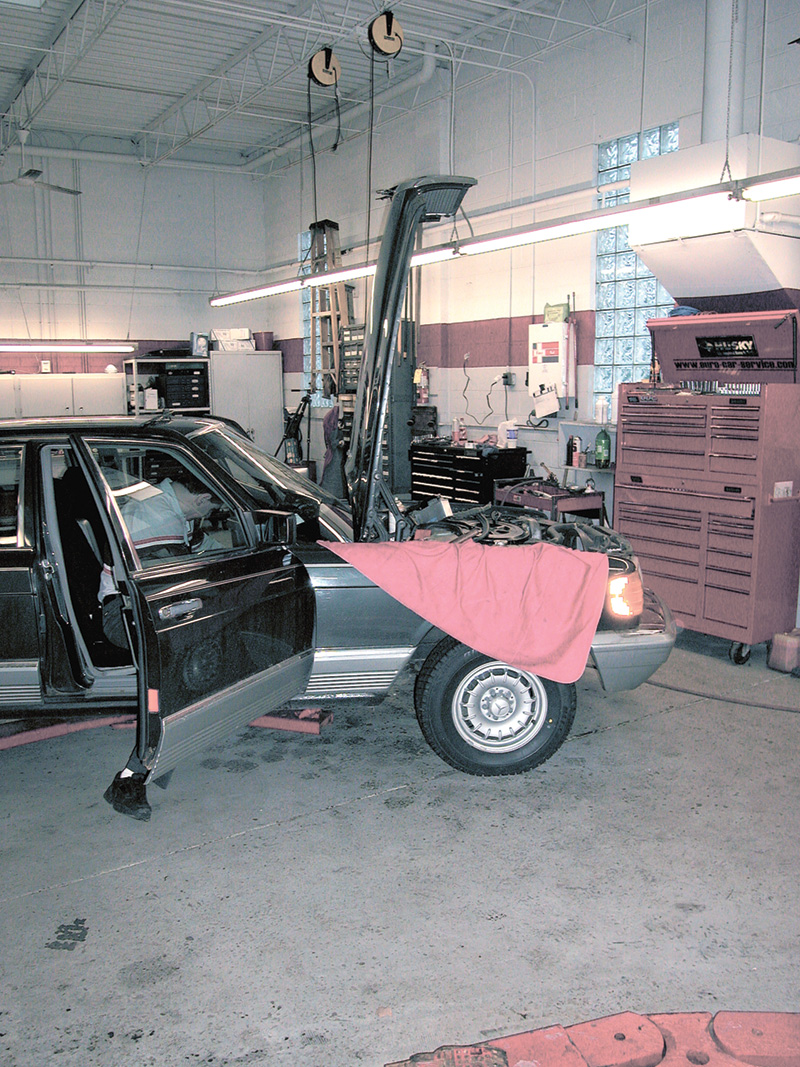
So roll up your sleeves, clean off your workbench and let’s swap some cores. First, open the sunroof. This isn’t part of the official procedure, and it doesn’t get anything out of the way, but it does let more light in on the work. Access and visibility are limited, and trouble-lights are often dim and awkward, so every little bit of additional illumination helps. Next, toggle both the seats back to their maximum rearward travel and tilt, to clear more workspace. Now you can disconnect the battery. There will be many loose wires and connectors, some of them hot. Why take chances? Toss the floormats in the trunk or wherever you plan to keep such accessories.
 Something that might strike you as unexpected, if you haven’t done this kind of work before, is the relative delicacy of the dashboard, the console and the other components you have to remove to get to the heater core, compared that is to the immensely robust drivetrain, suspension and steering components. This may seem particularly surprising in a vehicle built so conspicuously solid to withstand the force of accidents and impacts. If you were in a serious accident, you could do much worse than driving a 126.
Keep in mind the vehicle is designed not so it would survive an accident unscaped, but so its passengers would, at least as much as possible given the force of the impact. The internal parts of the instrument panel and center console are deliberately made from soft, flexible plastic and similar material, so they are less likely to cause injury themselves in any accident. Ideally, I suppose, you’d like everything to magically turn to packing peanuts at any moment of impact. Absent such transformational thaumaturgy, the factory makes the interior parts soft and yielding to absorb, not resist, any impact with people.
That does mean you have to be gentle taking things apart and gentle putting them back together. You could snap many of these parts into pieces with one hand. Many employ quite small screws and other fasteners that don’t have torque specs, like heater box spring clips. Snug ’em tight, but snug ’em gently, remembering how delicate some components are. They’re strong enough for what they have to do, but you’re not hammer-forging the bow of an icebreaker.
We’ve mentioned this before in StarTuned, and probably will again. Be particularly careful with wooden parts like the console switch plate, climate control cover and veneered parts of the dash. You can get replacement panels, but it is very hard to match the wood grain and hue exactly, particularly after twenty years. All the original panels came from the same tree, and the lumber from it is now in the passenger compartments of many other cars.
Drain the engine coolant. While in principle you could re-use the same batch, this is likely to be a good occasion for a regular biannual replacement. Even if the antifreeze chemistry and freezepoint are still good, there may still be a certain quantity of suspended abrasive particles like rust recirculating through the system, possibly what caused the heater core to leak in the first place. Because the coolant system will be thoroughly empty when you finish, refilling after drawing a coolant system vacuum can insure the elimination of air pockets.
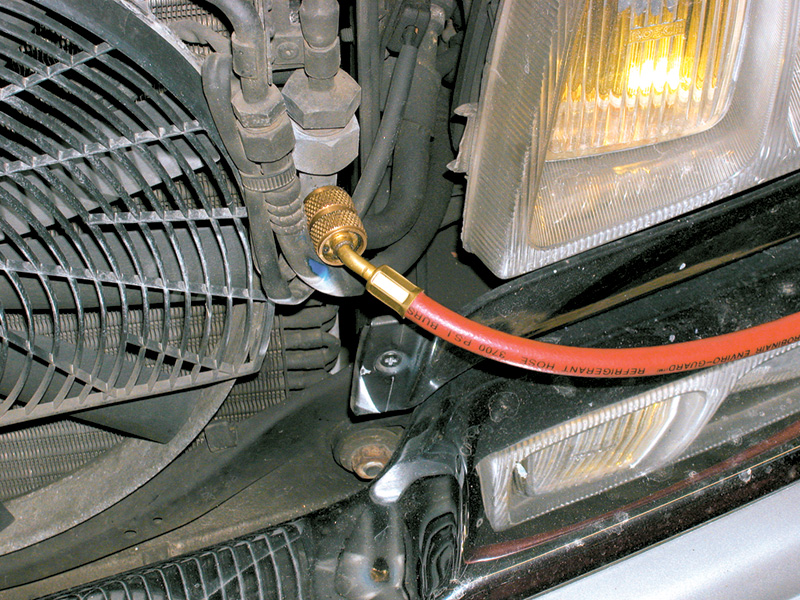
Evacuate the air conditioning system, measuring what you extract to calculate whether there has been any loss. 1983 cars came originally with R-12 refrigerant, and that’s probably what is in the system now. Nevertheless, check whether the system was converted to R134a. As long as the refrigerant is uncontaminated, you can use the same dose when putting things back together. This is probably a good occasion to replace the filter/dryer, as you’re reassembling things.
Usually technical discussions of this sort end up with something like ‘installation is the reverse of disassembly.’ That’s generally so, but we’ll add and flag a few reassembly notes in the course of taking the cores out.
 1 Be glad you’re working on a Benz because the vertical hood setting gives you working access to the space between the two bulkheads separating the engine and the passenger compartment, a space where you have some wrenchwork to do. You won’t have to hunch down to fit your head in to see or unbolt the hood for elbowroom. |
 2 Pull off the windshield wipers, the lower windshield rubber molding and the screen that keeps leaves and other large airborne debris out of the ventilation system. The hoses and tubes for the heater core go through both bulkheads just below the ABS control unit. On most cars, there’s enough slack in the electrical harness you can unbracket the control unit and set it to one side without disconnecting the wires. Get its bracket out of the way, too. |
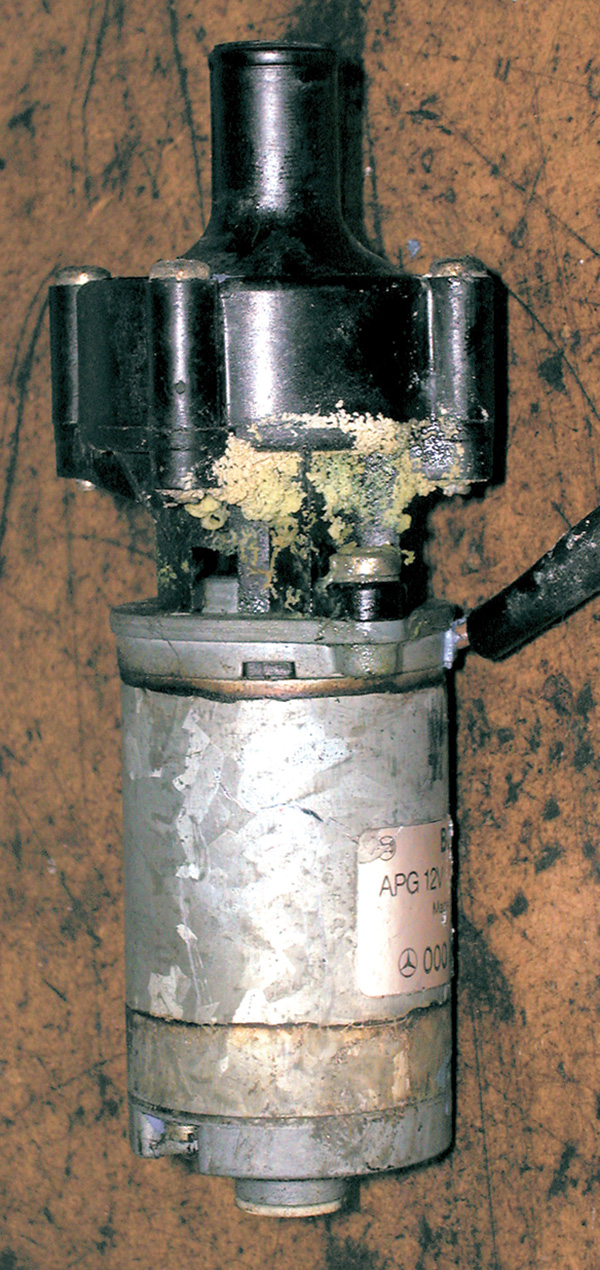
 3 Underneath are the auxiliary coolant pump and the monovalve. Check the pump and valve for leaks and loosen all heater-core hoses. Many of these are molded hoses difficult or impossible to replace with straight-coil heater tubing right off the spool, so check every hose and clamp carefully. At this point, you’re about a day away from sending the car off, so there’s time to get any new hoses and other components the car needs. |
 4 Reassembly note: This is not the tightest place to work, but using some silicone spray to ease the hoses on the heater core as well as the auxiliary pump and monovalve can make these steps much easier and calmer. Recall that silicone is the enemy of oxygen sensors, so carefully control the direction of the spray if the car has a gasoline engine. Don’t get any near the exhaust system or intake inlet. |
 5 Reassembly note: When you’re installing the heater box with the new heater core, you’ll probably need three people. Two will wrestle the heater box from the passenger compartment side, the third will peer between the bulkheads with an inspection mirror to confirm with a signal when the pipes are correctly lined up to come through the bulkhead aperture properly. |
 6 Loosen the clamp under the hood where the A/C line goes through the bulkhead into the passenger compartment. While in principle the flare-fittings at the expansion valve should line up exactly later, a little wiggle-room can sometimes buy an easier time of it when trying to start a thread. Don’t forget to retighten the clamp at the bulkhead when you’re finished and are recharging the system or you’ll allow an audible vibration when the A/C compressor engages. |
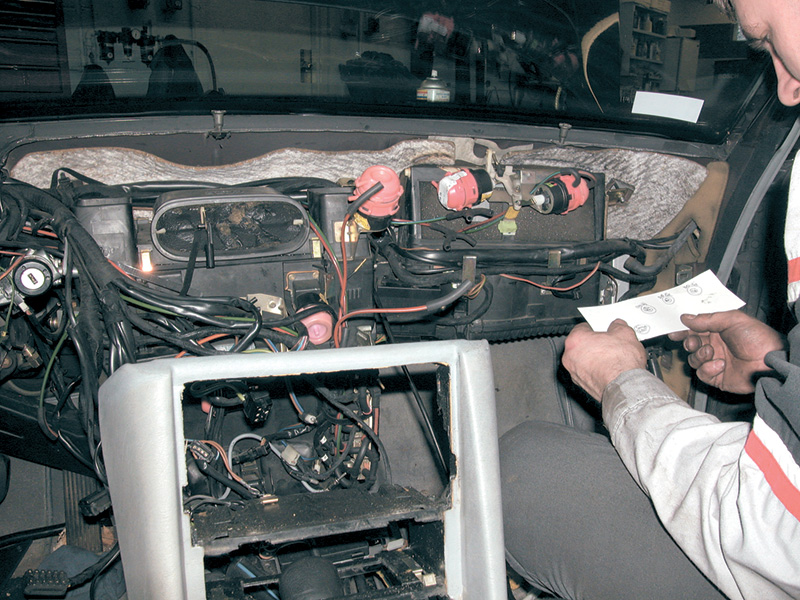
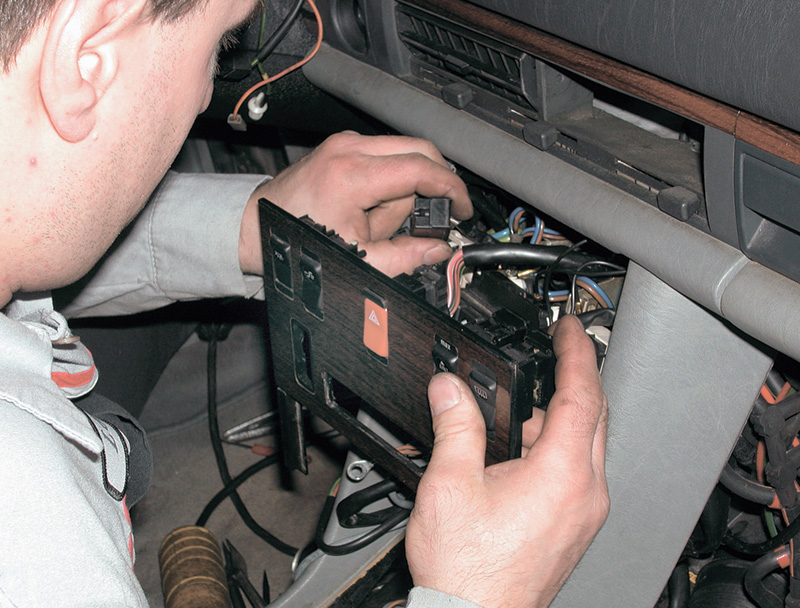
 7 Now into the passenger compartment… Take off the steering wheel, making sure you can put it back in the same clock position. Next comes the center console. If a console is a Chinese puzzle, the key piece is the ashtray. Slide the tray out and you expose the screws holding its frame, disconnect the wires to the cigarette lighter and the lamp, and you have access to the radio and heater controls above and to the change pocket and console switch plate below. |
 8 Radios vary; this one simply slid forward and unplugged from behind. Later ones require the special extraction hooks, and you have to record the enabling code to get them to work the next time. The heater panel has two screws at the bottom; after the small bin is out, the console switch plate slides forward, up and out. |
 9 Reassembly note: The connectors for the switches under the console plate look complex, but each one has a unique shape that will allow connection in only one place. Sometimes it is easier to remove the switches from the panel, make all the electrical connections and then return the switches to their unique positions on the panel. |
 10 Remove the console side pads on each side. Pull the screw and you can flex them and the console plastic enough to free them. Beneath, remove the air ducts carrying heated air down the sides of the tunnel and across the floor back to the rear seat. Get the other footroom pads as well. There are screws on either side of the tunnel and at the top, where the console connects to the instrument panel. |
 11 Under the mat, the rear of the console is held by a screw accessible through a hole in the plastic housing. The front bolts to the instrument panel with two screws at the top. While you have to raise and shift the console somewhat to get the dashboard/instrument panel out, you can leave it tilted back in place as long as you’ve managed enough clearance to get past it. Once it’s raised, you have access to the screws holding the shift plate. |
 12 The heater control unit unbolts once the plate is removed. Disconnect as well the electrical and vacuum connections behind. While each is uniquely shaped, these connections are relatively complex, so this may be a good point to make notes. Some people use a strip of masking tape with a code letter or number on each part of a mating connector to make sure they go back where they should. Carefully remove the glass-fiber illumination lines to each button. It doesn’t matter which glass-fiber line goes back to which except to keep the routing as simple as possible. Putting them where the factory did is always a good idea. |
 13 Now we move along to the instrument panel. First pull the screws holding the glovebox in, then remove it and disconnect the harness to the lamp. Having the glovebox out will help in disconnecting some of the fasteners, wires and vacuum lines more accessible from behind it. |
; disconnect and remove the speakers.") 14 There are covers below the instrument panel on each side, each held by several screws. Above the panel, pull out the windshield molding and the covers for both front speakers (use a very stubby or offset Phillips); disconnect and remove the speakers. |
 15 Use a special right-angle hook to free the instrument cluster from the catches and pull it toward you. Then disconnect the wiring to the cluster. The headlight switch knob comes off with a simple pull, but you’ll need to unscrew the set-nut to free the switch itself from the instrument panel. Lower the switch out and disconnect the electrical wires to it. |
.") 16 In the middle of the center vent is a threaded fastener to the flap that opens the vent allowing unheated ventilation air in. You have to separate this because the front part is a component of the dash while the rear is part of the heater box. This threaded link is a bit of a trick to reconnect, so recall exactly how you separated it. When reassembling, you’ll probably need bent long needle-nose pliers or something similar to hold the female end, unless you think of some other way to start the screw (some people use beeswax to temporarily hold the female end in place). |
 17 Just below the headlight switch, free the chain that connects the parking brake lever to the cable, and disconnect the cable for the hood release. Remove the parking brake pedal/lever from the side panel. When you’re reassembling these, you’ll probably need a third hand to connect everything together. Lift and disconnect the in-dash temperature sensor. |
 18 Reassembly note: There are three main bolts, left, right and center, holding the instrument panel. In addition, there are horizontal adjustment screws at either end, which you can use on reassembly to align the wooden strip with the matching strips on the doors. Once the panel is loose, raise it just enough to free and remove the defroster ducts. You’ll want to have a helper get the instrument panel out. It is much easier to fit it out the right door than to wrestle it over the steering column. |
 19 With the dashboard out, the heater core is the next objective. On either side of the driveshaft tunnel, remove the air ducts for rear heat. With the carpet and tunnel pads out of the way, the attachment screws are in plain sight. |
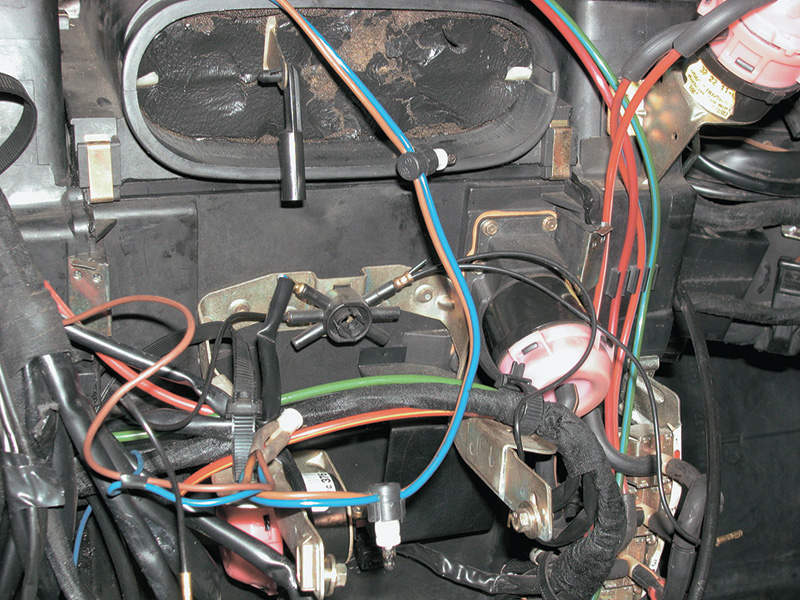
 20 There are numerous electrical, vacuum and Bowden-cable connections to the heater box, and those connections are somewhat different with different climate-control systems. Most of the electrical connectors have unique shapes, to make misconnection later less likely. |
 21 Reassembly note: Vacuum lines are color-coded, but the connections are not entirely obvious: Here is one place where even the most experienced will make notes for reassembly. It is impossible to overemphasize the importance of recording all the connections for proper reassembly, because if you should misconnect something, the climate control system could then exhibit symptoms that won’t appear on any diagnostic tree. Such a tree presupposes proper assembly and searches for a component that has failed, not for one that was improperly installed. |
 22 Tag the Bowden cables with masking tape to identify where each goes. It isn’t even critical that you know what each does. What counts is getting each back in exactly the same place on reassembly, including the adjustment position. There are multiple cable ties holding wires, tubes and cables under the dash. Besides keeping them properly routed, these cable ties also prevent their contents from rattling, tangling or snagging when the car is underway, so be sure to replace them on reassembly. |
 23 On the driver’s side, remove the tubular brace between the tunnel and the heater box, bolted at each end. There is an angular bracket on the blower housing you should also unbolt, as well as the bolts into the bulkhead. One of your preliminary checks, presumably, was to listen to the blower for bearing sound or imbalance, indicating the need to replace the motor or the squirrel cage. You can get to the blower from below without removing the heater box, so it is not a part to routinely replace with the core. |
 24 Keep in mind when you lift the heater box out, the pipes all go in from above and in front, and it’s still full of coolant. Tilt the heater box back toward you, not forward, as you remove it from the vehicle. Otherwise, you could spill coolant on the vehicle carpet or other parts. As with the instrument panel, it is easier to fit the heater box out the passenger door. |
 25 Once the heater box is on the bench, you’re closing in on the heater core and A/C evaporator. Spring clips and screws clamp the box together, but be sure you go around the seam thoroughly to be confident you have all of them removed or unbolted. The cover for the heater core is on top and relatively small. You split the box lengthwise to get to the evaporator. As you disconnect the vacuum motors and the linkage to the blend doors, take particular care to observe and record exactly how they go. |
 26 Not only are the heater box parts relatively complex, they are also as we mentioned before, relatively delicate. In their ordinary functioning, they have no loads beyond air deflection loads. In such normal use, they can work indefinitely. But when you take the box apart, you’re subjecting them to unusual stresses, so care is important. As you can read in this issue’s Parts News, we cracked the pivot pin from one blend door and had to get another. |
 27 There are foam and rubber grommets and pipe brackets holding the core in, as well as the plastic cover. Recall while disassembling the box down to the cores that you have to be careful with the box and all its hardware and small pieces. |
 28 The feed and return pipes are separate from core itself. You unbolt them from the old and, using a new set of gaskets, connect them to the new core. Remember that these should be snug enough to prevent leaks, but don’t risk stripping the bolts or the cores. |
 29 Reassembly note: The foam insulation around the core most probably will tear apart as you lift the old core out, but you’ll replace that with new insulation around the new heat exchanger. This foam insulation serves both to direct all of the air through the core air passages and to prevent the core and its pipes from rattling or buzzing in the box when the car is underway. |
 30 Reassembly note: Sealing the box at the parting surfaces can help to insure sufficient air volume once the repair is complete. When the parts are new, they fit very closely and don’t require sealer, but after many years they can distort slightly from the heat and allow seepage, all of which could reduce delivered air volume and throw off the temperature control. |
 31 On this job, the customer decided to replace all the vacuum motors, the A/C evaporator and the expansion valve. Chances are, not all of these had failed, but there was no additional labor cost to the job, only the parts. The foam insulation around the evaporator is more extensive than the foam around the heater, and even more important for the elimination of vibrations because of the compressor. |
 is soft metal!") 32 Reassembly note: You can remove and replace an expansion valve without removal of the instrument panel or heater box, but it is much easier to do so with the evaporator core on the workbench. You’re not working in such close quarters, you can get the fittings threaded more easily, and it’s easier to hold the valve in place for the final tightening. Keep in mind that everything here (except for the flare nuts) is soft metal! |
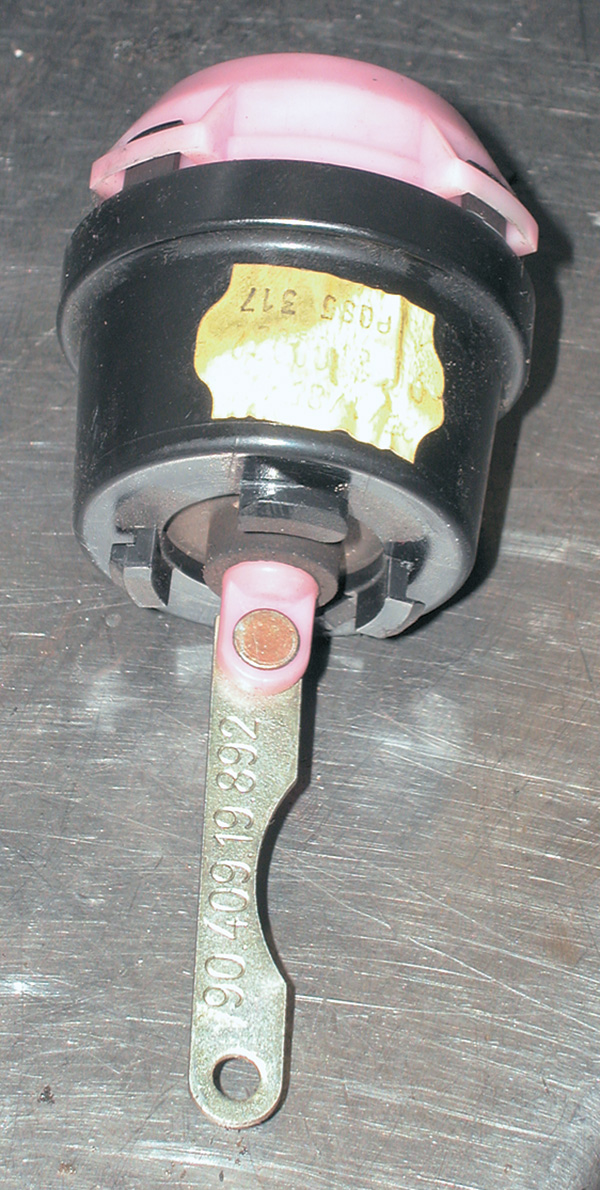
. It is similarly a reasonable economy to replace all of the vacuum lines as insurance, even through they are probably satisfactory.") 33 Anytime you have a heater box out, take the opportunity to check each of the vacuum motors to see that it holds vacuum (several would be very difficult to reach for subsequent replacement). It is similarly a reasonable economy to replace all of the vacuum lines as insurance, even through they are probably satisfactory. |
 34 Reassembly note: When you are replacing vacuum motors, replace them one at a time. While all of them look similar and while several are interchangeable, not all of them are so. If you take them all off before you start replacing them, you’ll have an interesting and time-consuming reassembly puzzle! Remember what Yogi said. All vacuum-actuated devices of this sort are more critical on a Diesel car because the auxiliary vacuum pump, while satisfactory for the task, cannot produce the ‘volume’ of vacuum a gasoline engine does. A gas engine can sometimes mask a leaking vacuum motor by simply overwhelming a pinhole in a diaphragm or a porous hose. |
 35 Reassembly note: When you have the heater box back together, get a hand vacuum pump and confirm proper operation of each of the blend doors. This confirmation checks not only the intact vacuum each can hold, but also the proper arrangement of the linkage geometry. You want to see each of the doors operate over its full travel, being certain they close completely. Skip this step, and you may be back in this deep tomorrow. |
On any job as extensive and nonroutine as this, it is critical to make each disassembly and reassembly step as carefully as possible. The last thing you want to find when you think the job is done is that the controls don’t work properly or there is some sort of noise or other problem. Take your time, write yourself notes and make drawings as you take things apart. Much better to have taken ten notes too many than one note too few!


0 Comments