
by John Galt
For every person who wants to start building race cars, there is a different style of getting the job done. We’ve seen work areas that look like a surgical theatre and folks working in their back yard rolling the parts around in the grass. We’re not going to tell you which is better, but we will share with you what we’ve done ourselves. And, we’ll cheerfully tell you that we’ll be doing it differently in two months because, just like you, we’re still learning and improving. You’ll never hear us tell you that that we’ve got all the answers, because we don’t. In fact, sometimes we don’t even know the damn question. With that, let’s explore some of the things we’ve learned and you can sort through them and see if any of them will work for you in your shop.
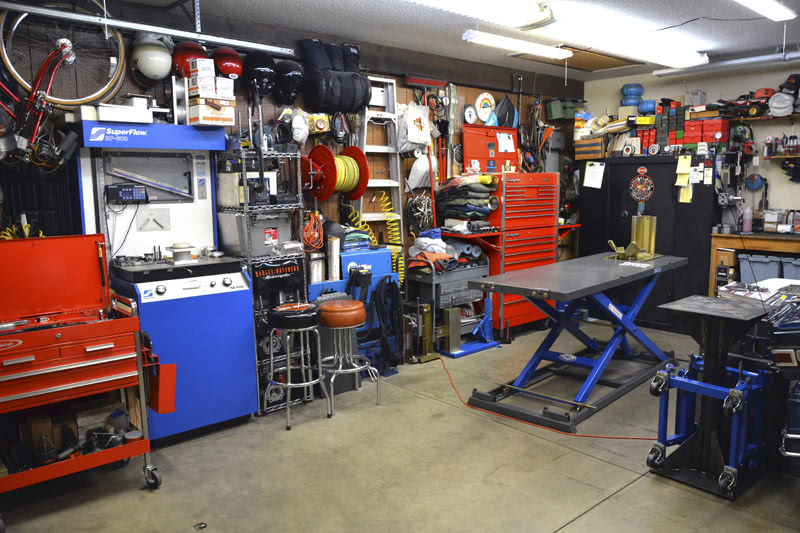
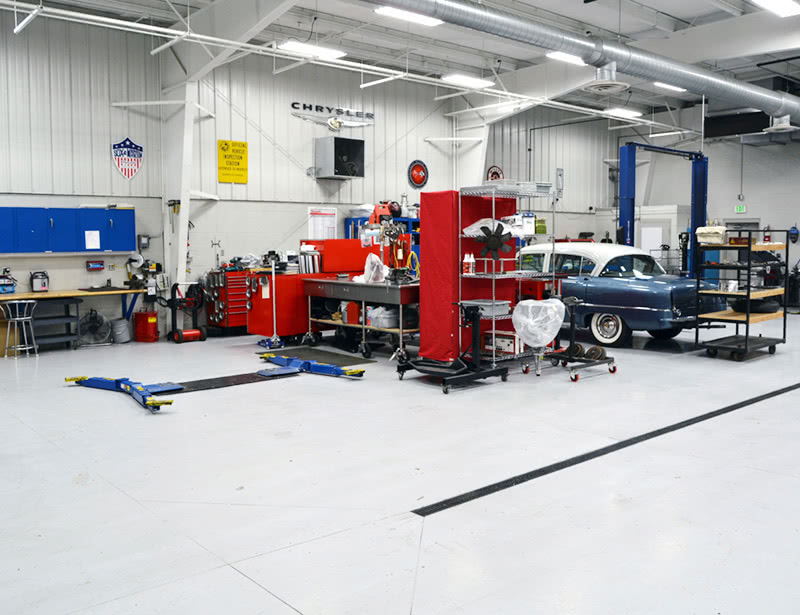
Kindred spirit and fellow performance junkie Mike G. is the most organized human alive. Look at what’s packed in this two car garage!
To a large degree, the amount of space you have will determine how you end up working because your floor plan will dictate work flow. If you have a one-car garage to work out of, you will have to work differently from someone with a two-car, three-car, or big dedicated work shop. Workbenches and storage systems are critical, but the number of linear feet of bench, or the size and type of storage is set in part by the size of the work area. If you’re in a small space, your organization, cleaning, and preparation skills have to be highly refined and follow a logically-designed flow path that will let you accomplish the most in the least space and in the shortest time.
Swarf
There is a large upright air compressor, a flow bench, a cold tank, a valve grinder, a lift, a seat and head machine, a blast cabinet, a water cooled TIG welder, a custom work stand and dozens of tools, jigs and fixtures stuffed into every nook and cranny. No excuses! You can do it!
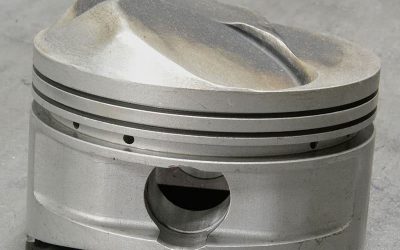
Working on race components means that you will inevitably be grinding, welding, or re-shaping parts, because “Race Car Parts” is Latin for “Almost Fits.” You will find yourself resizing fasteners, removing or adding metal on blocks, heads, intakes, and header flanges. You’ll have to manage the swarf floating around from the abrasive or cutting tools you use, dirt that’s resident in your shop, and dirt that’s blown in when the door is up. Managing dirt will become an important part of your day if you’re a successful builder.
If you are lucky enough to locate one, a salvaged sink section makes a great work area.
It’s not always possible, but ideally you would like to set up dirty-process areas, clean-up process areas, and an ultra-clean area for reassembly. But let’s assume for now that you don’t live in a perfect world and that you have to work in the same general area and bring the project from teardown to reassembly in the same few square feet. Let’s start the conversation with storage and work benches.
Work surface
We like steel top, laminate wood, and stainless steel work surfaces. Given our druthers, we’ll take stainless every time. It shows dirt, reflects light, cleans up with lacquer thinner or brake cleaner, and you can write notes all over it with an industrial Sharpie that you can clean off later with thinner. It doesn’t rust, won’t chip, or dent, or hold dirt. It does scratch, but over time the scratches all morph together into a “matte” surface that works just fine. It’s a great surface, either as a work bench or an oversized Post-It note.
Even in a large dedicated shop putting everything on wheels makes the space flexible and easy to clean.
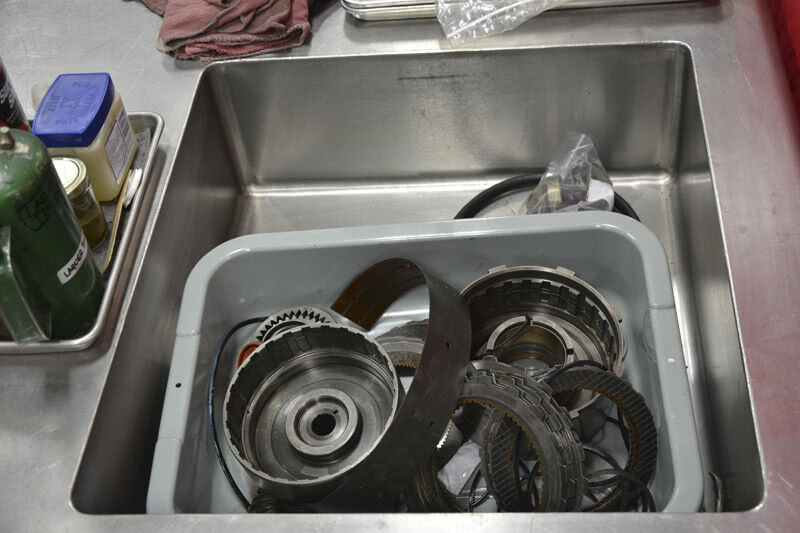
A sink isn’t wasted real estate… it makes a great holding tank for dirty parts.
One cart stores tools, the other stores parts for the project in process. This one measures 24” by 48” by 96”. Go up to maximize storage with the smallest footprint.
We salvaged a stainless steel sink section and mounted it on scaffolding wheels to make it mobile. The wheels lock in both the rolling and rotating planes and when locked up the bench is rock solid. Wheels are wonderful things … everything you have should be on wheels. It makes moving something outside easier (for cleaning, grinding, or welding), and it makes cleaning your shop a breeze. We use the built-in sink as a parts catcher. We put a plumber’s test plug stopper in it, and we just toss everything we’re discarding in there to hold until the project is done. Holding on to the old parts will save you sometimes if you need to compare new to old halfway through assembly. You can see in the photos that we also kept the pots and pans hooks and the carousel. Makes a nice place to clip instructions, or hang gaskets, caulk guns, or miscellaneous parts. The racks below hold all sorts of things you should throw away — a man can’t have enough “crap collectors” (shelves) in his shop. Speaking of which, shelving needs to be on wheels as well. The tall rack with the red canvas covering is holding tools and boxed items in our shop, but that rack (available from Omega Shelving… precisiontools.com/default.asp, for around $240) will hold 1,200 lbs., and you can store an entire engine on the five-shelf unit, including the block. We like the wire shelves because the dirt and dust falls right through to the floor. Roll it outside, blow it off and cleanup is done. That heavy red cover you see in the photo is another $250, but if you want to keep things under wraps and clean, it’s a great addition.
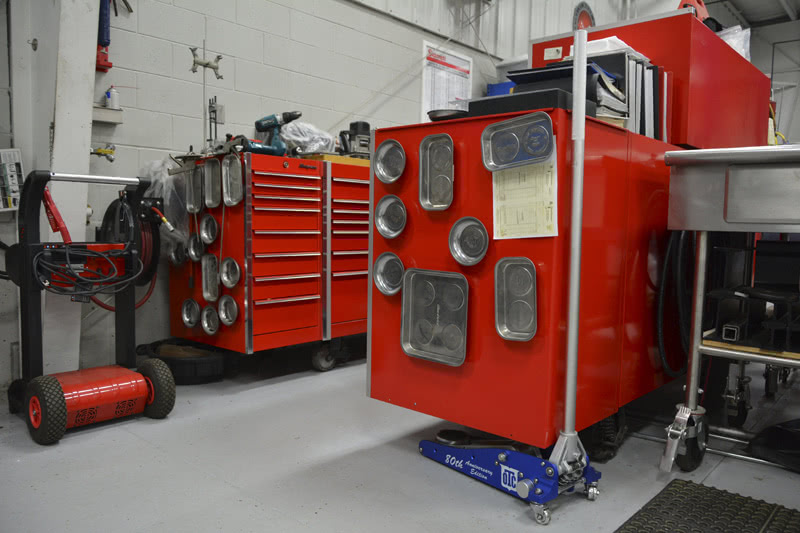
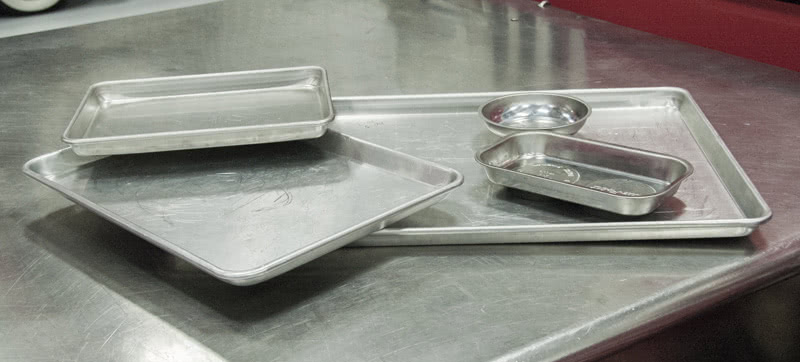
If you have several projects running concurrently you just can’t have enough magnetic trays.
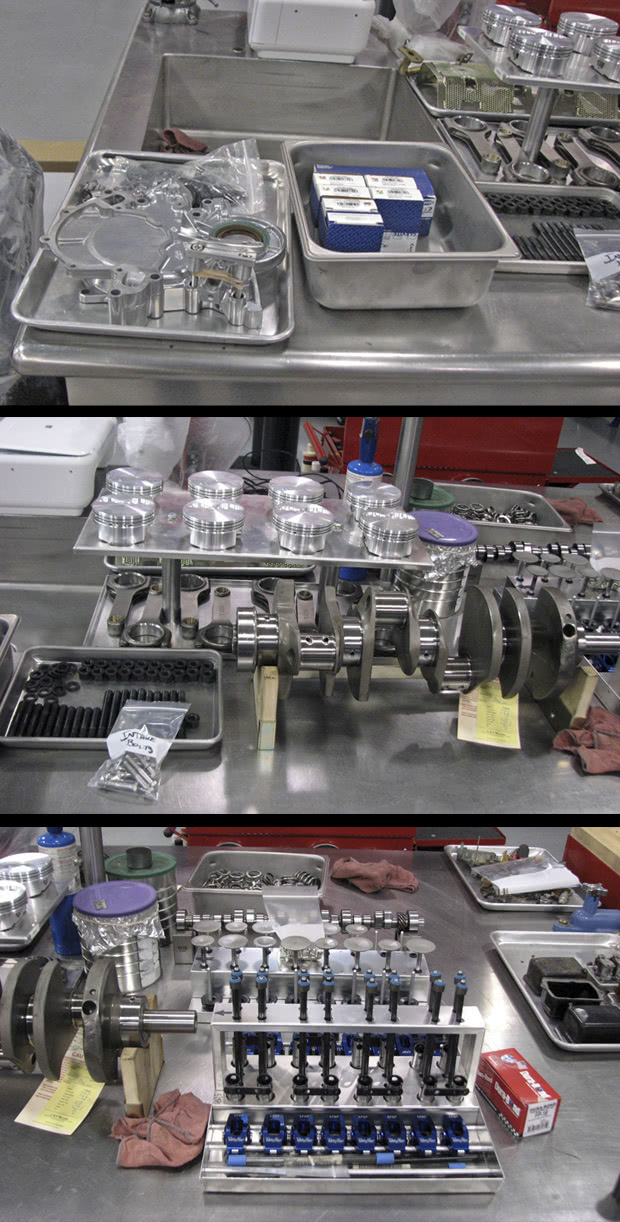
You can also see plastic tubs like they use for bussing tables in a restaurant, and full-sheet, half-sheet, and quarter-sheet baking pans, along with lots of magnetic trays. The bussing tubs and sheet pans are available at any restaurant supply store, and the magnetic trays are available from the Mac or Snap-on man, or online at any number of tool warehouses. Buy all of the same type and brand of magnetic tray so all the magnets are of the same polarity and you can stick them together in a tall stack to take up less room. We’ve acquired a couple of off brands, and they repel the others and won’t stack. You’ll also see a few specialty trays — piston and rod racks, valve train racks, V-blocks for holding cranks and cams, and valve and valve spring racks. They’re worth their weight in gold and can be found at places like CV Products.
Bag it and tag it
We’re “bag it and tag it” kind of guys. We’ve got day jobs and sometimes it takes a few days to get back into the shop, so given our age and state of deterioration, it’s either organize or spend half our work day searching for something we misplaced when we were last in the shop (don’t laugh, if you live long enough this will all make sense to you one day).
On build day, the clean parts are removed from the storage bags and organized into the various trays and parts organizers so that your time is spent building in quality and not looking for a misplaced part.
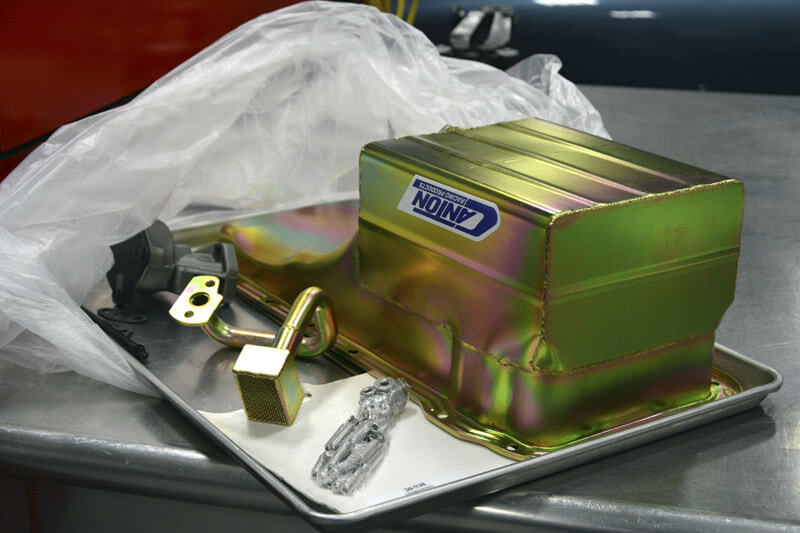
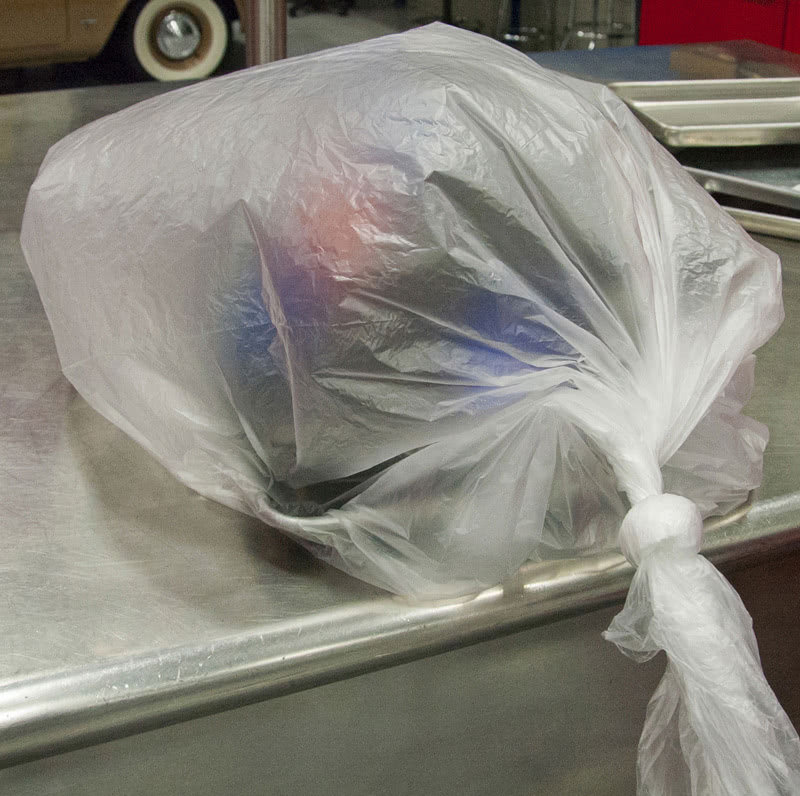
Putting the entire system and all the related parts on a single tray and bagging it all up helps inventory control.
When a job arrives, we grab a handful of trays and start the teardown. We spread each system into its own tray or container and make notes in permanent marker on the tray (just love those industrial Sharpies). We’ll put fasteners in magnetic trays to hold them fast and put everything associated with a given system on the sheet pans. Then, we’ll wrap the whole thing in a cheap plastic trash bag, tie it off, and put it on a shelf. We’ve found that doing it this way ensures we won’t lose parts and that the dirty bits stay in the bag until we remove them for cleaning and modifying, if needed. After everything is cleaned, modified, and inspected, we clean the tray, use a new trash bag and our freshly-cleaned parts stay clean until we’re done fitting, grinding, and mocking up all the other parts that need work. If we’re replacing parts, we’ll remove the old parts from the tray and put the new ones in place of the old, tossing the old parts in our sink holding area, “just in case.”
Bag it and tag it.
We like using anti-fatigue mats on the floors around the work bench area. Not for our comfort, but because sooner or later you’ll drop something really, really expensive and those mats will save your hindparts. While we’re talking about floors, we highly recommend that you seal them with an epoxy type floor product. Not only is it much easier to clean, but if you use a color like a light grey, it reflects light and makes spotting dropped parts a lot easier. We’re not fans of the “sprinkles” that you top off some floor products with because a single color makes spotting things on the floor much easier. We also use rubber matting on the bench if we’re working with large aluminum parts like heads. If you have the luxury of starting with a clean slate in your shop or work area, remember that you can never have enough light, enough pegboard or shelves, or enough air and electrical outlets.
Control freaks

Tracking your parts on a spreadsheet like this example will save you time and effort later. We record the manufacturer, the supplier if it’s not manufacturer direct, who we talked to and the date and time ordered. Under “notes” we record the received date and the inventory count so we know that we have the parts that we need to complete the build. You can easily build your own customized spread sheet that fits your specific needs in a program like Excel.
A big part of this business is inventory control. Make sure you keep track of what you bought, when you bought it, and where you bought it. We’ve attached a sample inventory control sheet for your use. As parts arrive, we “decant” them, count them, record the information, clean them, tray them up, and cover them with a light film of oil before we put them in their respective plastic bags. While we’re thinking about this, know what materials your parts are made of before you clean them. Certain materials are not compatible with some common solvents or cleaners (titanium and chlorinated solvents like brake cleaner come to mind — never expose titanium to any chlorinated compound). Several of the exotic alloys used in race engines must never be exposed to any kind of moisture, including the oils and sweat on your hands and must be kept oiled. Some alloys that we’re aware of that require special handling include L-19, H-11, Custom Age 625+, ARP 3.5, 300M, Aeromet 100, and Inconel 718. There are others, so read the directions!! We keep Sure Shot cans full of WD-40, Marvel Mystery Oil, lacquer thinner, and an alcohol/acetone-based brake cleaner on our bench for quick cleaning and lubrication needs.

Keeping the right cleaning products and lubricants close at hand and the wrong ones out of the shop altogether will keep you from making a bad mistake.
As you bag and tag, try to keep systems together — valves, springs, locks, retainers, pushrods, and rocker assemblies in one group. Pistons, rings, rods, locks, rod bearings, and rod bolts in another. Block plugs, cam bearings, oil pump, pickup, oil pump drive rod, crank and main bearings in yet another. Oil pan and windage tray in another, and so on. You can count on mocking up the engine three to five times, so don’t get crazy with your final cleanup until everything has been installed and checked for clearance throughout the full range of at least two crankshaft revolutions. Keeping all your assembly groups in nice, clean plastic bags will make your job as lot easier as you load, unload, modify, and reload the parts. Once you’re good on clearance, all you’re left with is removal from the storage bags, final clean up, and installation. If you mock up, measure, grind and fit, clean and bag, you end up just pulling clean parts out of clean bags and torqueing up the fasteners during the final assembly.
Stainless and aluminum pans and system trays are worth their weight in gold as you move from mock up to mock up. They are easy to clean and once the parts are placed they keep you from overlooking a misplaced part or component.
Look, I don’t care how clean the shop looks or how many times a week you clean it. Even if you’ve got heat and air conditioning, you’ve still got dirt moving. Just lock the shop for a week and go back in and look at the dust lying around. You tell me, what could be worse than losing parts, or mixing clean and dirty parts during mockup? Other than working until midnight on the final assembly only to discover that you forgot to order something, or miscounted it, and you’re one main stud short of a build. When it comes to engine building organization, cleanliness really is next to godliness.
0 Comments