Our man Greg has produced such a stupendous amount of truly useful copy on this subject that we’re going to present it in three parts. This time, we’re giving you interesting info on bore finish and block preparation.
The poor piston ring. It’s blamed for many sins, and truly guilty of so few. It is both a sliding bearing and seal that manages the interface between the violently moving and rocking piston to the (largely) solid and unmoving cylinder bore.
It is blamed for mysterious power losses, oil consumption, excessive leakage and friction, and it has to be one of the most reviled and least understood components in the system of parts responsible for overall engine performance. It comes in hundreds of iterations by the time you consider profiles, materials, coatings, widths, and diameters, and the preparation and care that proper ring installation requires during mock-up and final installation in the bore is far more extensive than most builders take the time to do. Like most performance parts, rings follow the racer’s creed: It only takes twice the money, twice as long, and is twice as hard as you thought it would take.” Before we begin any discussion about rings, we have to talk about properly finishing, cleaning, and preparing the bore wall.
Hone sweet hone

Here’s a bore treated with Total Seal’s Quik Seat dry bore lubricant. This is an interesting product that I just started using. It’s a dry film that does double duty. If it turns black on application, then the bore isn’t clean enough and you have to keep scrubbing the block. If it turns a sort of Army green/olive drab, as it did here, then the bore is clean enough to install the pistons. It’s supposed to provide just the right kind of lubrication needed for proper ring seating and it’s formulated to work with the AL-8 lubricant that’s used on the ring grooves and skirts.
There is simply no one way to hone all blocks for all ring and racing applications. There are certain numbers you must hit, but getting those numbers is dependent on a number of factors, not the least of which is the block you’re using and the hardness of that block. There was a time back in the stock-block days where you could follow a single recipe for honing and the cylinder finish turned out pretty well nearly every time. When all your blocks measured 150-175 on the Brinell scale, you could do the same thing every time once you figured out what needed to be done. But what worked then doesn’t work now. Today, our blocks might range from 150 Brinell to over 350 Brinell, which translates from 82 Rockwell “A” scale to 36 Rockwell “C” scale. That means that getting your bore finishes right also means adapting your process to the block you’re honing. In a nutshell, honing is a custom process specific to the block, application, and the ring pack you intend to use, and that requires an operator to be open-minded about what must be done and willing to vary the process to produce the bore finish numbers required.
Changes are a part of our industry and the changes we see today are driven in a large part by how fast we can measure, parse, and compare data — and all of that is driven by computer. Just the changes in the last four or five years have rendered years of practical experience useless. What you might think you know is often largely wrong in today’s racing world. There was a time when the manufacturer learned from the racers and adopted our processes where they could, but today it’s the other way around.
Manufacturers have the funds, tooling, and ability to produce and measure cylinder geometry and cylinder bore finish simultaneously as they finish-hone their production blocks. Today, their products are second to none in terms of finish, taper, concentricity, and straightness.
Just as the actual finishing technique has evolved, so has our understanding of what a proper bore finish needs to be concurrent with our ability to develop and master improved measurement techniques. If you’re still using an old-school machinist who isn’t using a profilometer to measure and record the bore after honing, you’re taking a huge risk in assuming that the finished product you’re getting will be compatible with today’s racing rings.
There’s a number of measurements or values that are used in the discussion of bore finish. Ra or arithmetic average used to be the standard. Its major drawback was that it didn’t give you a clear picture of the total bore finish. It tended to reduce the effect of peaks, and as you can see in the accompanying drawing a surface with identical Ra numbers could have dramatically different surface profiles.
Rrms, or Rq as it’s now known, produced a number that skewed more with highs and lows, so it was more sensitive to the presence of peaks and valleys in the profile. Ra is an arithmetic averaging function and Rq is a geometric average height of the roughness irregularities, both compared to the mean of the surface under measurement. Today, we use a completely different set of numbers to look at bore finish.
So what does the bore finish do and why is it so important to us? In simplest terms, the bore finish is a measurement of how much oil the bore holds, how much ring rotation we get and how much oil migration up and down the bore we can expect. It tells us if the bore is “wet” or “dry.” It also tells us what to expect in terms of ring seat-in and performance.
Ring friction has two parts: the ring against the bore (finish, ring tension, and axial ring width), and the amount of oil on the bore that the ring has to plow through, scrape down, or move aside. Much is made of achieving a plateau finish, and it is critical that we do so for virtually all ring applications used today. A plateau finish can be described as a surface with very few peaks, largely flattened off to provide a good bearing surface, with valleys extended down into the material to act as an oil reservoir. Too rough and there’s too much friction, seat-in wear, and swarf generated. Too smooth and the cylinders burnish, rings don’t rotate, and the oil load in the bore is too low.
The numbers we use today tell us a great deal about if that plateau has been achieved and to what degree. There’s no real secret about a plateau finish — the rings of any engine start plateauing the bore as soon as it begins accumulating run time and loaded miles. The asperities or high spots on the bore are constantly getting shaved down by the high spots of the rings, producing the maximum bearing area to support the ring.
Achieving full ring face contact with the bore plateaued by the ring is what we used to call the process of ring seating or ring bedding. Today, we really need to get a jump on the process and start off with a plateaued bore finish to get new rings designs to seat quickly. As a side benefit, we also avoid the excess wear and swarf generated by old-school ring seating. In theory, modern rings should seat in almost instantly and produce none of that nasty old gray sludge we used to find stuck on the drain plug magnet, or living in the bottom of the oil pan that was partly made up of the bore and partly of the rings. If you can avoid introducing abrasive slurry into the engine, it’s always a good thing.
Low-tension ring packs lack the radial tension needed to seat in quickly to an improperly prepared bore finish, so if you’re going to rely on the rings to plateau the bore you may be several thousand miles down the road (and on the receiving end of a lot of angry phone calls) before they get the job done. Low-tension ring designs offer so many advantages in terms of improved bore conformability, sealing, and fuel economy that they are the standard for virtually all new factory engines as well as for racers in every class, so achieving a verifiable plateaued surface during machining is critical to ring performance and customer satisfaction.
Your machine shop should be giving you a profilometer readout like the ones shown. Let’s look at the numbers we use today; Ra and Rq are no longer what we look at. Rk is the core roughness number, or the depth of the roughness core profile. It looks at the overall finish, from peak to valley.
The Rpk or reduced peak height is the average height of the peaks protruding above the average roughness core profile. Rvk or reduced valley depth is the average depth of the profile valleys projecting below the roughness core profile.
Mr1 (material ratio 1) is a percentage number that is determined by the line that separates the peaks from the roughness core profile and Mr2 is the percentage of material separating the valleys from the roughness core profile. The general numbers to shoot for in builds from stock to roughly 1,000 horsepower are an Rpk of 5-20 microinches, an Rk of 25-30 microinches, and an Rvk of 35-40 microinches. We’d like to see the material ratio 1 (peaks) at 5-15% and the Mr2 (valleys) at 80-90%. At this point, we have sufficient core, a plateau finish and good oil-holding capacity in the valleys. This works for most gapless, 1/16 to .043 rings, non-blown, non-nitrous applications, and produces the core roughness and plateau needed to hold the volume of oil on the wall that will let the rings work correctly; enough to lubricate the ring and not so much that we’re losing power plowing oil off the wall, or using oil.

Here are the profilometer output tapes for the bore pictures shown in this feature. Our shop has done a pretty good job matching the bore finish to our ring requirements. Additionally the bore geometry is nearly perfect. It’s impossible to judge bore finish without the profilometer. You have to have the data to know the result of the actual work.
If you’re going to use a blower or nitrous, then the Rk and Rvk need to shift upward about five to ten numbers each as you might run higher tension rings in some locations, but you’ll certainly deal with increased cylinder pressure and higher ring loads, and you’ll need more oil on the wall to keep the ring from galling.
Are you running NASCAR or Pro Stock, or some other application where extremely low ring tension and reduced axial thickness is the norm? Then you need to see a maximum Rpk of 5-10, an Rk of 15-25, and an Rvk of 25-35. These are general numbers — you should always consult with your ring supplier for specific recommendations for your application. If you’re going to run modern ring and piston designs, you’ll need a machinist willing to invest $5,000-$10,000 in a profilometer, and you must ask for and retain the output tape as part of your build log. Simply following a recipe that says something like, “this stone at this pressure and rpm for this amount of time, then this stone for so long or so many strokes” will not guarantee the result because it all depends on block hardness. You might get close, but there may be 40-50 horsepower difference between “close” and “right.”
Each engine block is unique, each honing machine is unique, and the maintenance of the machine (stone condition, wear and taper, honing oil condition, and machine calibration and upkeep) is unique to the shop culture where it lives. Even the honing oil type, temperature, and cleanliness affect the core roughness numbers. Achieving the correct core roughness, reduced peak height, and reduced valley depth can’t be expressed by a simple set of instructions.
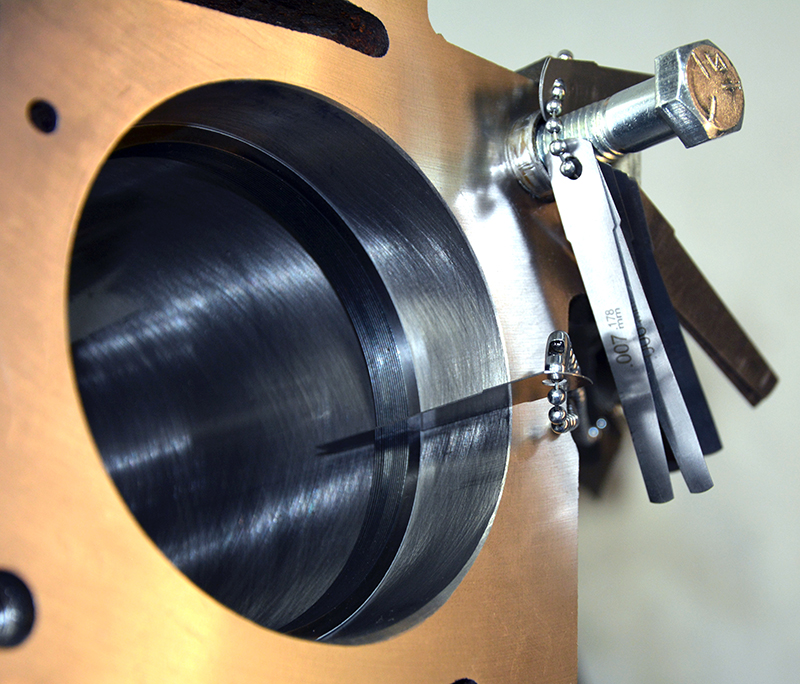
Just as important as the finish is the geometry of the bore and the cross hatch. Blocks should be honed using torque plates, preferably plumbed with hot water, using the same fastener torqued to the same values as the cylinder head, mounted with the same gasket you intend to use under the head. The bores should be round, free from taper and distortion from top to bottom with dimensions held to +/- .0002 in. Don’t let anyone tell you this isn’t possible because I can tell you it is. Our blocks often come back +/- .0001 in.” measured at six locations from top to bottom at 12 and 6 o’clock and 9 and 3 o’clock (checked from the bottom with the cylinder head and gasket torqued in place). Notice that I did not say it was cheap — I said it could be done. The very best shops out there are almost artists when it comes to their work and you can expect to pay extra for round bores and proper finishes.
The cross hatch shouldn’t appear to vary from top to bottom, which would be a condition called “stacked crosshatch.” Sometimes during honing, an operator will hold the hone high or low in the bore to correct a localized irregularity, which is absolutely a normal process. But the final finish mustn’t display an irregular crosshatch pattern. The appearance of the bore should be bright and shiny, not dull or burnished. The crosshatch should be uniform and consistent and the included angle between the strokes should be 45 degrees for most applications.
The crosshatch helps induce ring rotation and it affects how much oil is moved up and down the bore. It essentially acts like a helical oil seal. If you’re running a very long stroke engine, then increasing the included angle more toward 50 degrees or so will help move oil up the bore more effectively. For very high speed engines, you may need to move the cross hatch angle down to something approaching 30 degrees. Most racing applications will land somewhere between 32 and 45 degrees.
Too steep an angle can increase ring rotation and accelerate wear as well as cause excess oil consumption. Too shallow can cause ring chattering and lubrication issues. Your best bet is to talk to the technical advisors at your ring company and to your block machinist to ensure that you optimize your combination.


0 Comments