Here are the basics of wheel bearing diagnosis and service, as well as some old-time wisdom and techniques that used to be a little more commonplace prior to the information age. We’ll focus on the fixed-preload cartridge style wheel bearings that are most common in modern vehicles.
These days, a lot of emphasis is placed on teaching the electronic and engine management skills associated with automotive diagnosis and repair because they are the most rapidly changing and complex aspects of our industry. However, this does not make mastery of “basic” skills such as wheel bearing diagnosis and repair any less important. Which do you suppose would cause your customer more concern, a MIL/Check Engine Light on, or a wheel falling off? Wheel bearing service, while relegated to “B” skill level in the labor guide, requires skill and knowledge to be performed properly. This skill set can be easily missed in automotive school and in continuing education, and is often taught on-the-job by a co-worker, which can be good or bad, depending on the teacher.
Finding Bad Wheel Bearings
Wheel bearing failures fall within one of two categories: noise/roughness or excessive play. Either way, your customer may not notice anything until the problem has developed into an unacceptable safety issue. Wheel bearing noise may go unnoticed by a driver because the level increases gradually. The noise may be very subtle, similar to the noise caused by rough road surfaces at first and the driver may not notice that the noise continues on smooth roads as well. With every mile driven, the noise gets a little worse, but the day-to-day increase is so slight, it does not register with the driver. Therefore, it is important to road test cars when they are in for service. A wheel bearing will make a droning noise while moving; in the beginning stages it may only be audible at 35 MPH or greater.
Wheel bearings are not the only possible sources of droning noises. Irregular tire wear, aggressive tread patterns, axle shaft support bearings, and output shaft or differential carrier bearings can all make noises similar to a bad wheel bearing. So how can these other sources be eliminated as the cause?
Road Test Procedures
A road test is critical because it is the only way to test the wheel bearing and drivetrain under strain. A series of maneuvers and observations will help isolate the cause of the noise. First, accelerate and decelerate slightly while the noise is occurring. Usually, transaxle or differential problems will be affected more by acceleration or deceleration than will wheel bearings. So, if the pitch and amplitude of the noise change substantially with drive train load, suspect the transaxle. Next, swerve the car side to side, if the noise changes with side load, it usually indicates a wheel bearing is the source of the noise. If a variety of road surfaces are easily accessible, take note of how the noise responds to rough and smooth roads. Wheel bearing noise will not be affected by road condition, but tire noise will. Finally, take note of where the noise sounds like it’s coming from: front, rear, left, or right.
Rack Inspection
Once back at the shop, rack the car and check the tires for irregular wear and proper pressure. A scalloped or feathered tread pattern can make a noise very similar to a worn wheel bearing. Also, some ultra-aggressive tread patterns will make noise, even when the tread is in good condition. If the tires are suspect, and the location of the noise seemed obvious during the road test, rotation followed by another road test may be helpful. If not, substituting wheels from an identical but noiseless car can be helpful (but not always possible).
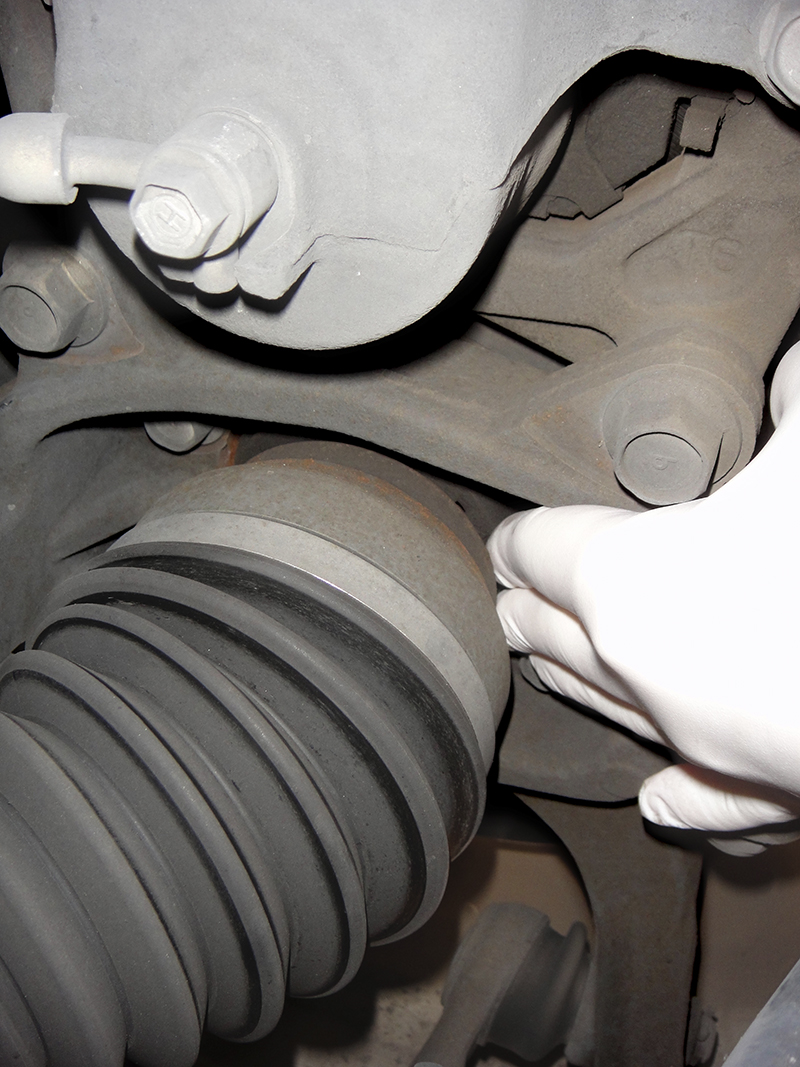
If you find play in the wheel, have an assistant rock the wheel while you determine if the wheel bearing is the source of the movement. Ball joints, bushings, and loose suspension bolts can also cause play.
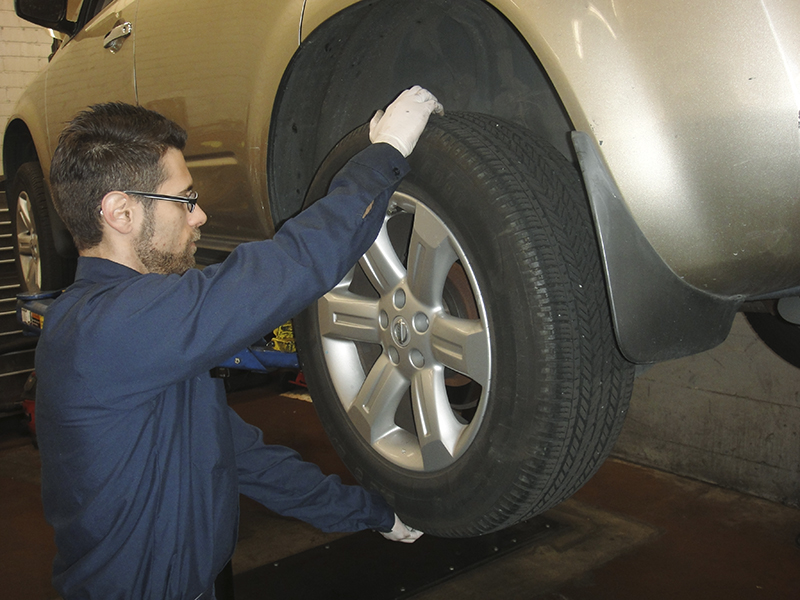
If the tires look okay, check for play in each of the wheel bearings by grabbing the tire at 12:00 and 6:00 o’clock, then attempting to rock it by alternately pushing with one hand and pulling with another. If the wheel has play, have an assistant continue to rock the wheel while you verify the movement can be felt by touching the outer CV joint and the knuckle, or the rotor and the knuckle. If movement is found, use a dial indicator and service manual to verify whether or not it is out of specification (usually, only a couple thousandths of an inch is allowed at the hub).
Now, the tricky part: All wheel bearings with excessive play are bad, but not all bad wheel bearings will have excessive play. In fact, you’ll find a great number of wheel bearings that make terrible noises, but do not have any play at all…. yet! Noise is caused by pitting on the races or the balls/rollers, but unless the pitting is prolific enough, the un-pitted areas of the bearings may be able to maintain proper preload, and there will be no play as a result. However, a noisy bearing with no play is not “good to go.” Roughness in wheel bearings will cause extra friction and heat. Once a bearing has started to make noise, it can fail very rapidly, especially if it’s worked for a long time without a break, which might occur during a long freeway drive.
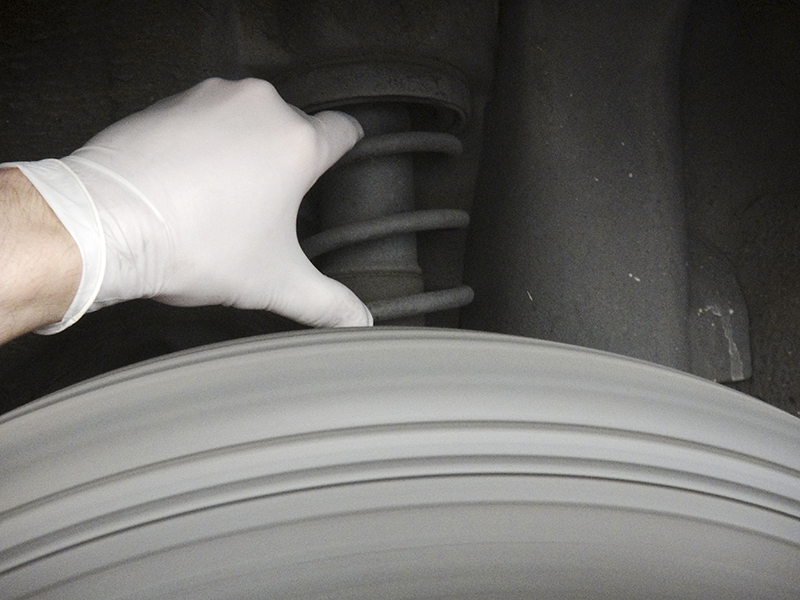
Springs do a pretty good job of amplifying vibration enough to be felt. When in doubt, compare side to side.
When a car is on a rack, the wheels are unloaded, and a normally noisy wheel bearing may fall silent. One technique that is quite useful is to spin the wheel while holding the spring. Vibrations from the wheel bearings are amplified by the spring and can be felt even though they cannot be heard. This works especially well on the non-drive wheels because they spin more freely due to the reduced rotating mass. “Driving” the car on the rack and using a stethoscope to listen for noise at the knuckle will work for some cars. However, most modern cars are equipped with ABS and VSC, so trouble codes will almost certainly set during this type of testing. Also, extreme care should be used when working around moving parts.
What If the Source isn’t Obvious?
If road testing and rack inspection do not reveal the source of the noise, a Chassis Ear can be used to listen to the car while the driving on the road. With a microphone clipped to each knuckle, you’ll be able to listen while the wheel bearings are loaded to find the noisy one. The only downside is the setup time and the inevitable wear and tear on the Chassis Ear (microphone clips sometimes fall off, and do not survive being dragged along the asphalt).
Replacing Wheel Bearings
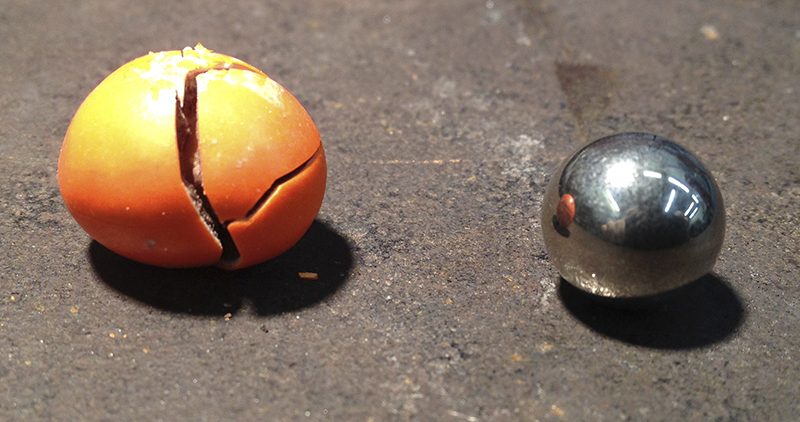
Ball bearings and bearing races are surface hardened, and can crack or chip if too much force is applied, like the m&m in this photo.
Replacing wheel bearings, like all things, is easy if you know how to do it. However, it’s possible to ruin a wheel bearing during the installation, or to overlook wear that will cause a repeat visit. Here are the key points to remember:
- Verify the hub is true, especially if you suspect that a collision caused the bearing failure.
- Always inspect the knuckle bore and hub sleeve for wear or burrs.
- Always install retaining clips.
- Never put any load on the balls or rollers while pressing in the new bearing.
- Always install new seals and LUBRICATE them before installation.
- Always use a torque wrench to install the axle/spindle nut.
- Always use a new cotter pin or lock nut.
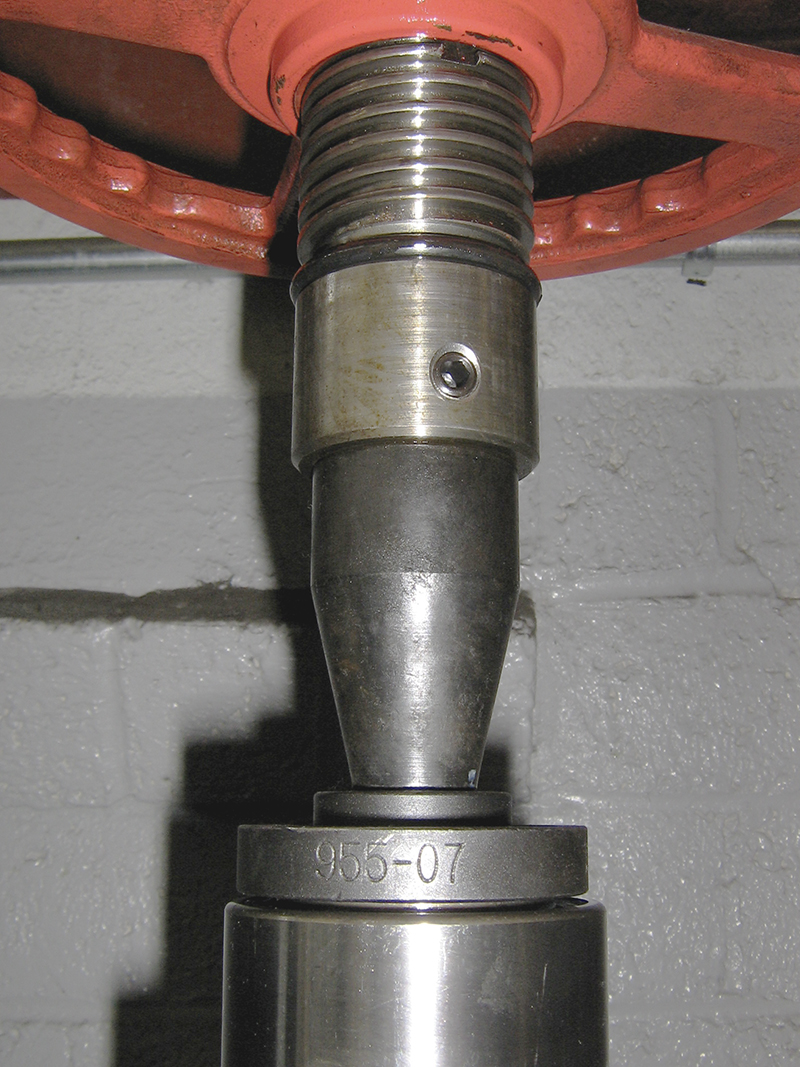
Pressing on the inner race like this will put too much pressure on the bearings and races and can cause premature failure.
Detailed bearing removal and installation instructions can be found online at nissantechinfo.com and infinititechinfo.com, but the procedure usually goes something like this:
Pre-Removal Inspection
Check the hub face for runout. You’ll find the maximum specification in the service manual, but it is typically less than .002 in. If the wheel bearing is loose, this test may not be possible.
Removal
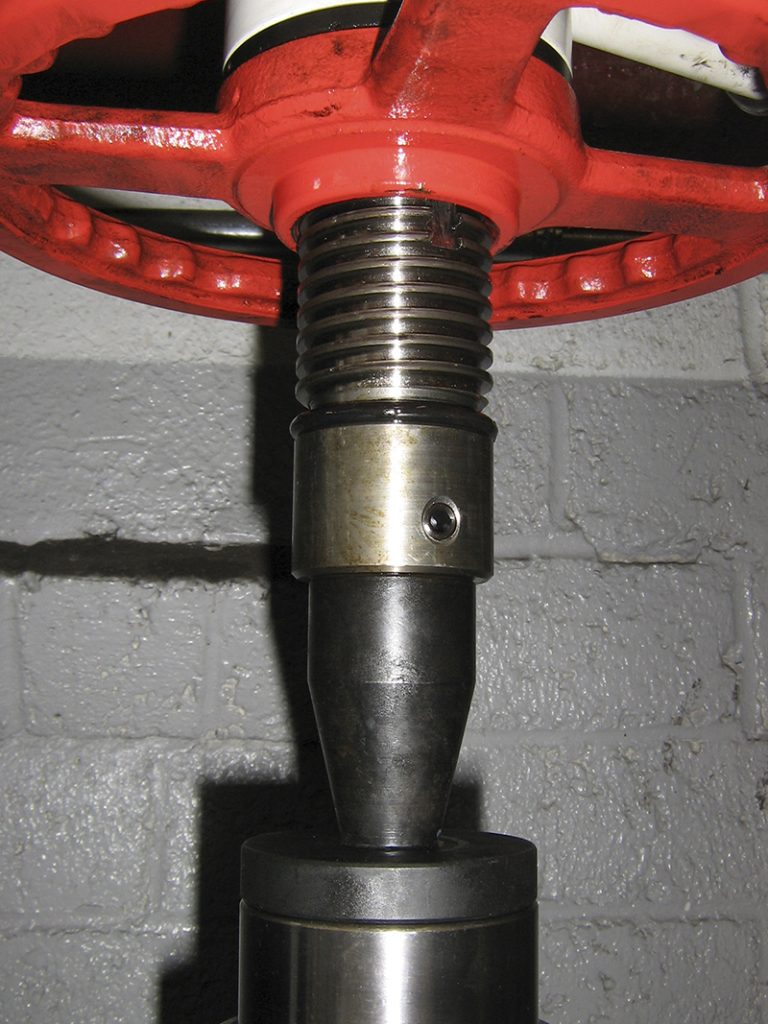
Use an adaptor that is slightly smaller than the outer race and does not contact the inner race to press the wheel bearing into the knuckle.
First, let’s discuss proper pressing technique. When removing the wheel bearing, putting load through the bearing is okay. This is because there is no other way to press the bearing apart and IT’S NEVER ACCEPTABLE TO REUSE A WHEEL BEARING ONCE IT HAS BEEN SEPARATED FROM THE HUB AND KNUCKLE.
To remove the bearing:
- Support the knuckle with a suitable tool and press the hub out of the bearing being careful not to damage the splash shield.
- Remove the seals (if any).
- Remove the bearing retaining clip.
- Support the knuckle from the other side then press the wheel bearing from the knuckle.
- Remove the inner race from the hub.
- Throw the bearing in the scrap metal bin. It should never be used again.
Post-Removal Inspection and Dressing
The areas of the knuckle and hub that contact the bearing must be free of defects. A small pocket or recession is acceptable, but a raised area is not as it may catch and gall the surface during installation. Check the knuckle bore for burrs or galling. Remove any raised areas with a mill file or stone. Check the hub sleeve for wear. Most of the time, hub wear will be obvious once the outboard inner race is removed. When in doubt, use calipers or a micrometer. The hub sleeve should be the same diameter where both of the races ride.
Installation:
- Some wheel bearings contain a magnetic encoder for the ABS sensor on one side and are directional; they must be installed with the encoder on the correct side. Always take a few minutes to consult the service manual before starting the job to avoid this and other pitfalls.
- Make sure the knuckle bore and hub sleeve are clean and grit-free. Use a lint-free rag wet with acetone (brake cleaner) or rubbing alcohol. Press fit lubricant is not required, but it does make the job a bit easier. Grease or oil should not be used on the press fit
surfaces. - Press the bearing into the knuckle PUSHING ONLY ON THE OUTER RACE. Pressing on the inner race can damage the bearing, causing a premature failure.
- Install the retaining clip.
- Lubricate the seals with wheel bearing grease and install (if applicable).
- Press the hub into the bearing. It is important to press only on the hub and the inner race. Pressing on the hub and the knuckle will put pressure on the ball bearings, and can damage the new bearing.
Torque It!
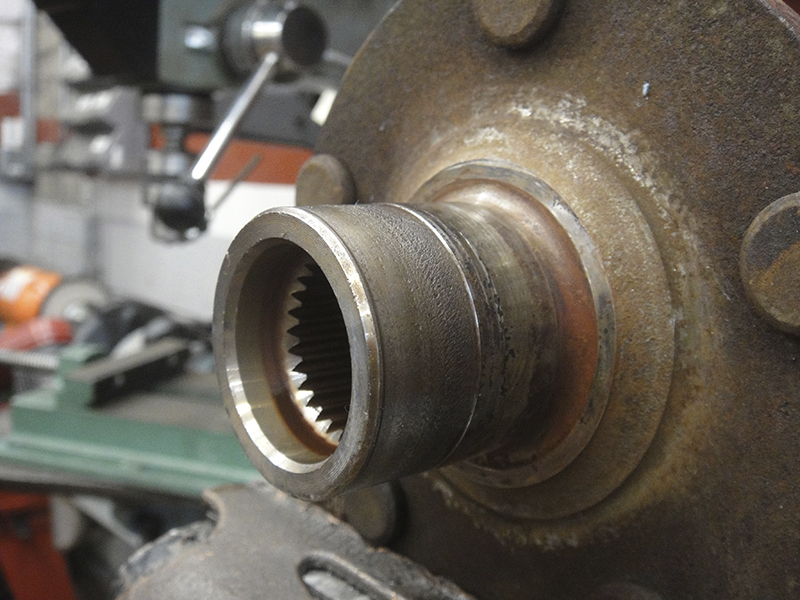
The most common problem is a seized bearing causing an inner race to spin on the hub. The race is a press fit, so if it’s forced to turn, it will quickly start to gall and wear away at the hub.
Immediate catastrophic bearing failure caused by over-torque is not as common as it once was when taper roller bearings with user-set preload were typical. However, torque is still very important, and it’s still possible to ruin a bearing with improper torque. Here’s why: today’s powerful impact wrenches can easily generate enough torque to compress the hub sleeve, and increase preload to the point where there is no longer any clearance left for a film of bearing grease. The bearing will in essence run dry and fail as a result. Axle nut torque specifications can vary anywhere from 80 ft.lb. to almost 200 ft.lb. Achieving the required torque with just an impact wrench cannot be done. Always use a torque wrench, and follow the thread lubrication instructions found in the service manual.
Lock It Up
Most designs will include some sort of secondary axle/spindle nut retention. The nut shouldn’t back off if it is properly tightened, but since keeping the wheel on the car is a priority, one can never be too safe. Common retention methods include staking, cotter pins, and self-locking nuts. Staked nuts should be de-staked before removal to avoid damaging the axle or spindle threads, and should not be reused. Cotter pins and self-locking nuts are also one-time use.


0 Comments