by Kerry Jonsson
In our last installment, we reviewed the service work performed inside a Jaguar transmission. Now, we’re going to look at the work needed outside the transmission, specifically changing the shifter cable and shifter assembly. One of the symptoms that come up with Jags is a trans that’s stuck in park. The cause of the problem is coordination between the shifter module inside the vehicle and the range switch mounted on the transmission. If the shifter’s electronics do not see the same gear position from each component, they will not unlock the shifter even when the brake is depressed. So, you have to make sure the transmission range switch and shifter assembly are functioning properly, then you have to verify proper alignment.
The shifter cable connects to both the shifter assembly and the transmission range switch. If this cable were to stretch over time, it could throw off the alignment. Obviously, if either component were to malfunction this may also prevent the shifter from being unlocked, or cause transmission shifting issues. This work is much easier with certain components removed, so it is best to start before reassembling the driveshaft. First, let’s look at transmission range switch installation.
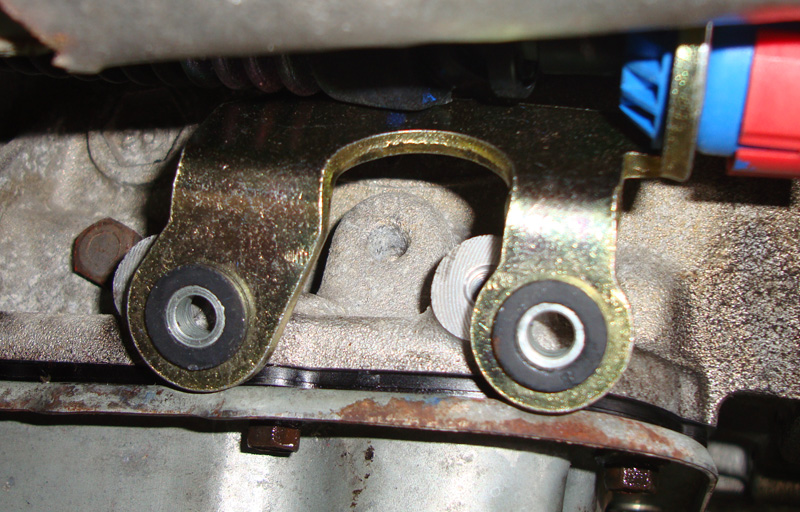
The shifter cable has two mounting bolts on the side of the transmission. Mount this end of the cable first. There is no adjustment here, so you have to make sure it’s right on the other end.
Location, location, location!
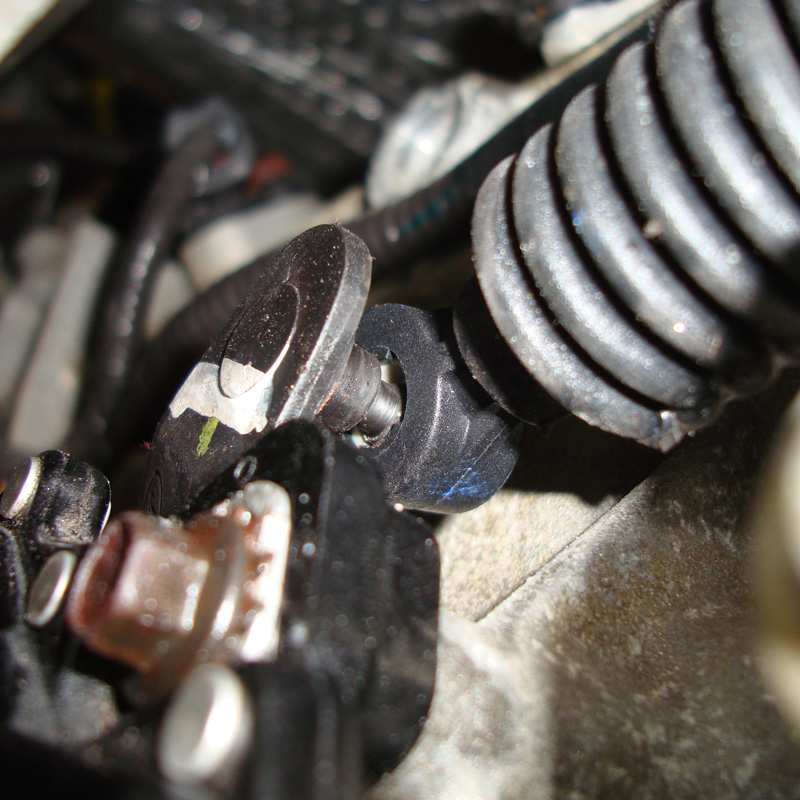
With the cable mounted, clip the socket on the ball of the manual lever. Make sure the lever is all the way in Park and align the shifter in Park. At this point, tighten down the bolts to secure the transmission range switch. In this photo only one bolt is visible.
The range switch may have been removed in the last article, so now it has to be reinstalled. It’s held down my two mounting bolts. These bolts fit into slotted holes in the switch. The slotted holes allow the switch to be rotated a slight amount. This allows the switch contacts to be placed in the correct position for a given gear position. The position of this sensor is important so the driver can start the engine, shift the trans out of gear, and get the ignition key out after moving the shifter into Park.
This component is a simple group of switches that can be checked with a DMM. There are actually two different circuits mounted in it. One is for the starting circuit, and the other four switches are for each gear position on the transmission linkage. These switch inputs go directly to the Powertrain Control Module (PCM). Looking at the wiring diagram provided by Alldata, you can see that the “S” or slate (gray) and “S/O” (slate wire with an orange tracer) need to have continuity with the transmission in Park, so check for it with your meter. Once the switches are in the closed position, you can tighten the mounting bolts.
Installing the shifter assembly
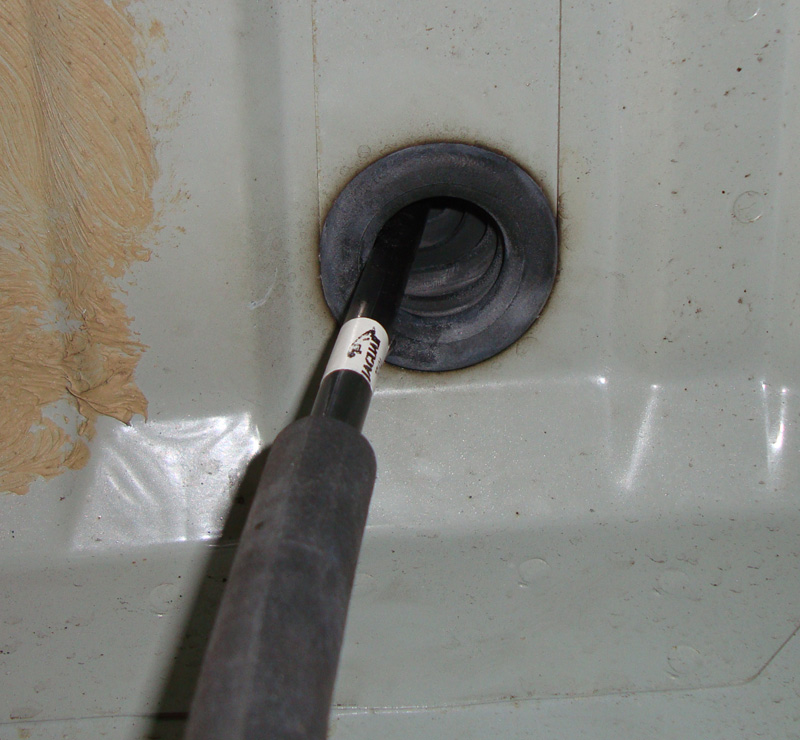
Fish the shift cable through the hole in the floor. Be careful not to twist it into an unusual position or it might bind. Fully seat the grommet in the hole to keep moisture out (it also keeps the cable housing from flexing).
Go wash your hands because you’ll now be working inside the vehicle — please, no grease marks on the beautiful tan interior, something the customer will probably remember.
Shifter removal will be easier if you take out the center console completely. First, turn the ignition key on and move the shifter into neutral, if possible. We understand that the shifter may not come out of Park. If it won’t move, then simply twist off the shifter knob. This will give you more clearance when lifting out the center console. Next, remove the switch plate trim, then the mounting bolts at the end of the console. You can now take out the console. You don’t have to remove the HVAC duct, but you will have to unplug the shifter electrical connectors and two shift cables. The smaller cable on the front right is for the ignition key release. The larger cable along the passenger side of the shifter is the one we have to worry about adjusting properly.
Although there’s a large hole in the floor, no linkage passes through it. It’s actually for the manual transmission found in some European versions. Our shifter bolts right over it. Reconnect the key interlock cable and the electrical connector for the shifter module. This module is a solid-state device that does not have the same simple switches of the transmission range switch. A control unit inside the shifter module sends the shifter position to the PCM through CAN communication. You will need a scan tool capable of Jaguar specific data to look at the shifter position. The only simple circuits in this shifter assembly are for the shift lock mechanism. Referring back to the Alldata wiring diagram, you can see that the brake switch energizes the shift lock relay, which provides power to the interlock solenoid if it is in the Park position. This allows the shifter to be moved out of park. Now, you have to make sure the position of the shift gate matches the transmission range switch gear positions.
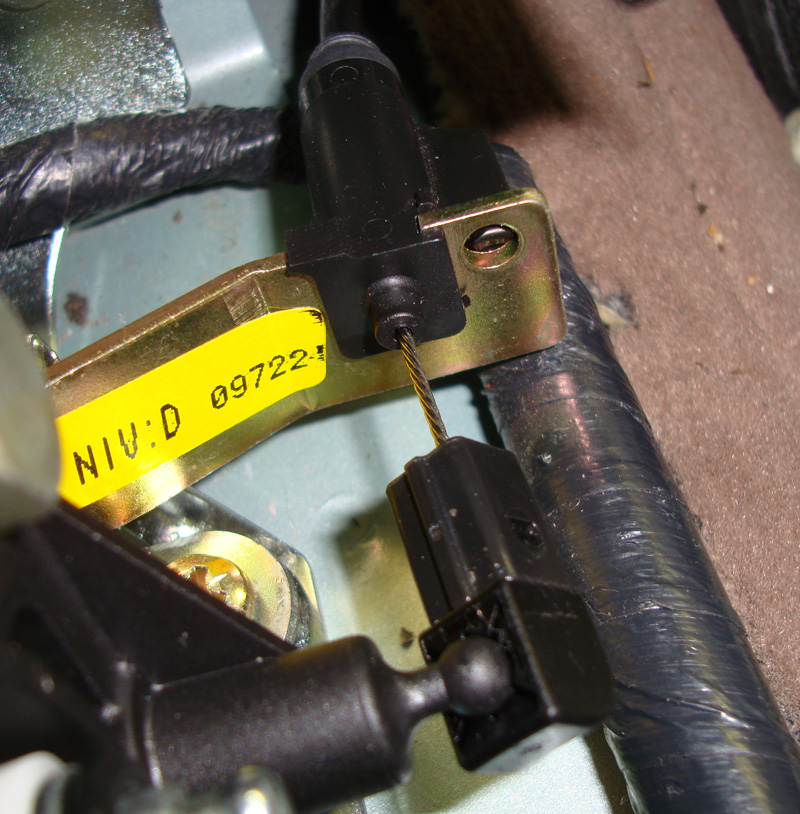
Don’t forget to attach the key interlock cable. This isn’t adjustable, but it doesn’t need to be to get the key out of the ignition switch. While it’s disconnected, pull on the cable and make sure it doesn’t stick.
Finally, installing and adjusting the shifter cable
With the transmission range switch and the shifter assembly installed, you can now install and adjust the shifter cable. Even after all this work, if this isn’t done correctly the vehicle will still not shift out of Park. On the transmission range switch end there isn’t much to do. A ball socket at the end of the cable fits onto the ball mounted to the linkage that goes inside the transmission. It actually moves the manual position lever and also the transmission range switch. There are two mounting bolts that secure the shifter cable housing to the transmission housing. Once this is complete we can “fish” the opposite end of the cable through the body. Make sure the transmission is shifted into Park. This means moving the manual level clockwise, towards the back of the vehicle. Make sure the grommet on the cable is seated in the body to prevent any moisture from entering the cabin. Be sure you have not twisted or kinked the cable in an unusual position at this point to prevent the inner cable from binding. We can now lower the vehicle off the lift and start working inside the cabin.
With the shift cable inside the car, we can attach it to the shifter assembly. The threaded cable housing fits through a bracket coming off the shifter. Clip the socket of the cable to the ball of the shifter. You should position the shifter in Park since the transmission is actually in Park. With the cable attached to the shifter, you can now adjust the tension on the cable with the two large lock nuts at the shifter end of the housing. Back the lock nuts off so you have some room to move the cable. In the rest position, the bracket should be approximately at the center of the threaded part of the cable housing. A tip: Pull the cable housing towards the back of the vehicle, then thread the rear locknut until it contacts the bracket. This will hold the cable housing in position while you tighten the front locknut. Don’t pull too hard. You just want to put a little tension on the cable to take the slack out of it. Now, when you put the shifter in the Park position it will pull the cable and trans lever all the way into Park.
After reassembling the center console, you should clear codes and go for a road test. It would be nice to have a scan tool capable of clearing codes in all Jaguar systems, but clearing the codes in the PCM is good enough. Verify that the transmission shifts through all gears both automatically and manually. If they do not manually, you’ll have to remove some of the center console again and readjust the cable. After you complete the repair, your customer should not have any more problems with getting the vehicle out of Park and shifting. Problem solved.
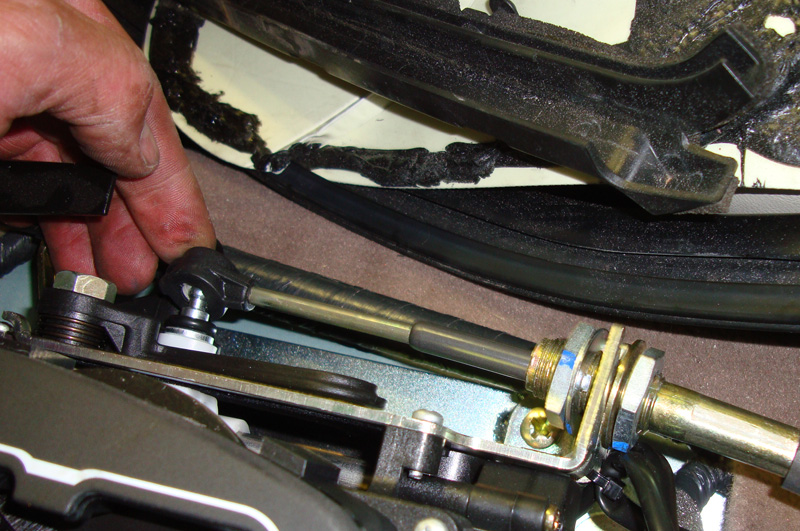
Here is the important adjustment of the shifter cable. With the lever on the transmission and the shifter both in Park, put the ball in the socket. Then, pull on the cable housing lightly and tighten the locknuts on the bracket. As you move the shifter, the trans lever should move with it.


0 Comments