

The bulk of the Volvos you are working on today are pre-2014 and the times, they are a-changing.
If you are working on Volvos today in an independent shop, you are at the beginning of a whole new world for Volvo cars, since most independent shops don’t usually see new Volvos until they are out of warranty. Most shops won’t start servicing and repairing these new Volvos until they are at least four years old, and many shops won’t see them until long after that.
What this means is that the bulk of the Volvos you are working on today are pre-2014 models, and times are a-changing.
There are a lot of new Volvos out there, actually more than there have ever been before.
So stay tuned because Volvo is just getting started.
Luckily for us there are still millions of old Volvos on the road today, but a lot of the fleet is getting older and it’s up to us to keep these old Swedish beasts from going to Valhalla prematurely.
Fuel level sensors
Worn or shorted fuel level sensors causing erratic or incorrect fuel gauge readings
Volvo fuel level sensors have been very reliable over the years.
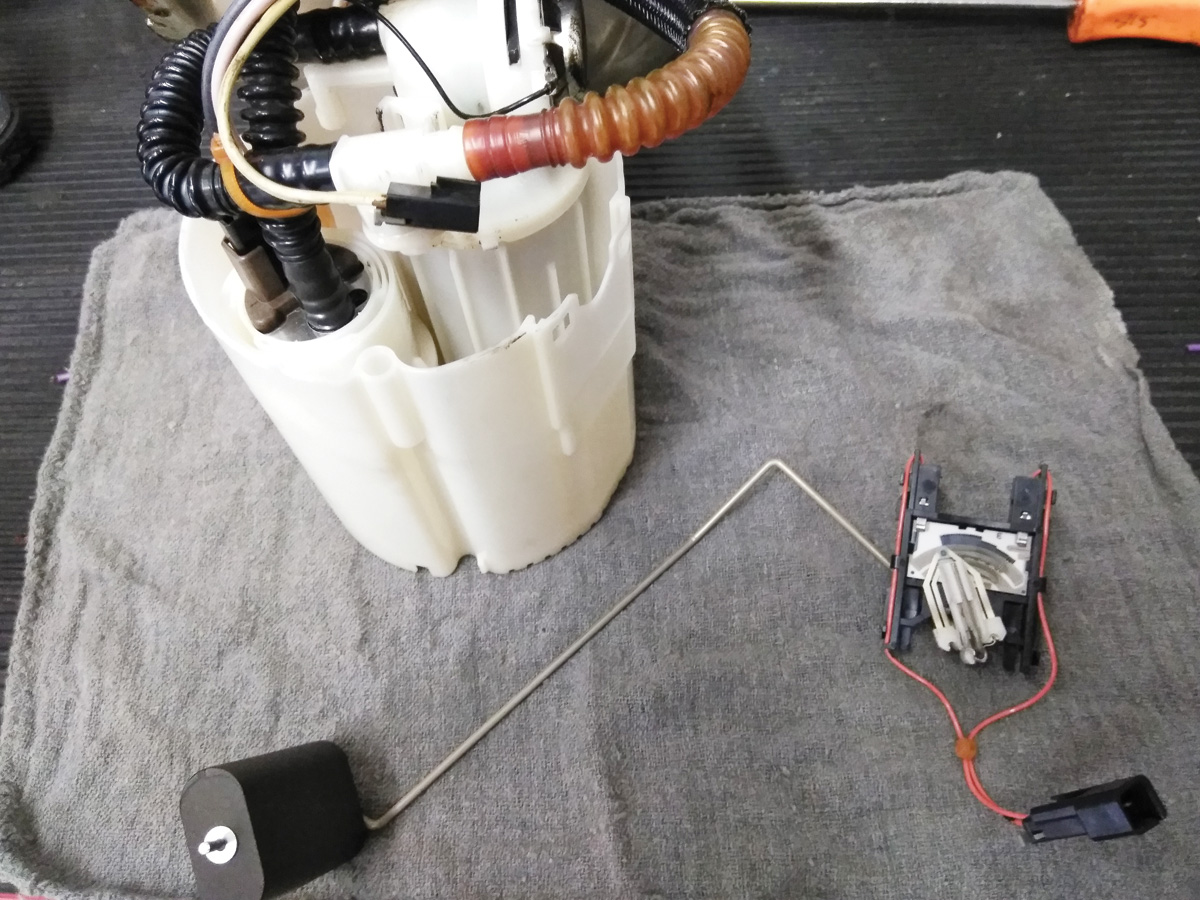
Most modern Volvos use two fuel level sensors and a saddle type tank because of the all wheel drive option for a center driveshaft that the fuel tank must straddle. So two sensors are needed to get an accurate measurement of the total fuel level in the tank.
When theses sensors start to wear, they won’t always set a code in the CEM, because the fault can be very intermittent.
These sensors use a relatively old technology to measure the fuel level. The reason is that it works and is very reliable. Most of them still use a contact arm that sweeps along a series of graduated resistors that are used to tell the gauge what the current fuel level is. The fuel gauge then determines the fuel level by the difference in the reference voltage.
Most Volvos these days use two level sensors, one on the left side of the tank and one on the right. In U.S. market Volvos, the right side sensor is integrated into the fuel pump assembly; the driver’s side sensor is just a stand-alone sensor.
The main reason for this is to get the most accurate readings under all driving and fuel level conditions, as most fuel tanks today are made in odd shapes and sizes to accommodate different body and drivetrain setups. But over time, these sensors can wear down from constant movement and from corrosive elements in the fuel.
Most customers have a routine on how and when they fill up their fuel tanks. This can result in the fuel level sensors’ sweep arms being in the same areas and wearing in the same places.
In most cases, on Volvos, the customer may complain of intermittent accuracy issues with the fuel level gauge, and in 9 out of 10 cases the problem will be caused by a worn or shorted tank sensor.
Of course there is the rare case of a problem with the fuel gauge or Driver Information Module (DIM), but this is very rare in the case of fuel level.
When testing for problems in the fuel level system, you can save yourself a lot of time if you have Volvo’s VIDA software.
You can not only check the codes and freeze frame data (if there is any), but you can use the communication feature to see the live data from both the left and right sensors.
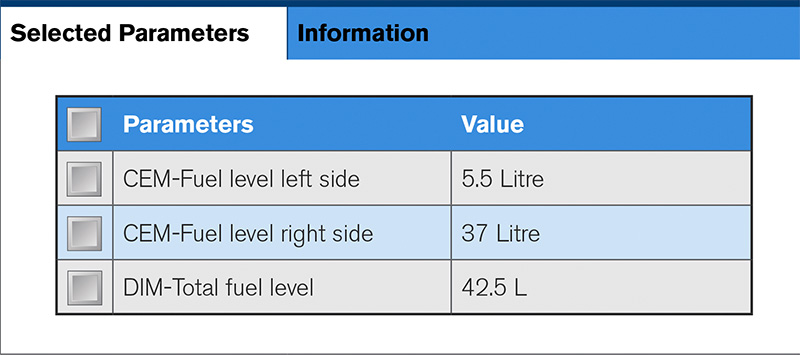
The individual sensor readings will be found in the Central Electronic Module (CEM), and the total fuel level can be found in the Driver’s Information Module (DIM). The readings on the left and right sensors will be different but should add up to the total fuel level.
On a Volvo that has a problem with one of the sensors, there may not be a code stored since the glitch can be very intermittent.
But if you use VIDA, you can watch the live data on the two sensors as compared to the total fuel level and you should be able to see the glitch when it occurs.
Of course it’s best to always follow the electrical testing procedures to verify that the problem is caused by a worn fuel level sensor before you replace parts.
In some cases, removing the fuel level sensors can be a very large job that involves removing the fuel tank.
If the Volvo you are working on is an all wheel drive model, the job will take you some time. So if you have one side sensor that’s malfunctioning, you should recommend that the customer replace both sensors. This is good advice because the sensors are the same age and you will have to remove all those parts again if the other side fails shortly after the sensor you just replaced.
Alternator noise 2005-2007 S40/V50
This subject is covered in Volvo’s TJ 16341.
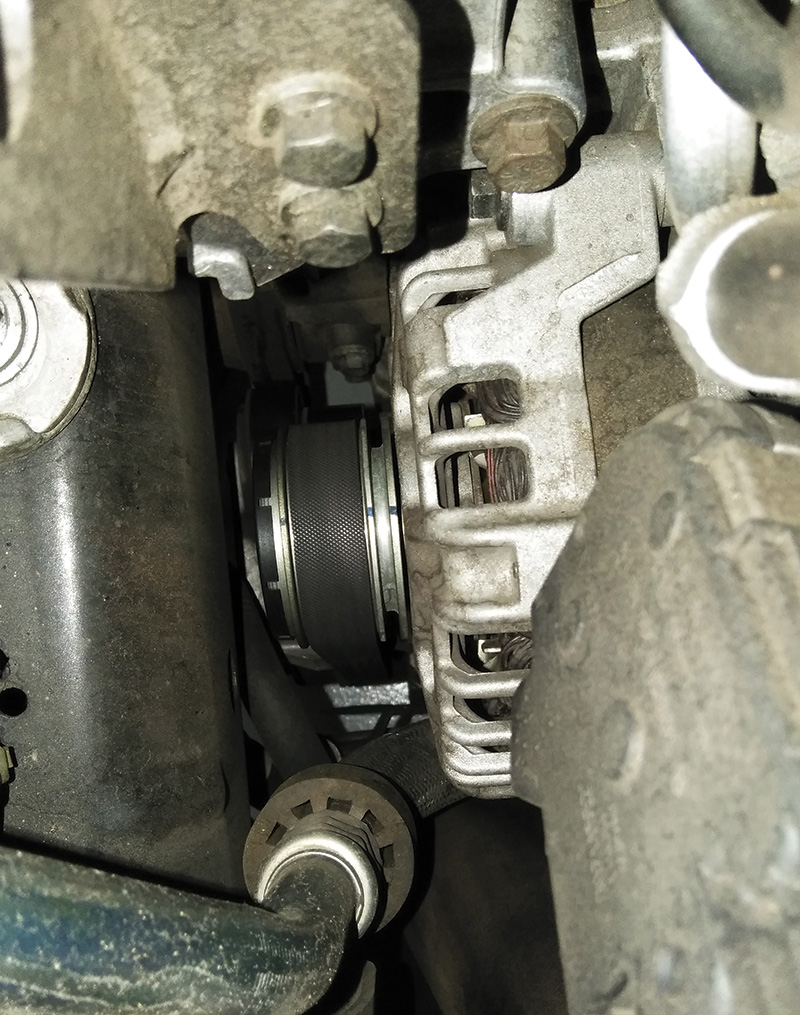
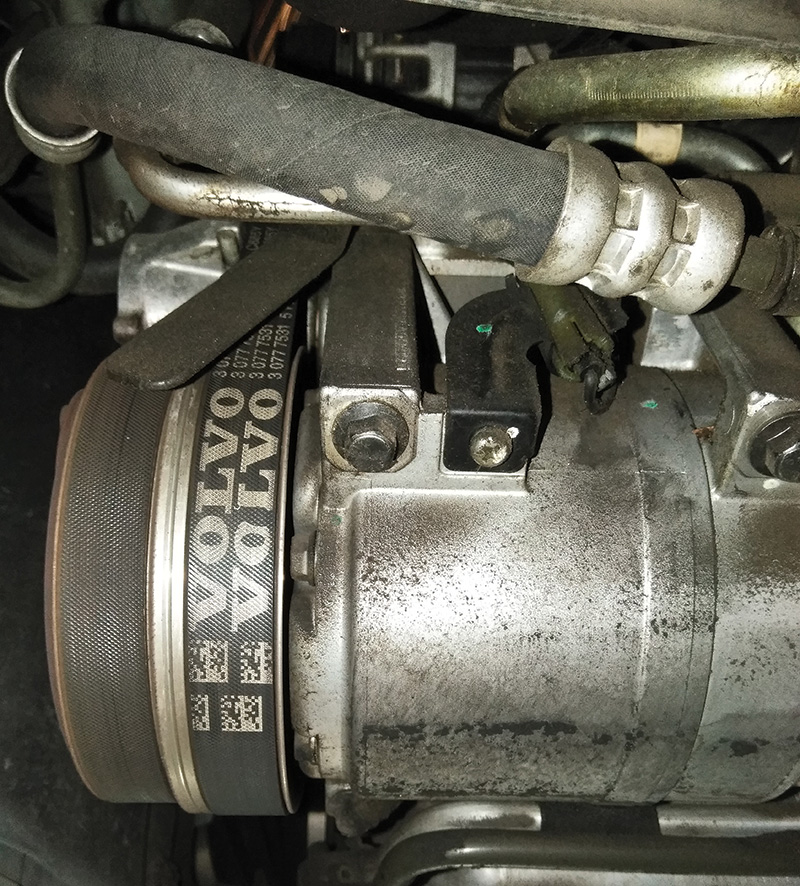
A common complaint seen on the 2005-2007 S40 and V50 is a bearing noise that can come and go with varying engine temperatures and different climate conditions. This can be a high pitched whine or bearing noise that seems to come from the alternator area.
When diagnosing this problem make sure to check not only the belt condition but also the alignment of the pulleys that the belts ride on.
Misalignment of these pulleys can cause a noise that is similar to a worn alternator bearing. Even if you use a stethoscope to pinpoint the noise, it can sound like it’s coming from the internals of the alternator.
Belt alignment is crucial on these cars to ensure noise-free operation and help prevent premature belt wear.
Headlamp internal moisture due to broken guide pin XC90 2003-2013
This Issue is covered in Volvos TJ 27303
Moisture inside a sealed headlamp light assembly is something that is rarely seen on Volvos unless there is a crack in the lens. But on some Volvo XC90 headlamps there is a guide pin that can break off the back of the assembly and allow water and dust to get into the assembly.
These headlight assemblies can be costly to replace, so if you can save your customer some money by repairing them, it can be a good thing.
Of course, the most common problem that these light assemblies have is that the clear coating on the lens has yellowed and fogged up. Most body shops can make these look new by resurfacing and recoating them.
If you get one of these in your shop, the assembly can be saved with a little cleaning and repair.
Volvos TJ 27303 uses a sticker to seal up the hole in the back of the assembly, where the guide pin used to be. The part number is 30779754.
STEERING ANGLE SENSOR MOST VOLVO MODELS 2001-2007
The Steering Angle Sensor, or SAS on a Volvo is a very important part of the vehicle’s stability and traction control systems.
Volvo has been using them on all their cars since 2001. The design of the sensor has evolved over the years, but the basic purpose has not changed.
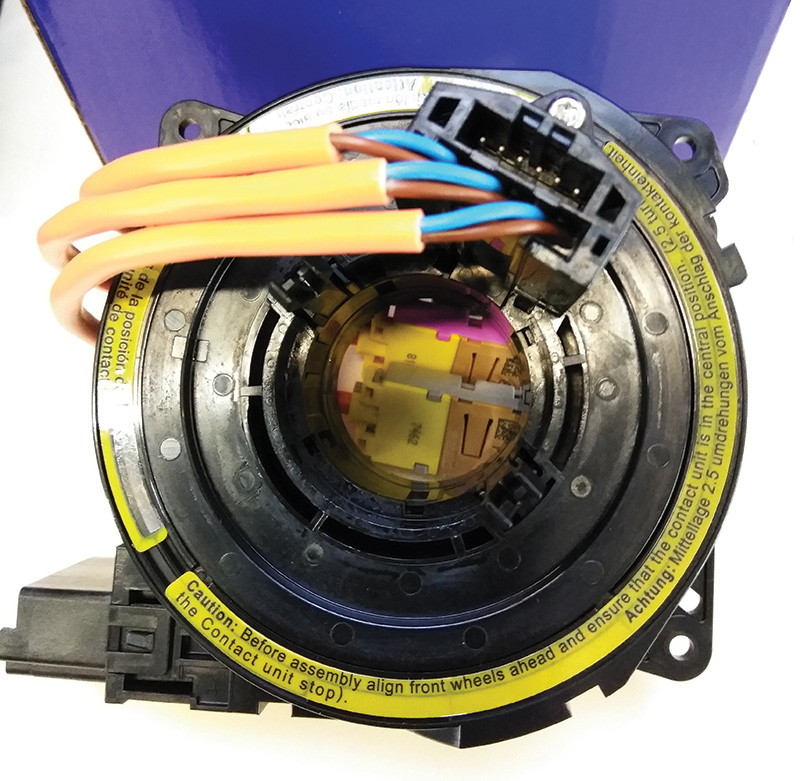
The SAS is integrated into the steering wheel’s contact reel. Its only job is to accurately report the angle of the steering wheel in real time.
Here is how it works….
STEERING WHEEL ANGLE SENSOR MODULE (SAS)
After initiation, with the ignition key in position II and when the steering wheel is turned 4.5 degrees in any direction, the steering wheel angle sensor module continuously transmits information about the steering wheel angle position to the Brake Control Module (BCM) to calculate the intended direction of travel. The steering wheel angle sensor module also transmits information to the Suspension Module (SUM).
Communication between the SAS and the BCM occurs on the high speed side of the Controller Area Network (CAN). The SAS is integrated in the Steering Wheel Module (SWM).
The SAS is powered via the steering wheel module (SWM).
STEERING WHEEL ANGLE SENSOR
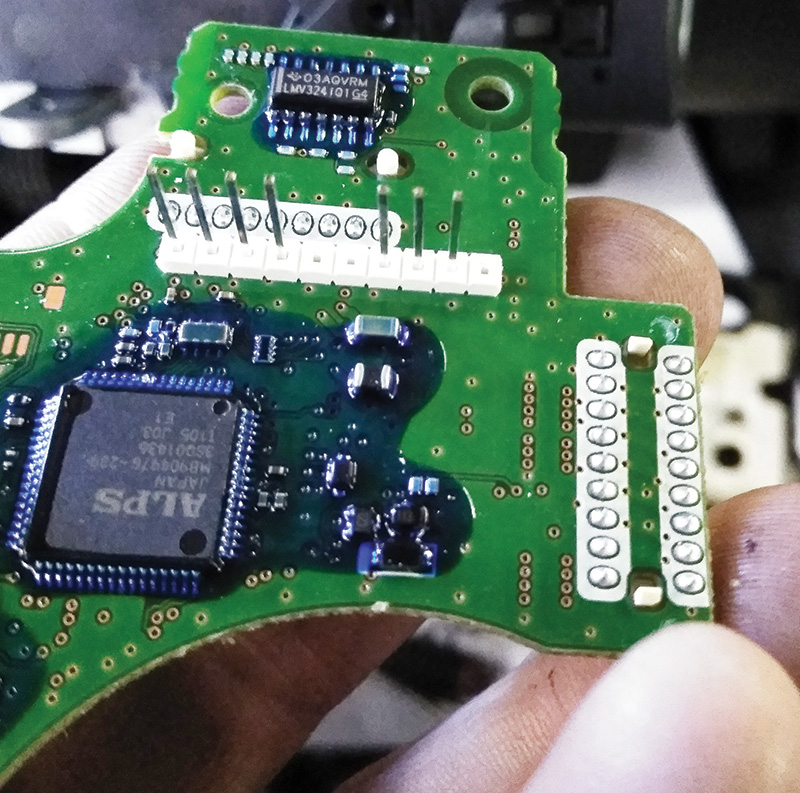
The steering wheel angle sensor is incorporated with the SRS contact reel, which in turn is installed on the steering wheel module. A code wheel is mounted inside the steering wheel angle sensor which follows the movement of the steering wheel. Nine optical digital sensors and two analog photo diodes read off the code wheel. The signal must create a specific pattern.
This information is transmitted to the steering wheel angle sensor module which uses these signals to calculate the steering wheel angle, speed, and number of turns. In total, the steering wheel angle sensor can measure a range of +/- 720 degrees, although the steering wheel can only be turned a maximum of +/- 540 degrees.
Due to the reliance of the DSTC (Dynamic Stability and Traction Control) system on information from the steering angle sensor, it is extremely important that the contact reel has been centered correctly and that only an original Volvo steering wheel is used.
A worn steering angle sensor (SAS) will almost always set a code, but not always just in the SAS module. It’s common to see codes stored in the brake control module and central electronic module also.
The steering angle sensor is a CAN module, so that means that when you replace it you will need to use VIDA to order and download a software package for it to work properly.
It’s also a great idea to sell your customer a four wheel alignment as part of the job, as most newer alignment machines have a steering angle sensor calibration capability.
If the alignment is off and you replace the SAS module and download software only, the accuracy of the steering angle may be off a few degrees left or right when the steering wheel is straight.
Instructions for changing the SAS contact reel on a 2012 Volvo XC90 is similar to that on most Volvos from 2001-2007.
As always, with any electrical repair on a Volvo, start this job by disconnecting the battery. It’s always best to wait at least five minutes after the ignition key is turned off before disconnecting the negative battery terminal at the battery.
Make sure to isolate the negative battery terminal away from the post to make sure that the post and clamp don’t come back together while you are handling and removing the largest air bag on the car.
It is extremely unlikely that the air bag would deploy accidentally, but as wise man once said, “Better safe than sorry.”
The next step is to remove the driver’s air bag assembly.
Warning!
Under no circumstances should you use an ohmmeter or other live measuring instrument to take readings on a disconnected, non-deployed pyrotechnical SRS component.
Warning!
Pyrotechnical SRS components must never be taken apart, repaired, or transferred to another vehicle.
Insert the ignition key, and from center, turn the steering wheel 90 degrees to the right.
Insert a screwdriver in the holes on the reverse side of the steering wheel. The screwdriver must be at a right angle to the rear surface of the steering wheel.
Place the screwdriver point against the top of the spring clip as illustrated.
Pry the screwdriver up against the upper edge of the hole so that the point of the screwdriver presses down the catch until the catch releases.
Turn the steering wheel one turn in the opposite direction. Repeat the process on the other side.
Turn the steering wheel to the neutral position.
Fold out the air bag.

Next, carefully release the three air bag connectors by depressing the small clips on the sides of the connector and pulling them straight out.
Be gentle with these tiny locking tabs because they can break easily. Of course, if you are replacing the steering angle sensor/contact reel, the new part comes with new connectors.
Place the air bag unit in a safe place so that in the extremely unlikely event that static or some other mysterious source was to deploy the bag accidentally, it will not hurt anyone or damage the car.
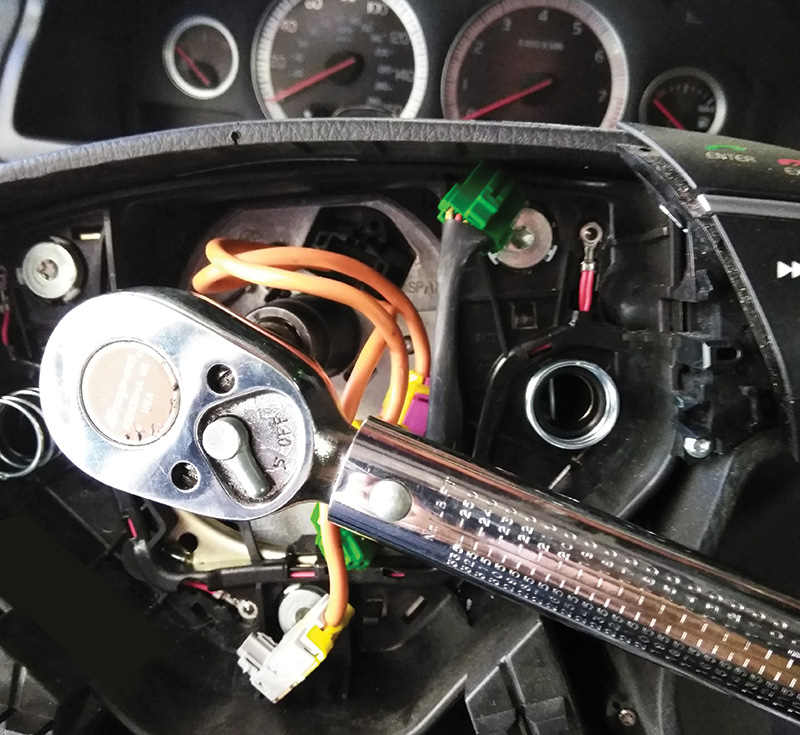
The next step will be to remove the steering wheel.
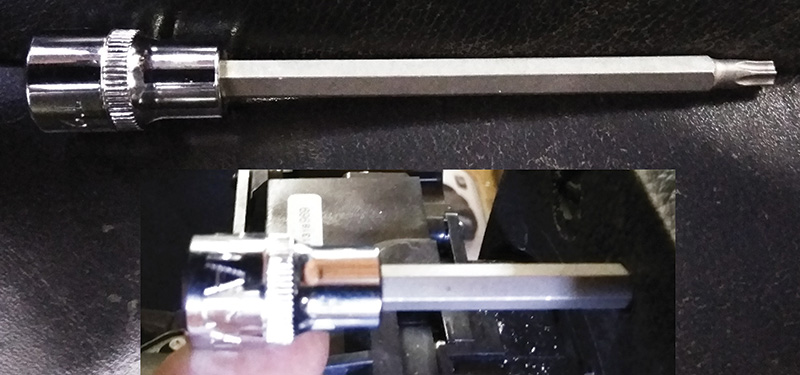
Center the wheel and remove the ignition key. This will engage the steering lock, and will hold the wheel in place while you remove the steering wheel bolt.
Once the center bolt is removed, take a marker and mark the position of the spline shaft and the wheel center so you can put the wheel back on in the exact same position.
Pull the steering wheel off while feeding the air bag wires through the hole in the bottom of the steering wheel.
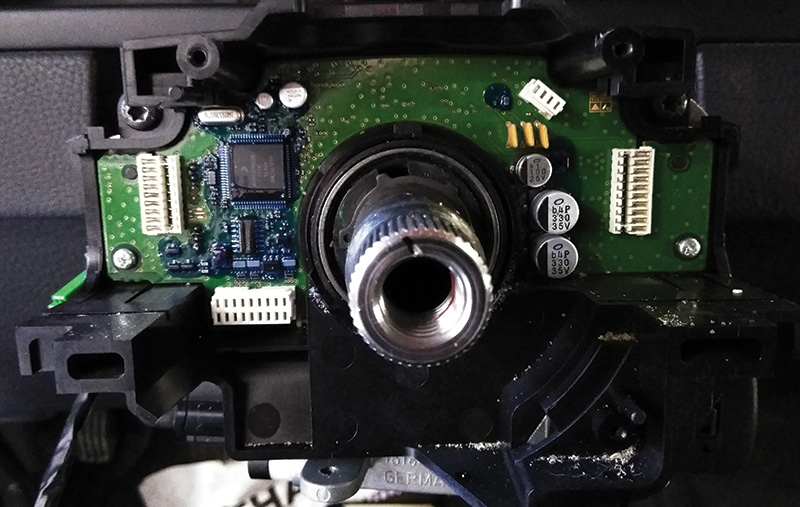
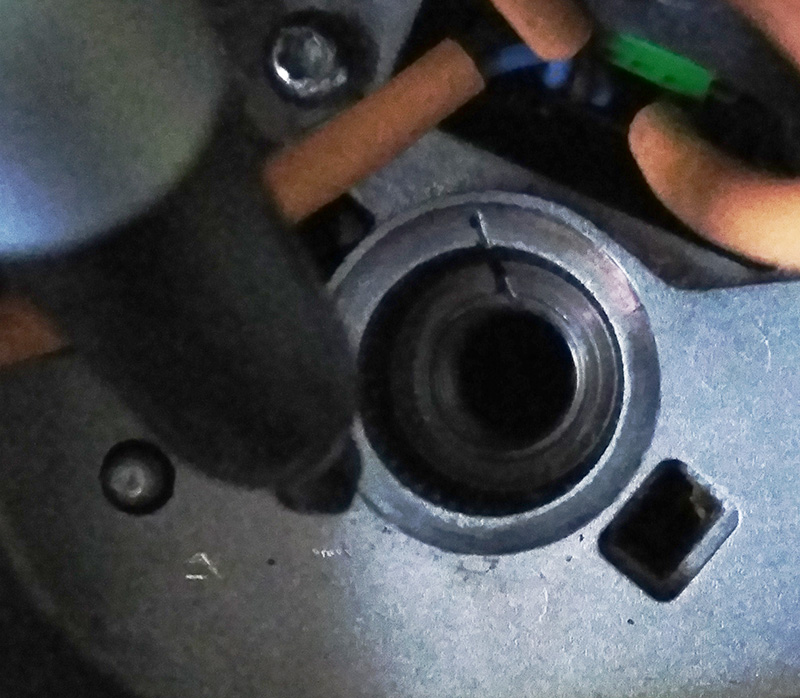
The next step will be to remove the three Phillips screws that hold the SAS sensor assembly onto the steering wheel module assembly.
Be careful to pull the sensor assembly straight out since the pins are very fine and delicate.
Now you can install the new SAS sensor and reassemble. The screw in the new part is to hold the contact reel in place while you reassemble the steering wheel. You will be able to remove it after the steering wheel is back on and bolted down.
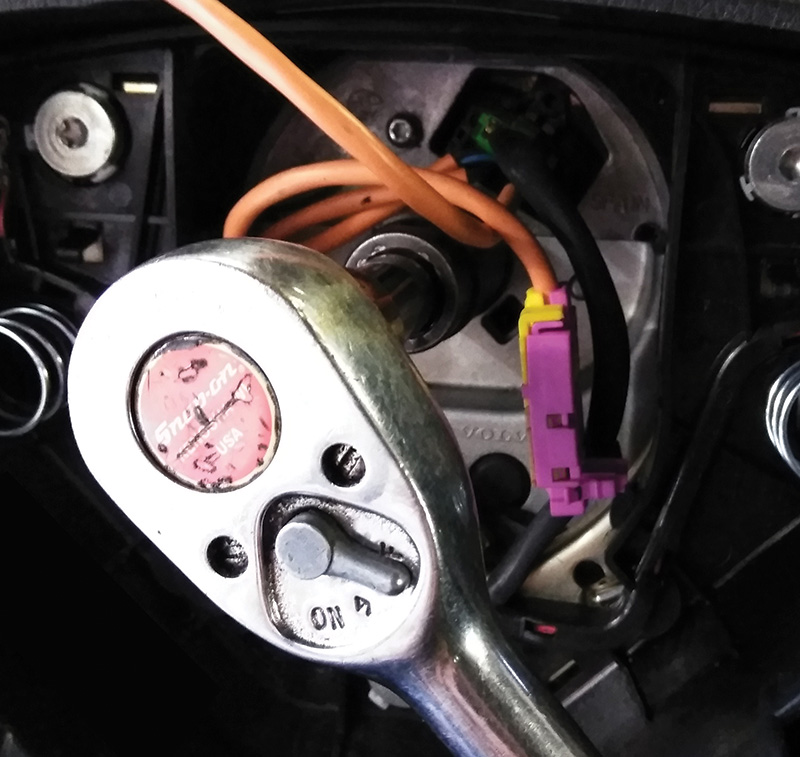
After installing the screws for the SAS sensor and the steering wheel, torque the steering wheel center bolt in two stages: first stage 30 Nm and second stage 30 degree angle torque.
You can now remove the new SAS sensor’s holding screw and install the air bag connectors and press on the air bag.
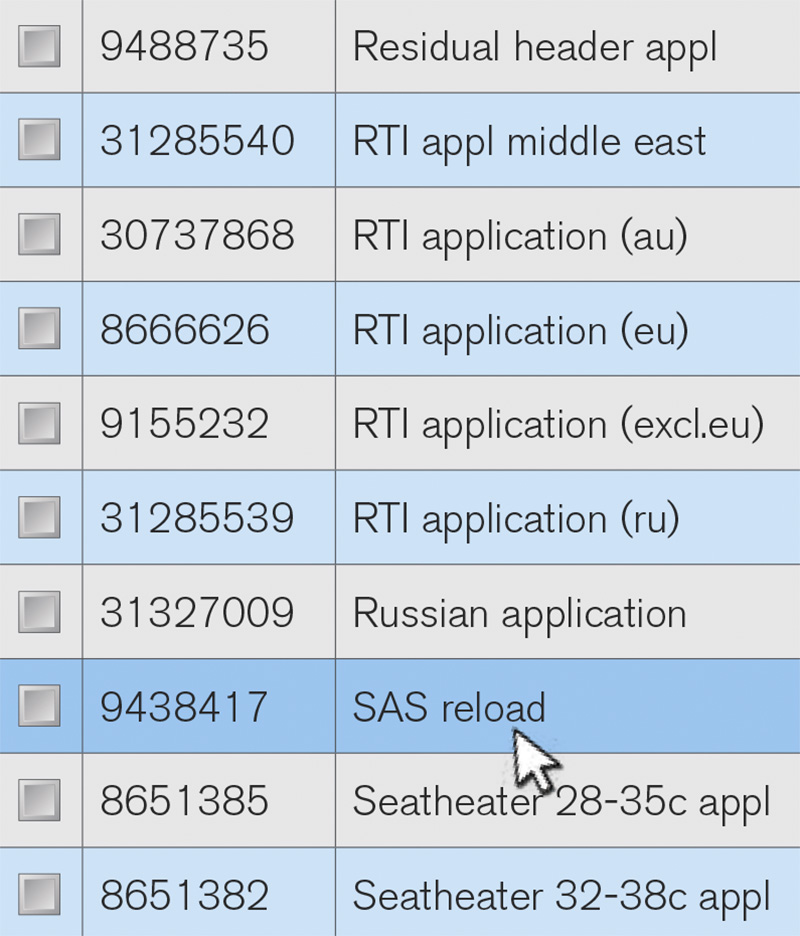
Now it’s time to reconnect the battery and use VIDA to download the software package called SAS RELOAD.
If your shop does not have VIDA, you will need to have someone that does have it install the software, and it’s always a good idea to perform a four wheel alignment with an SAS calibration after this repair is done.


0 Comments