


There is not a lot of aftermarket information out there yet about the procedure of replacing this timing belt. With VIDA, you can get complete, step-by-step instructions.
Independent shops that work on Volvos are working on more and more newer Volvos that are equipped with the relatively new 2.0L B4204 engines in their various configurations.
If you have been working on Volvos for a while, you know that they have had a lot of engine variations over the years, but now they are going back to their roots by using the same displacement engine in all their models, even the hybrids.
Volvo has used a 2.0L engine before, in Volvos made in 1968 trough 1975, that had the B20. Of course the early Volvo 2.0L engine and the new one are galaxies apart in so many ways.
Since these cars are relatively new, most independent technicians have not had the opportunity to replace a timing belt on one of these cars, since the service interval for the timing belt is 150,000 miles or 12 years, whichever comes first.
Of course that service interval is for cars that are driven under the rare and mysterious “normal driving conditions.”
There is not yet a lot of aftermarket information out there about the procedure of replacing this timing belt.
On platforms like Alldata or Mitchell there is very little information, at least that was the case at the time this article was written.
But there is hope. If you have Volvo’s Service, Parts and Diagnostic Application VIDA (Vehicle Information and Diagnostics for Aftersales), you can get complete, step-by-step instructions in the Information tab. You will have to have an active subscription and have the car that you are working on connected or selected.
If you do not already have VIDA, you can learn more about it, including pricing and how to get a VIDA subscription, by visiting volvotechinfo.com and selecting the “VIDA” tab.
Since these cars will soon be out of warranty and getting higher mileage on their odometers, you will have more Volvos come into your shop that will be due for a timing belt replacement, so get ready for them.
The special tools for this job are pretty inexpensive, and when you need them you don’t want to have to put off the job until they come in the mail or from your dealership parts department, just get them now.
Remember Volvo is using this 2.0L engine in all their late models now; that’s a lot of Volvos with basically the same timing belt setup.
The relatively new Volvo 2.0L engine has several improvements that lessen stresses on the parts as compared to any previous Volvo engine.
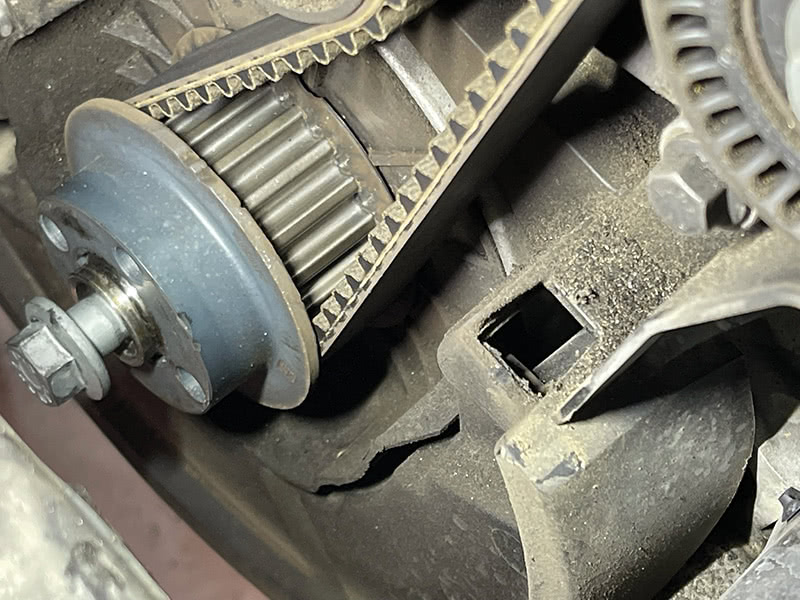
One thing is the huge harmonic balancer and the design of the crank gear and timing belt; the belt teeth are a 1 mm oval shape.
The slight oval shape of the timing belt helps counteract the kind of tight-loose cycling that comes from the power stroke followed by the crankshaft slowing down from the next compression stroke on the next cylinder in the engine’s firing order.

This is a relatively easy job for a skilled technician that has done a few timing belt jobs on other cars.
The tools that are needed to perform this job are pretty standard, but you will need some special tools to do the job right.
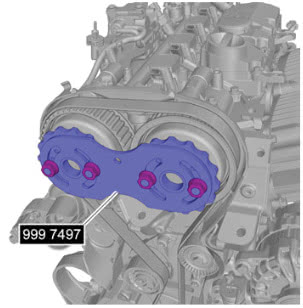
You will need a special tool Volvo calls a Counter Hold Tool (Volvo part # 999 7497) to align and hold the camshaft gears in place when the belt is removed.
You will also need tool # 999 7495, another Counter Hold Tool, which is actually two tools under the same number. They are used together to hold the vibration damper pulley in place while removing and torquing the five bolts that hold it together and mount it to the crankshaft.

Parts needed for this job
Since you only replace this timing belt at 150K miles, it’s obvious that you should use the best parts available; don’t try to save money here — it’s just not worth the risk.
We all know that it’s the timing belt tensioner and idler bearings that are usually the weak points in late style timing belt setups. Do yourself and your customers a favor and only use genuine Volvo factory parts to perform this job.
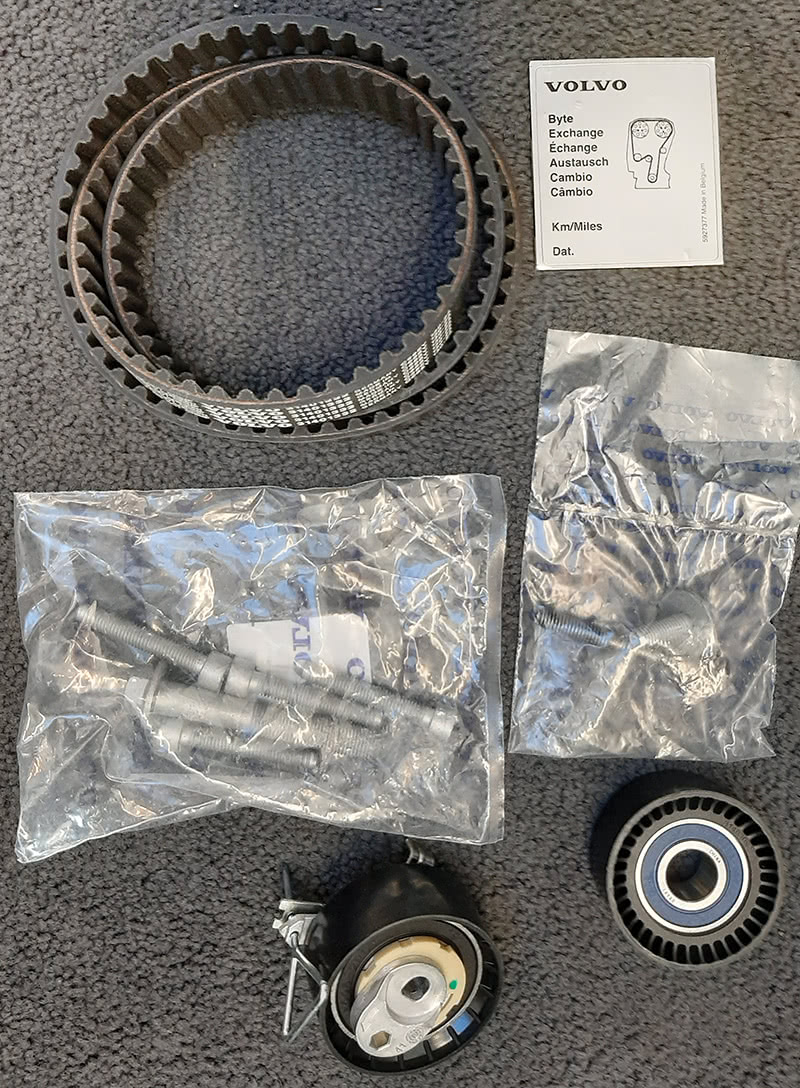
And there’s good news: Volvo sells most of the parts you need for the timing belt job as a kit, part number 32213096. It comes with new bolts, idler bearing, tensioner with bearing, new mounting for bearings, new crank balancer washer and timing belt.
You will still need the special washer that goes between the vibration damper pulley and the end of the crankshaft. You’ll also need to specify a new auxiliary belt.
The crank balancer washer is made with diamond dust and is designed to keep engine vibrations from allowing the harmonic balancer from moving back and forth, which could loosen the bolts over the long service life of the timing belt.
This washer must be replaced any time the harmonic balancer is removed for any reason; the bolts and the washer can be purchased separately.
Torque specs are very important when doing this timing belt replacement. The 2.0L engine is a very complex design with very tight tolerances, so if the torque specs and procedures aren’t followed exactly, you may be setting yourself up for trouble.
| Torque Specs for 2.0L timing belt replacement | |
|---|---|
| Auxiliary belt tensioner and idler mounting bolts: | 24 Nm |
| Timing belt tensioner bolt: | 24 Nm |
| Timing upper cover: | 10 Nm |
| Timing belt idler bearing bolt: | 24 Nm |
| 4 X M10 Damper Bolts |
|---|
| Stage 1: 20 Nm |
| Stage 2: 90 degrees angle torque |
| Central Damper Bolt |
|---|
| Stage 1: 110 Nm |
| Stage 2: 90 degrees angle torque |
Bearing failure is by far the number one cause of timing belt failure in most modern cars. The actual timing belt itself rarely breaks even if the customer goes well beyond the factory recommended replacement mileage interval.
This is because automotive engineers have over-designed these modern timing belts to handle almost anything the engine and driver can throw at them, even in extreme temperatures.
Timing Belt Replacement
Just like all timing belt replacement jobs, you will start by putting the car on a lift and disconnecting the negative battery post on the main battery. On Start/Stop cars, read up on battery disconnection procedure.
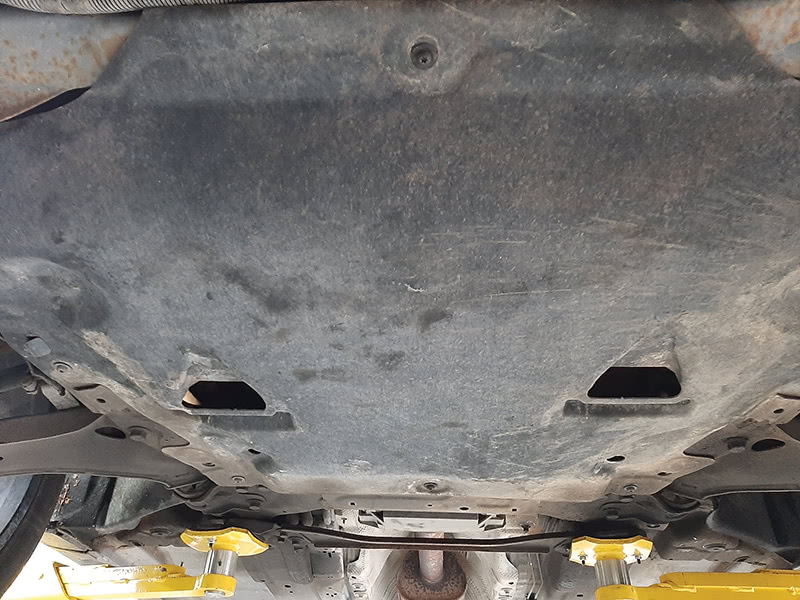
Remove the splash shield under the engine.
Remove the right front wheel.
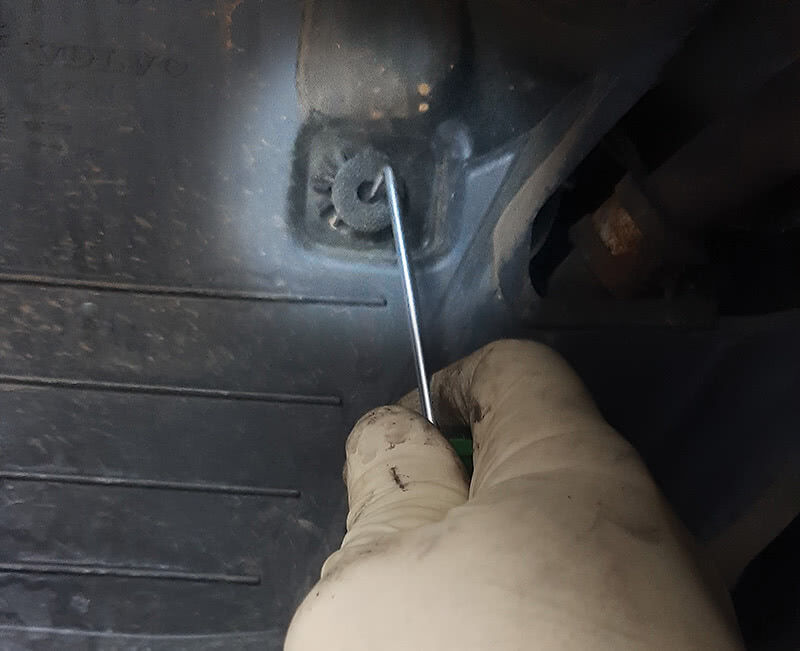
Remove two screws and the plastic 10 mm nut and fold back the inner fender liner to expose the harmonic balancer pulley.
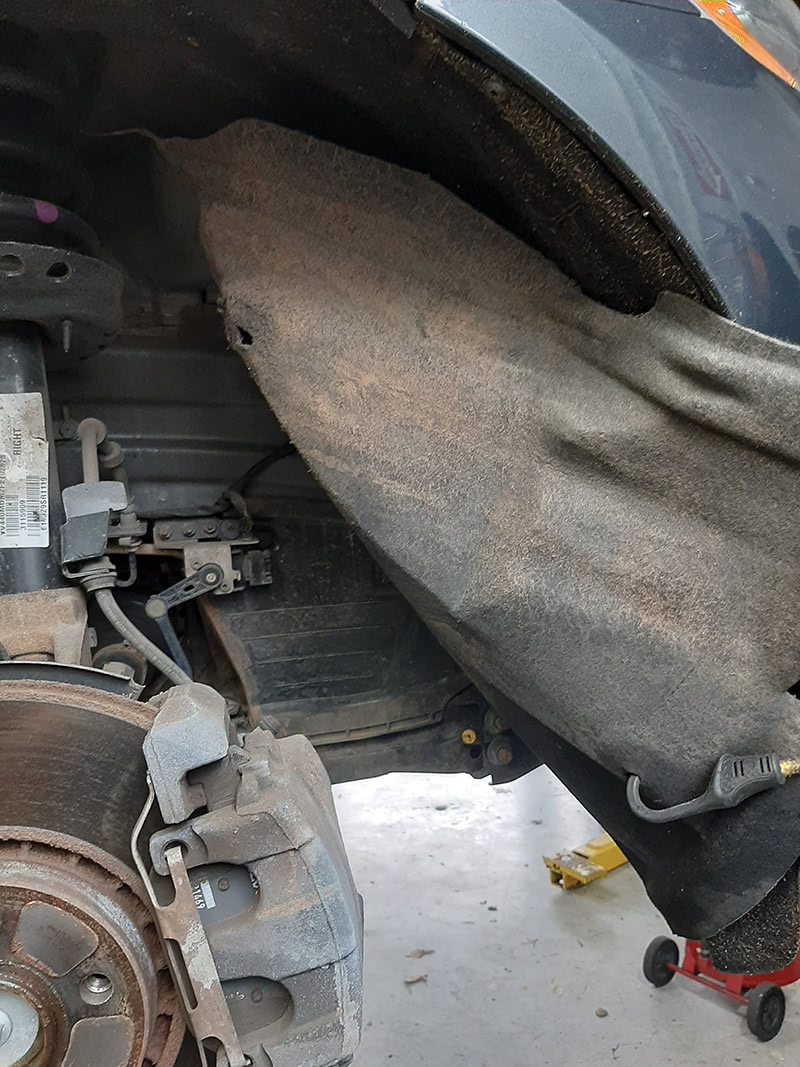
On some of the models there is a second plastic cover under the inner fender liner; remove the two clips and pull it down out of the way.
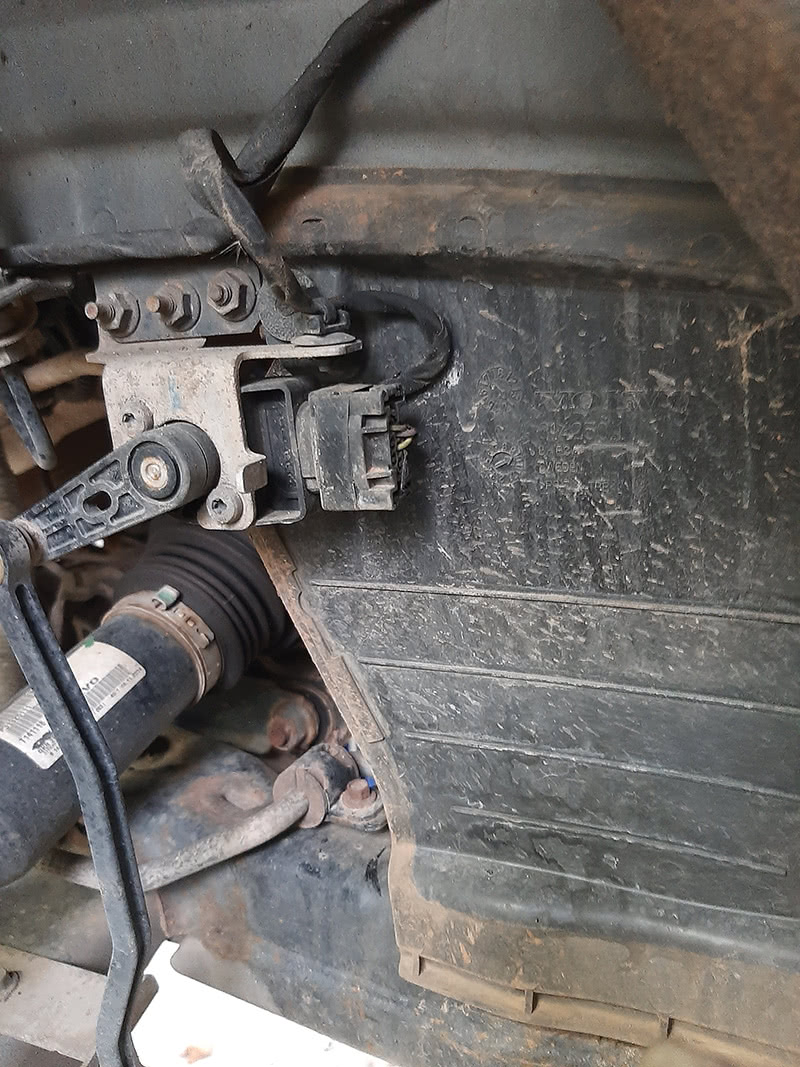
Be careful when working around the load level sensor bolted to the right inner frame rail; you should not have to remove it to do this job.
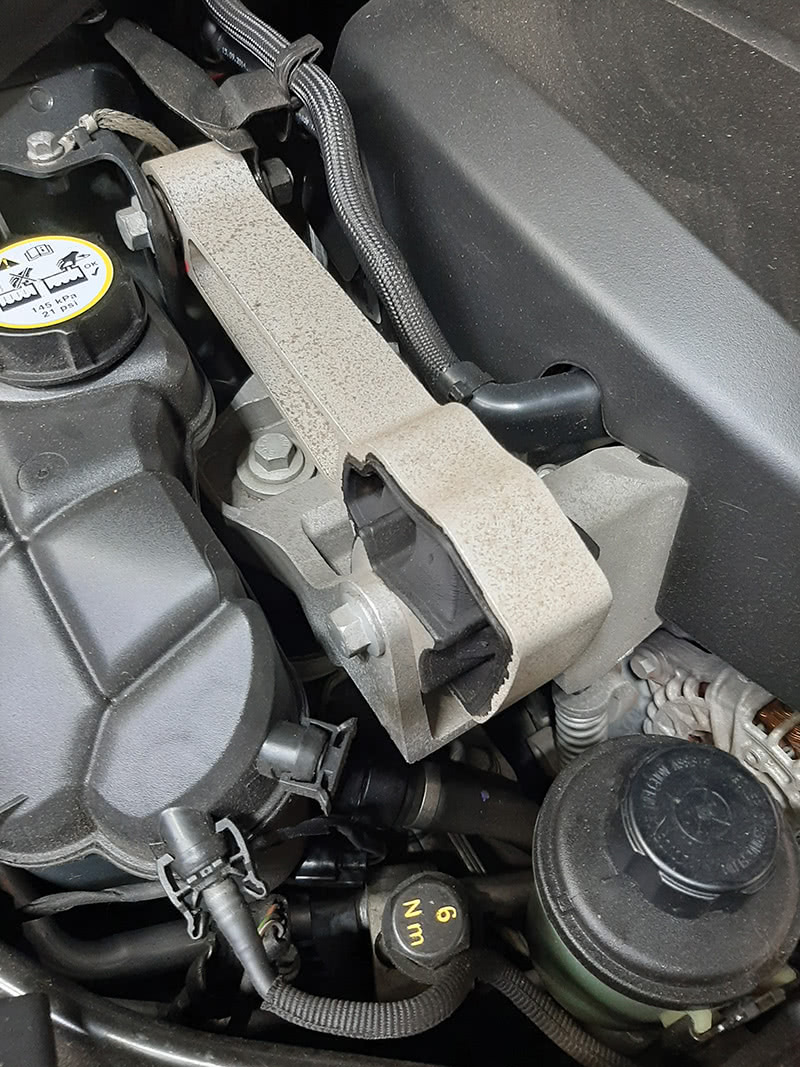
Next, you will have to remove the right motor mount assembly. (Volvo calls it an engine support insulator.)
You should support the engine from the bottom or the top when you remove any motor mounts.
You can use an engine support brace assembly and hold the engine up from the top. Or you can lower the car down and support the engine from the bottom while you do the job.
Volvo makes a tool for this or you can carefully use a jack and a block of wood.

Be careful if you use a jack to push up on the oil pan; you could damage or crack it. The thin aluminum casting on the bottom of the oil pan was not designed to handle the load of lifting the engine. You don’t want to have to call your customer and tell them that you have to replace their oil pan as part of the service.
The right motor mount design will differ slightly from model to model depending on the configuration.
You should inspect this mount for leaks and wear; it may need to be replaced, especially if the car has 150,000 miles on it and the mount is original.
Next remove the auxiliary belt (it should be replaced at this time).
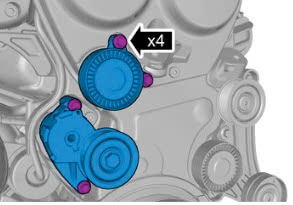
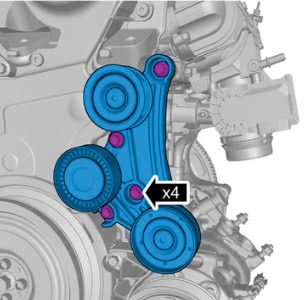
Next, remove the auxiliary belt bearing and tensioner assemblies on both left and right of the timing belt; they have four M8 mounting bolts each.
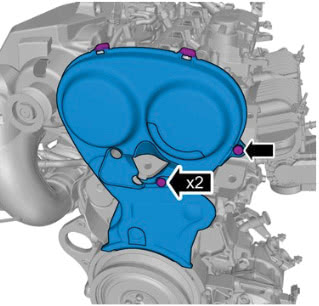
Remove the bolts from timing cover and remove the cover.
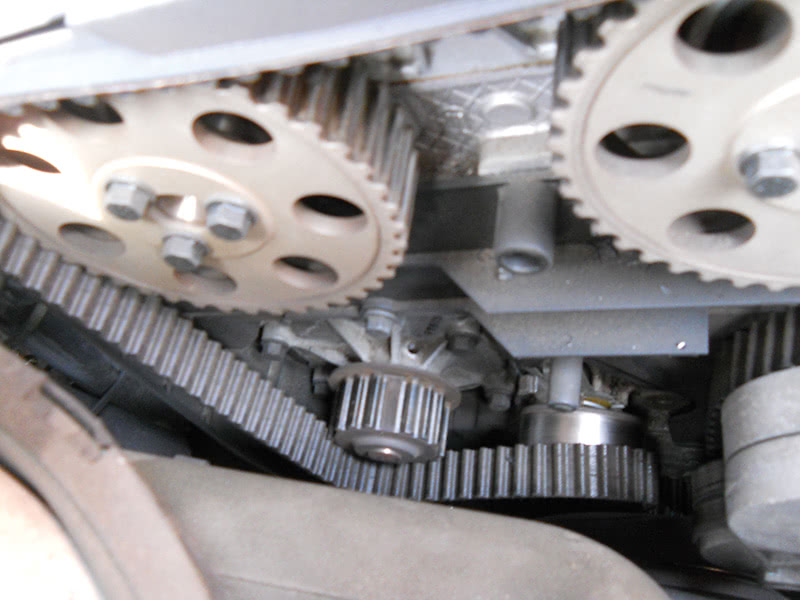
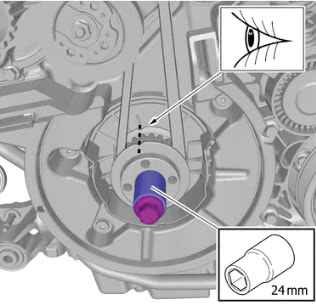
Now it’s time to put the engine on top dead center, cylinder number 1.
You can use the handle part of tool # 999 7495 to turn the crankshaft.
Position the crankshaft so marks line up on the gear and engine case.
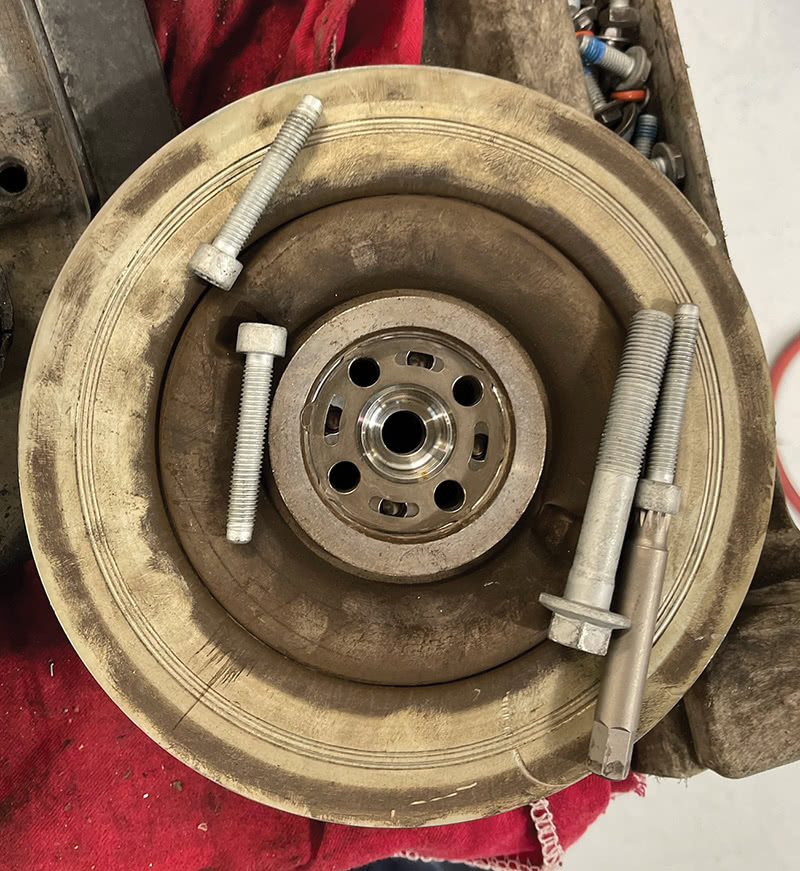
Remove vibration damper
When removing the vibration damper, you will need Volvo special tool # 999 7495, which is actually in two parts that fit together to hold the crankshaft in place and can be used to turn the crankshaft as well.

Don’t try to hold the pulley with another tool like a chain wrench or some giant pliers because you will damage it.
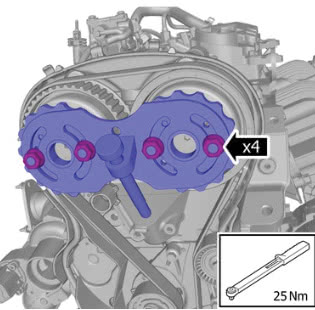
Next, Install cam holder tool # 999 7497 and turn cams outward to take up any slack in the belt and tighten bolts to 25 Nm.
Next, loosen the bolt for the timing belt tensioner and turn the adjuster to let the tension off the timing belt and remove the belt.
Remove the idler bearing bolt and bearing.
Now it’s a good time to clean the timing belt area with a mild degreaser and air pressure.
Inspect the cam sprockets and crank gear for leaks or wear and make sure they are still on TDC marks.
Install the new idler bearing and new bolt; then torque to 24 Nm.
Install the new tensioner bearing and new bolt, but don’t tighten fully yet.
Install the new timing belt. Start from the crank sprocket, then run to the idler, and then to the right cam gear; install around the tensioner last.
Remove the cam holder tool and make sure all TDC marks are still on.
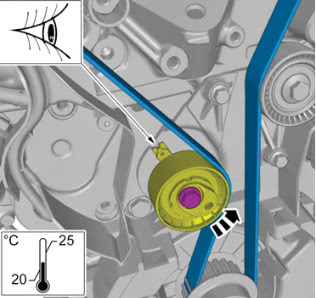
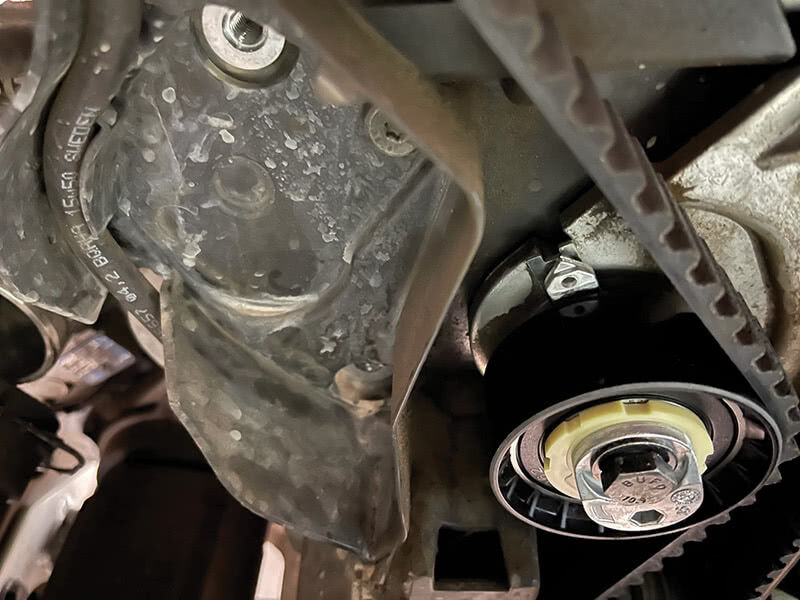
Use an allen key to adjust the tensioner so it is aligned to the notch in the belt tensioner bracket and tighten to 24 Nm.
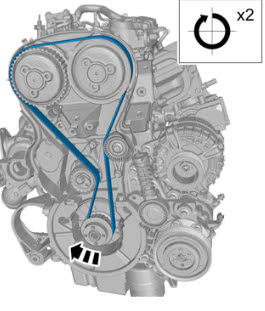
Next, verify that the belt is set up correctly by rotating the engine twice in a clockwise direction; then bring it back to TDC and recheck your marks and tensioner settings.
Install the vibration damper with new washer installed and set up the Counter Hold Tool (999 7495) and install new bolts.
Tighten bolts to specs as seen in the diagram above.
Reinstall the timing cover and auxiliary belt bearing assemblies with new auxiliary belt.
Reinstall mounts and the rest of the parts in reverse order.
Test drive and you’re done!


0 Comments