


Alternators have been charging vehicle batteries for many years, and charging systems have changed through the years as well. We will talk about one specific model, the Volvo XC90 V-8 engine type.
It’s important to note that 2003-2004 V-8 models use a self-regulating alternator in which the current and voltage regulation systems are built into the alternator unit. Starting in 2005, the regulation is controlled by the ECU. The regulators are still inside of the alternator, but the current and voltage output are now controlled by the ECU instead of internally in the alternator.
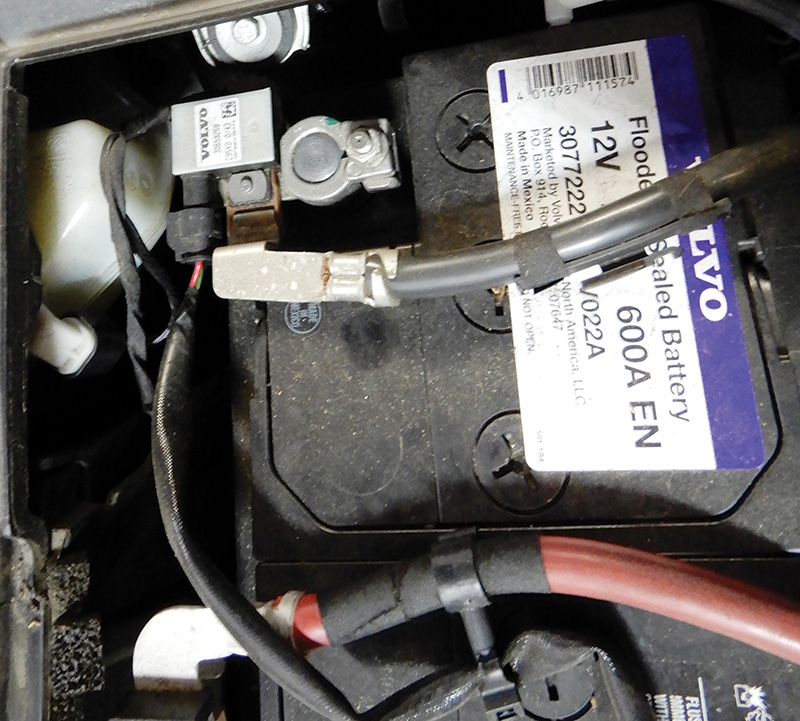
Starting in 2011, Volvo P3 vehicles have a Battery Monitoring Sensor (BMS). This sensor is located on the battery negative terminal and monitors the current flow in and out of the battery. The information is sent from the BMS to the CEM.
All the information regarding battery charge level is stored in the CEM. The BMS is always monitoring battery status. This is the reason, when connecting a battery charger, the ground cable should be connected to an engine ground point.
Be careful not to mix up years and alternators. A different alternator will fit and charge, but you might get an error message: a red triangle warning “POWER SYSTEM SERVICE URGENT,” and a battery light because the ECU cannot communicate with the alternator. The alternator will continue to function normally and will charge the battery, but you will still get the warning messages. It’s just a good idea to put the correct alternator in the vehicle so that it works properly.
Once you have determined the alternator is not charging enough, or maybe it’s over charging, here is the procedure to remove the unit and replace.
Start by letting the car sit for at least five minutes after you take the key out. This allows the ECM to store any running parameters and go into a safe state so you can disconnect the power. The battery is in the back. You will need to uncover and disconnect it, starting with the negative cable. While the battery is disconnected, hook up a battery charger and make sure the battery is fully charged.
On Volvo 2007 XC90 V-8 models, the new alternator for this vehicle is Volvo part number 36000791. Make sure to have the correct part for the vehicle you’re working on.
Step 1: Remove front passenger side wheel
Since the V-8 engine is so crammed into the engine compartment, the alternator is somewhat difficult to reach. It is installed at the bottom behind the passenger side front wheel close to the firewall.
The first step is to remove the wheel so you can access the panel and components behind it. Raise the vehicle on a hoist or make sure the vehicle is jacked up and on a secure jack stand. After the wheel is off, the plastic inner fender well will need to be taken off. Remove a series of plastic flange nuts so the lower component cover can be removed. Remove the nuts and then remove the panel.

Step 2: Disconnect suspension components
Now take a look at the hub assembly. There is an axle nut on the front that needs to be taken off. Remove this, the outer tie rod, and the sway bar link. Spray them down thoroughly with a penetrating lubricant first to make the job easier. The joints may rotate in the socket, so you might need to improvise something to take the nut off. It will also help to jack up the entire hub assembly with a floor jack to make it much easier to remove the sway bar link connection to the strut body.
Step 3: Remove axle
With the linkages removed, it’s now time to remove the axle from the hub assembly. Make sure the ABS sensor and the brake lines are out of the way. Unbolt the brackets and tuck them away. Remove the ball joint nut and use tool number 9997076 to pull down on the control arm and remove the ball joint. Another way to remove the axle is to remove the two bolts that hold the strut assembly to the hub assembly. This will also give you room to remove the axle.
Turn the hub assembly hard to the left all the way as if you were making a hard left turn, and then get a punch with a flat point. Put the punch where you removed the axle nut and lightly tap with the hammer to remove the axle from the hub assembly. You may need to play with the hub angle and vary the pressure on the axle to get it to pop out.
Before the axle will come out from the transaxle willingly, the axle bearing cradle has to be removed. It’s a lot easier than it sounds. Follow the axle into the car until you come across a U-shaped piece bolted in at two opposite points. Remove the bolts and give it a firm whack with a drift and rubber mallet and it will come off.
Now, jack up the hub assembly again as if you were removing the sway bar link bolt, firmly grab the axle with both hands, and give it a firm tug. The axle will pop out of the transaxle. You will need to maneuver around with the hub and the axle to get it out. You will be able to remove it without removing the lower ball joint, it will just take some time and some effort to get it out. Remove the jack that’s holding up the hub assembly.
Step 4: Remove drive belt and alternator
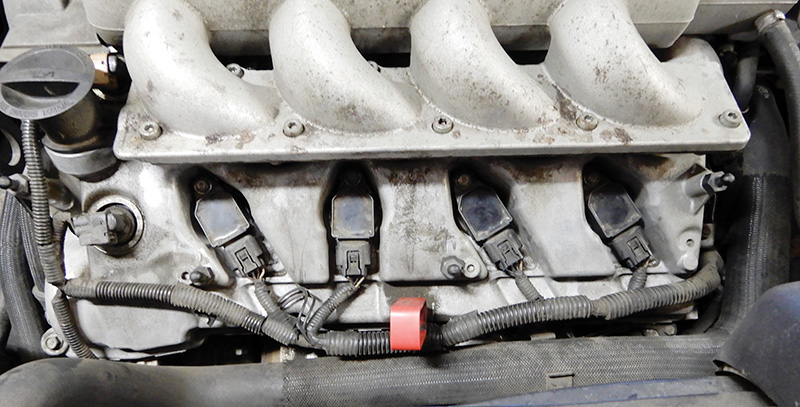
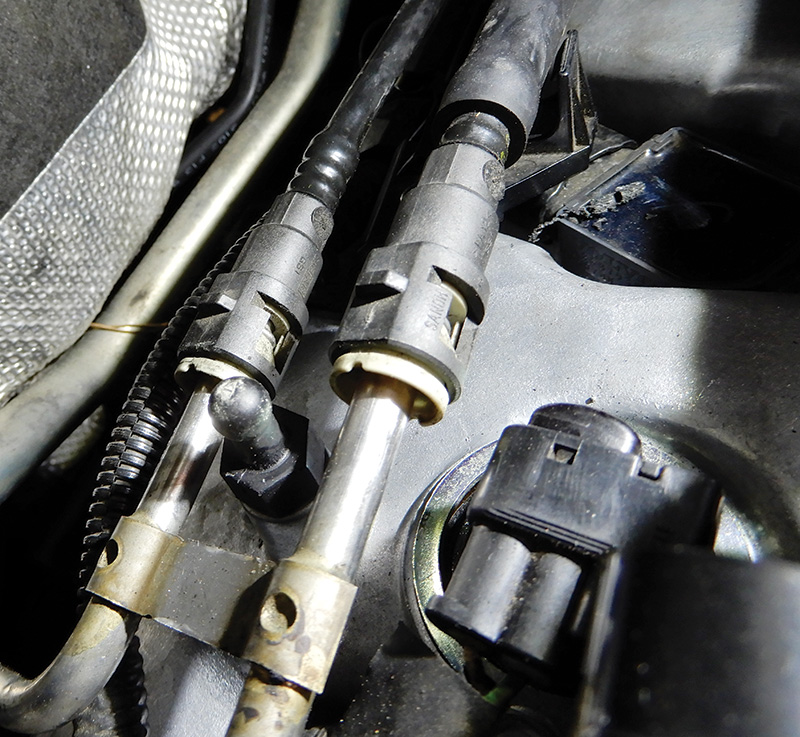
This is the most difficult part of the job. See the alternator hidden up there? Disconnect the fuel lines at the valve cover firewall side. The lines use quick connectors. Be sure to clean up any kind of fuel spill.
With the vehicle on the hoist, raise it and remove the two screws that hold the fuel lines in place. Now disconnect the two lines at the bottom of the vehicle and remove the lines and set aside. Before you remove the three bolts, you will need to disconnect the wiring harnesses to the alternator.
The alternator output positive cable is pretty easy to get to with a small 1/4 inch socket wrench from under the car. Reach up from the wheel well, up behind the engine, and up over the alternator and remove the nut that holds the positive cable in and remove it.
The alternator field wiring is easier to remove from the top of the car. You will need to remove the upper engine mount assembly that goes between the strut towers, the rear plastic engine cover, and the plastic accessory belt cover. Beware of the accessory belt cover. There are two Torx T30 screws holding it in. With the plastic covers off, you can reach behind the engine from the top of the engine bay, reach the alternator, and disconnect the field wiring.
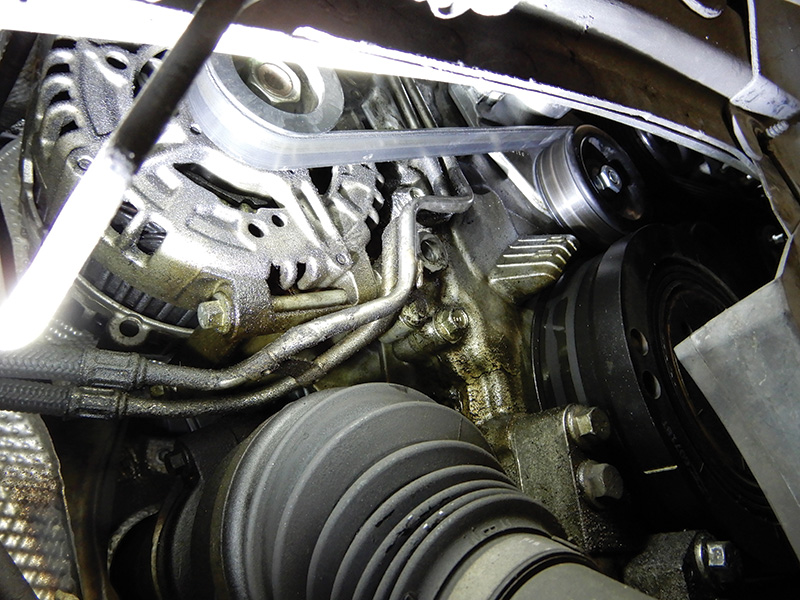
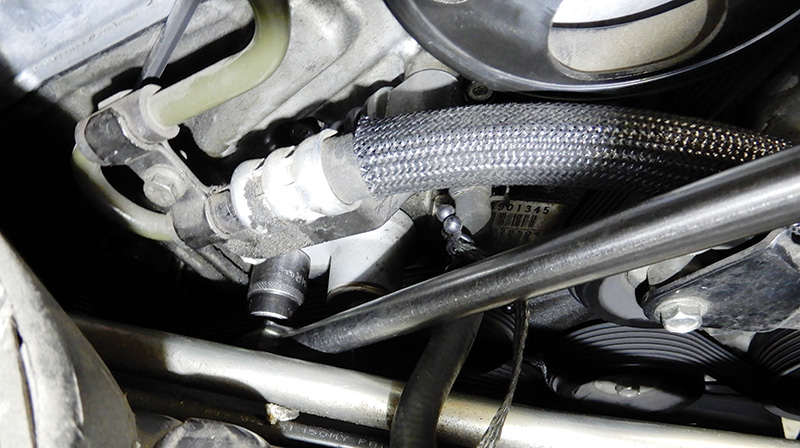
Now we will need to remove the accessory belt around the alternator. You can do this by first removing the servo oil line bracket, then disconnect the hoses and cap them so fluid doesn’t spill everywhere. To relieve pressure on the tensioner, use a 19 mm socket with ratchet. You might want to use a 1/2 inch drive socket and ratchet. These tensioners have a heavy load so you will need to use some muscles.
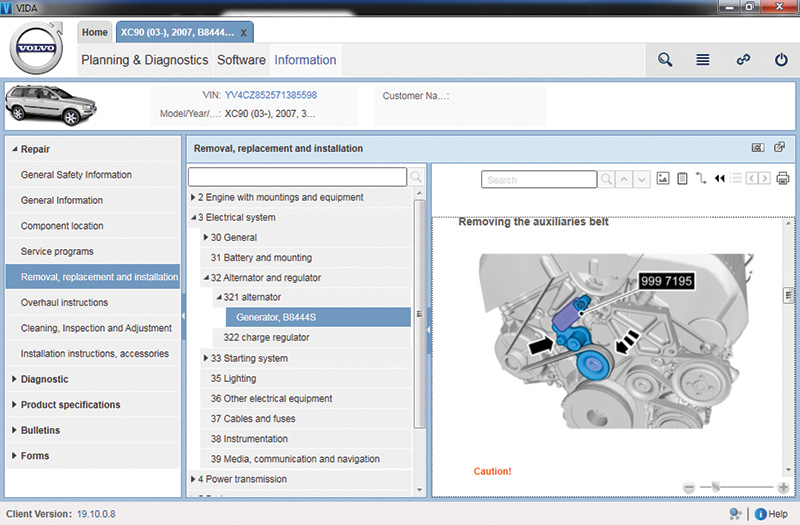
Once the tensioner
is loose and the belt is free, insert tool number 9997195 at the
tensioner. This will hold it in place until you reassemble it. You
will need to pull on this toward the front of the car, firmly, for
about 40 seconds. Slowly, the belt tensioner will release and you can
slip the belt off the top idler pulley. Take your time on this! If
you exceed 230 Nm on the tensioner, you can damage it, so do it
slowly! Remember the correct belt path so you will know the proper
routing when
assembling the auxiliary belt.
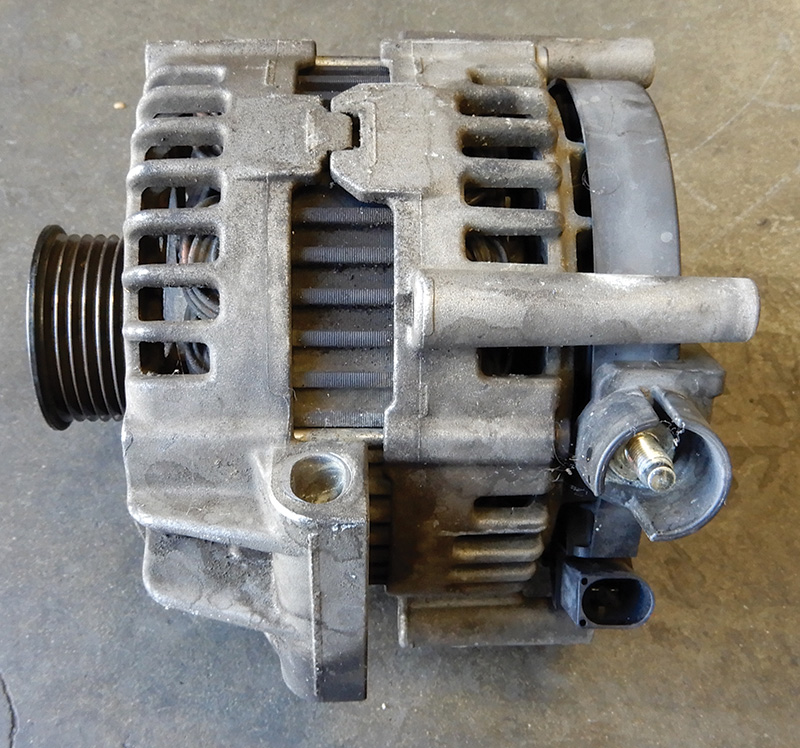
It’s just a matter of unbolting the three bolts — two lower, one upper — that hold the alternator to the engine block, and dropping it out. This is what takes the longest time. It’s a tight squeeze to get the alternator out of this little hole you made. Get the alternator out, and turn it around. You need to remove the heat shield on the back of the old alternator and install it on the back of the new alternator, reusing the Torx mounting screws.
Step 5: Install new alternator and drive belt
Now you’ll need to negotiate the new alternator back into the engine bay and bolt it up. The alternator alone is nearly 20 lbs. It will be extremely beneficial to have someone hold it while you navigate the mounting bolts in, being very careful not to strip these threads. Note that the engine block that you are bolting the alternator onto is made of aluminum.
Once the alternator is bolted up, install the output positive cable and the field cable. It is easier to do the output positive cable from the bottom, and the field cable from the top.
Now install the fuel lines that you removed earlier, making sure not to bend them. Connect the fuel lines at the bottom of the vehicle and insert the screws to hold the fuel lines down. Lower the vehicle and connect the fuel lines at the valve cover. Make sure there are no fuel leaks once you start the vehicle again.
Get your 19 mm socket and long socket wrench again. Install the alternator belt around all the accessories, making sure the belt is correctly routed around the pulleys. From the top of the engine bay, put the socket wrench on the tensioner, and give it a firm and steady pull and release the tensioner, then remove the tool holding the tensioner in place. The tensioner will release and the belt should be tensioned correctly.
Step 6: Install axle
Now, jack up the hub assembly again and install the axle back into the transaxle. Putting it back in requires some maneuvering of the axle, the hub assembly, and adjusting the height with the jack. Make sure the bearing surface is clean and then bolt the bearing cradle back up.
Now comes the tricky part. Turn the hub assembly and pull it away from the ball joint to insert the axle into the hub assembly, making sure the splines are clean and that the ABS contact wheel is not damaged. Pull down on the control arm using Volvo tool 9997076 and insert the ball joint. Tighten down the ball joint.
Step 7: Connecting suspension components
With the axle back in place and the hub assembly still jacked up, connect the sway bar end link back to the strut housing and lower the hub assembly. Reinstall the axle bolt and the tie rod. Reinstall the ABS sensor line and brake line brackets and secure. Install the inner fender well liner, both sections, and tighten down the plastic nuts until secure.
Install the wheel and tighten down. Lower the vehicle and install both plastic covers over the valve covers. Install the plastic cover around the power steering pump. Connect the servo lines and tighten to the bracket. Set your coolant reservoir and power steering reservoir back into place, making sure both are full of fluid.
Check that everything is working correctly and there are no leaks.
Now, reconnect the battery. Double check that the belt is installed correctly and the alternator is wired correctly, and the engine bay is free and clear of tools, rags, and foreign objects. Start the car and check the voltage across the positive junction and a ground. You should get around 13.8 to 14.2 volts. This confirms that the alternator works correctly. Test drive the vehicle and check again for any noises, and double check the charging system.
Replacing the alternator on these Volvo V-8 engines can be quite the task, but with the right tools and some Volvo repair under your belt it should be no problem. Always be sure to check and double check all your work.
Download PDF


0 Comments